A three-dimensional panel can become a unique and interesting decorative element in the design of a children's room. This product will add unique color and warmth to the interior. You can make a decorative panel with your own hands; any materials will do - leather, fabric, beads, plaster, polystyrene foam, dough. First of all, you need an idea!
For inspiration, we invite you to consider the wonderful textile panels made by the Spanish design studio Stencil Barcelona. Each painting is created specifically for the owner of the children's room and the design is not repeated. The technique for creating such panels is as follows: a drawing is applied on a linen canvas stretched over a wooden frame using water-based paints, then the composition is supplemented with three-dimensional elements - pieces of fabric, buttons, laces and bows and other details.


Other works of Stencil Barcelona designers can be seen on their blog: http://estudiostencil.blogspot.ru/
The design company BB the countrybaby also has a collection of beautiful handmade panels. They are cute and gentle. Made using the same technique. The composition uses fabric, felt, silk ribbons and lace. A little craftsmanship to add a touch of romance to a child's room.


Quick navigation through the article
In this article, for the attention of creative parents, we present 3 master classes on how to make wall panels for a child’s room with your own hands in just one evening.
- Decoration made of felt or fabric in the form of a cloud with a garland of drops;
- Canvas panel depicting the silhouette of a child;
- Wall interior letters made of fabric and cardboard.
In addition to the instructions, we have compiled a selection of other interesting ideas, which awaits you at the end of the article.
Master class No. 1: How to make a felt panel in the shape of a cloudThis cute felt panel can decorate a nursery for both a boy and a girl, and a schoolchild. You can hang it anywhere: above, above the crib, in the play area, etc. And you can make it yourself in just a couple of hours.

Materials:
- White felt;
- Pieces of colored felt;
- Sewing supplies (thick thread, needle, scissors)
- Ribbon for loop.
Step 1. Transfer this or a homemade template from paper to white felt, for example, using a soap that will not be noticeable on the white material. At this stage, also cut out drops of colored felt for the garland. By the way, instead of droplets, you can cut out stars or hearts.

Step 2. Cut out the cloud along the contour. If you want the panel to be voluminous, then you need to cut out two blanks, sew them together, leaving a small hole, then fill the cloud loosely but evenly with padding poly, helping with some kind of stick. Then, sew the product until the end.
Step 3. Now we will make the garlands. To do this, first calculate in advance:
- how many garlands will hang from the cloud;
- how long should they be;
- how many droplets need to be attached to each and at what distance from each other.

Next, we begin to sew and at the same time form the garlands according to this principle: we attach the thread to the edge of the cloud, sew the first droplet (on top) to the thread, cut off the thread. Then we attach a thread to the bottom of this droplet and sew the next droplet to it, then we cut the thread and sew the next part. We continue until you have a garland of the desired length, after which we begin making the next one.
Step 4. Now all that remains is to sew a loop to the back of the panel and hang it on the wall.
The following selection of photos presents alternative ideas for wall decor made of felt or fabric that you can come up with based on this master class.


Here is another master class on how to make a simple but very original panel for a nursery with your own hands.

Materials:
- Canvas on a stretcher (in this lesson we use a square canvas measuring 30x30 cm);
- Acrylic paint (red, white and blue colors are used here);
- Any Oracal vinyl self-adhesive paper;
- Foam rubber or any other brush.
Step 1. Buy a ready-made canvas on a stretcher in the desired size or make it yourself. If desired, the canvas can be repainted in the color you want, for example, with water-based acrylic paint.
Step 2. Decide on a photo that will become a template for the future image.
Step 3. Using Photoshop, Corel Draw or any other photo editor, resize the photo so that it fits on the canvas. You can also use a program (for example, the Magnetic Lasso tool, Pen tool, or eraser) to remove the background and leave only the desired image. How to do this, see the following video tutorial:
Step 4. Print the photo on regular office paper, cut out the silhouette and secure it to the canvas using pins or masking or double-sided tape (which will peel off easily and will not leave marks).

Hint: you can also transfer the outline first to the back of vinyl self-adhesive paper (copy paper will help here), then cut out the silhouette, glue the resulting template onto the canvas, paint it (more precisely, the background part of the panel) and only then peel off the paper. The result will be neat and the process will be fast.

Step 5. Carefully and very lightly trace the outline of the silhouette with a pencil.
Step 6. Now paint over the background and leave the silhouette unpainted. Or vice versa - paint the silhouette and leave the background the same. The third option is to paint both the silhouette and the background with different colors.

Silhouettes can be placed not only on canvas, but also on any paper (wallpaper is perfect), and then frame the picture with a beautiful frame, as in the following examples.


However, such a panel in a nursery cannot necessarily be made based on a photo of the owner of the room, but also on images of his favorite cartoon characters or animals.

Interior letters have long been in fashion, why not make up the child’s name from such letters and decorate the walls of the children’s room with them?

Materials:
- Cardboard;
- Pencil;
- Scissors;
- Several pieces of beautiful fabric (if you don’t have fabric, you can use paper wallpaper);
- PVA glue.
Step 1. Choose a beautiful font and print the baby’s name (or any word) in large size so that each letter fits on a separate A4 sheet. If you don’t have a printer at hand, you can simply place a sheet of office paper on the computer screen and trace the outline of a translucent letter. To make the letter shine through better, you need to increase the brightness of the screen and turn off the lights in the room so that it becomes dark enough.
Step 2. Now you need to transfer the outline of the letters onto the cardboard. You can do this in two ways:

Step 3. It’s time to cut out the same blanks, but a little larger in size and from fabric. To do this, place a cardboard blank on the material and, making an indent of 1-2 cm from it, draw the outline of the letter by eye (right photo above), and then cut it out as shown in the next left photo.

Step 4. So, we have “patterns” made of fabric with allowances of 1-2 cm. All we have to do is “cover” the cardboard letters with them and fix the folds with glue, and then attach small loops and hang the panel on the wall.

Here is a selection of photos of other examples of decorative letters, including: letters cut from plywood, cardboard letters with soft filling under the fabric, letters wrapped in thread, decorated with ruffles, pom-poms and other materials.


And finally, we present to you a selection of other ideas for children's panels that you can make with your own hands in 1 evening and use available materials for this, say, wallpaper, lids from cardboard boxes, toys, scraps of fabric, etc.


It's good to have money. It’s even better when they are enough for everything you need. For example, to make the child’s room bright, comfortable and beautiful. Fortunately, you don’t have to be a millionaire to realize this desire, because you can create interesting decor for a children’s room with your own hands.
Do you know what its main advantage is? Cost savings, uniqueness and originality – this goes without saying. The main thing is the time that you spend with the whole family doing a common task and the joy that your attention will bring to the children.
To make a room sparkle with new colors, it is not necessary to make repairs, especially when there is neither time nor money for it. Decorating the walls in the children's room will help refresh it.
Stickers and applicationsIf you noticed, almost all appliqué elements, except letters, have a symmetrical shape and the same size. Therefore, making them will be simple: just draw or print the figure you like, cut out one half and transfer the outline to the material folded in half from which the applique will be made. But you can try to make a more complex decor with your own hands for the children's room, like this tree in the last picture.
This decoration is attached in different ways:
- Using wallpaper or PVA glue;
- On double-sided tape;
- Using safety pins.
Note. The last two methods allow you to make the applique three-dimensional by bending the wings of butterflies or flower petals outward.
And with older children, you can take on serious, large-scale work: create a color map of the world. Even when you finish, the child will have something to do that will benefit his overall development: he will be able to stick pictures of their landmarks on countries and continents, or look for and label the names of capitals.
Wall paintingA very popular option for decorating walls in a children’s room is painting them (see). Of course, children themselves cope well with this task, and if you don’t keep an eye on them, their avant-garde painting will go beyond the boundaries of the room allocated to them.
So can it help the children? Unfortunately, real painting is only possible for people with artistic abilities. But for those who don’t have them, stencils for decorating a children’s room will help.
Where can I get stencils? Buy or make it yourself. All you need is transparent plastic, scissors or a breadboard knife, a pencil or a printer.
Instructions for its manufacture are shown in pictures:
| Draw the outline of the future wall picture or print the picture you like on a printer. Cut it carefully with sharp small scissors. | |
| The basis for the stencil can be a plastic folder or some other dense but transparent material. | |
| Attach the printed design and the base to each other with tape so that they do not move during the cutting process. | |
| Place the workpiece on a flat base, place a cutting board under it, and cut out a plastic design with a sharp breadboard or stationery knife. | |
| If you don't find anything similar to a plastic folder in your house, put tape on the printout. Can be done in two layers. | |
| And on the reverse side too. | |
| Having laminated the paper in this way, you can cut out the design - and the stencil is ready. If you only need it for one time, you can get by with a paper stencil, but if you are planning repeated decor for the children’s room, the paper will quickly become wet from the paint. |
You can apply paint through a stencil not only from a spray can, but also with a brush or sponge.
Advice. To make a multi-colored design, you don’t need to buy paint in several tones - it’s expensive, and there will be a lot of leftovers. Take only white and tinting paste in the desired shades.
Panels and framesYou can decorate the walls in another way by making removable decor for the children's room with your own hands. These are all kinds of panels (see), pictures and photographs in frames. There are a lot of options here: you can use natural materials, fabric, paper, buttons, children's handprints.
Here are just a few examples:
- Panel with applique. The details of the picture are cut out from colored or self-painted paper or fabric, and glued to the base. Then the panel is framed or, as in this case, glued onto thick cardboard or a board cut from thin plywood.
- Foam panel. If you still have foam ceiling tiles after renovation, cut out clouds and droplets from them. Paint the droplets with regular watercolors, string them on a thread and attach them to the cloud.
- Volumetric panel. Every parent always keeps some childhood things as keepsakes – the baby’s first booties, the baby’s favorite toy. There is no need to hide them. Place them in these voluminous shelf frames, covering the back walls with leftover wallpaper or colored paper.
- Panel with the child's name. Letters can be cut out of felt. Or made of thick cardboard, and then painted and covered with bright fabric. How to fix them on the wall? As you wish. You can place all the letters in one large frame or each one in a separate small one, as in this example. Or you can attach loops to the letters and put them on a wooden rail like curtains. Or hang it on strings at different heights. Experiment.
No, you don’t need to make it yourself from wood or furniture panels. It is enough to modify an old chest of drawers, bedside table, kitchen cabinet, or do some magic on a drawer or suitcase.
Decorating old furnitureThere are many options for remodeling old cabinets, ranging from basic repainting in bright colors or colors that match the interior, to replacing the facades.
Here are just a few of them:
- Decoupage or applique decoration. The instructions are simple: clean walls and facades are covered with light paint, after which, after drying, pictures cut out from old children's books, magazines, the child's own drawings, etc. are glued onto them using PVA glue. Varnish is applied on top in 2-3 layers.
For reference. You can also use thin colored fabric or photographs for applique.
- Upholstery with fabric. If your child is very active, it would be a good idea to make the furniture in his room safer at the same time as decorating. To do this, you need to glue thin foam rubber to the facades or sides removed from the hinges, stretch the fabric on top and secure it on the back side with a furniture stapler.
- Replacement of facades. An ordinary wardrobe will turn into a space rocket, and an old kitchen cabinet into a castle for dolls with a beautiful gate, if dad knows how to hold a jigsaw. They can be used to cut doors of unusual shapes from colored chipboard and hang them instead of the old ones.
The cost of such a remodel will be minimal compared to buying new furniture, and the pleasure from using it will be enormous.
Funny transformationsIn many families, old suitcases are stored on the mezzanine, which can be given a new life: remove the locks, paste over or cover the lid and bottom with fabric, as already described, and put the suitcase on legs or wheels. You will get a convenient table for children's creativity with a box for storing crafts or a mobile container for toys.
In a similar way, you can use old chests or wooden fruit boxes. And for a huge number of small soft toys, sew a large bag with a zipper on the side. When filled, it will serve as a cozy chair, and you will get rid of the eternal clutter and dust.
Advice. You can think of many such transformations. For example, make a children’s kitchen out of old stools by sewing up three sides with plywood, inserting a shelf inside, and hanging curtains instead of “cabinet” doors. And from durable cardboard boxes - containers into a rack for children's treasures.
Decorating the room with craftsYou shouldn’t limit yourself to just the walls, because there are still plenty of ways to decorate a children’s room with your own hands and together with your children. And here you need to use your skills and hobbies.
They are different for mothers and fathers, and the help of children is also limited by their age and abilities. Therefore, girls to the left, boys to the right, and let's each do our own thing.
Options for momsIt's rare that a woman doesn't know how to sew. In any case, the decor of children's rooms and kitchens, such as sofa cushions or potholders, can be done by any of them - there is no need for complex patterns and perfectly even seams.
Advice. Pillows for a nursery can be made not ordinary, but in the form of a bright soft toy. You will only need scraps of fabric that you can get by ripping out those children's things that have long since become small.
If you don’t have enough ideas of your own, we’ll suggest some options for decorating a children’s room in the form of toy pillows.
In addition to aesthetic functions, panels can also play quite utilitarian roles in the interior. For example, designating functional areas in a children's room or masking some design features of the room. In our catalog you will find a lot of options for children's panels to solve a variety of decorative and architectural problems. 5 reasons to buy a wall panel for a children's room in our showroom The ARTIK showroom offers exclusive wall panels for the nursery from famous brands: Eijffinger, Mr Perswall, York. Our products are aimed at buyers with different financial capabilities. In addition, we regularly hold sales where you can purchase premium quality products at a significant discount. Do you find it difficult to navigate the variety of collections offered? Our decorative designers are always ready to help. Use the “Add to my list” option on our website, and we will prepare your favorite collections for viewing before your arrival at the showroom. Does your order amount exceed 15,000 rubles? We will deliver it free of charge within the Moscow Ring Road.Any wall decoration after renovation gets boring, you want to change something and find a way to show your imagination, talent and creative skills.
A three-dimensional panel made from scrap materials is one of the fashion trends in design for 2017.

Looking through spectacular illustration work can seem overwhelming. But if in school labor lessons you got excellent results from plasticine and salt dough figures, and you have experience working with beads or natural materials, everything will work out.

A handmade wall panel is a special decor that can enliven the most ordinary surroundings, introduce a new design concept and enliven the atmosphere.

The choice of material and technique to implement an idea depends on many factors:
- Functionality of the premises;
- Wall decoration;
- Creative inclinations;
- Tastes and preferences;
- Availability of materials and tools;
- Skills in working with materials (sewing, knitting, modeling, weaving, drawing).
It is better to place a large panel on the entire wall in a large room where there is a lot of empty space. The easiest way is to buy a painting or put up photo wallpaper. But there is nothing original about this, plus there are high costs, and the new facility will soon become boring.

Another thing is your own “masterpiece”, which you can proudly display to all visitors to your home.

Looking at the unique work, friends and relatives will be interested in how to make such a panel with their own hands?

First, it is better to choose a free wall, and then decide what it will be - a collage of photos, a drawing, modeling or a mosaic of broken tiles. The general design and plot of the image must correspond to the functionality of the room and practicality in care.

For example, it’s easy to paint aquarium fish on a smoothly painted wall on the wall of a bathroom, but the paint must be durable and indelible.

If the material is susceptible to destruction or dust accumulation, it is better to coat the finished product with a colorless varnish, like a photo panel made of salt dough.
The paint base for the panels must match the wall cladding material. For example, if it is acrylic enamel, then acrylic paints are also suitable for painting walls.

The walls in the nursery can be decorated with wallpaper panels, which can be easily built together with the child from the remnants of rolled materials left over after renovation.

Tip: Let the kids be part of the fun process of creating homemade decor. They will willingly join in the creative process. This will help develop fine motor skills of the fingers and spatial thinking.

Children can collect natural materials - beautiful twigs, leaves and cones for panels. If you don’t know how to draw, have your child spray paint from a can onto a stencil.

They will enthusiastically trace large maple leaves on cardboard, cut out their outlines in order to spray a contour pattern with gold and silver paint on the walls in the hallway. Aerosol paints and stencils in the decor of any room are the best solution for those who do not know how to draw.
Panels of edible products for the kitchenThe kitchen is the home of products, where many bulk materials are suitable for decoration. Before you make a panel with your own hands, make an audit of your cabinets.
Note!

Beginning decorators have at their disposal a whole natural palette that retains its natural color for years. A panel of coffee, cereals and spices will decorate a free section of the wall in the dining area.

The work is carried out in several stages:
- Choose the sample you like.
- Make a sketch with your adjustments and mark it with squares to enlarge the drawing on the wall when enlarged.
- Apply markings and outlines of the panel with a simple pencil.
- Apply glue to decorative fragments for a specific product.
- The finished areas should dry naturally, after which you can move on to adjacent elements until the entire picture is completed.

Advice: To avoid disagreements, it is recommended to agree on the plot of the panel with all family members.

Any “appetizing” materials are suitable for the kitchen:
- dried, worn-out tea leaves are the black and brown contours of any design or soil in a painting;
- semolina is an excellent light base that can be additionally painted; it can also be used to fill empty areas;
- coffee beans (green and roasted) are an excellent material in brown and green tones;
- white and colored rice - variety of sizes and shades;
- peas, beans, lentils and beans - white, yellow, orange, reddish and green fruits of various shapes, applied to the glue in halves;

- poppy – black base of the design;
- instant coffee and chicory, cocoa powder and ground cinnamon - a loose base of brown shades;
- pumpkin, watermelon and cucumber seeds are excellent material for DIY panels; they are also glued in halves;
- chaff or grains of millet, corn and wheat, oat flakes and pearl barley - an inexpensive base of different colors and textures.
It is advisable to carefully open the finished panel with colorless varnish in 2-3 layers, so that over time it can be easily cleaned of dust.
Note!

The image can be left as if unfinished or limited by a side (frame). Decorating a kitchen together is a fun activity that can easily involve three generations of family members.

Interesting ideas will be suggested by experts who recorded a master class on making panels with their own hands:

Those who are good at sculpting figures, small sculptures or making dolls from any material should master the technique of working with salt dough.

For a relief panel, mix fine salt with flour 2:1, adding a little vegetable oil, water and dry wallpaper glue, kneading like regular dough. It should be plastic, but hard enough.

The finished mass should not stick to your hands. Small pieces or balls are separated from it, from which the faces of the characters, fruits, leaves and other elements of the panel are made. It will hold up better if mounted to a frame as a portable decoration or attached directly to the kitchen wall.
Note!

You can add any other material to complete the story, such as embroidered fabric, beads or yarn.

The relief painting dries for about a week, but then it turns out to be a hard, durable material. The finished creation can be decorated and varnished, like the photo of the presented panel.

Making your own decor is a fascinating creative process. Usually, after mastering one of the techniques using the example of decorating from dough or cereals for the kitchen, you want to move on to decorating other rooms.

In a children's room, a decoration made of autumn leaves or colored paper, a panel made of fabric using the patchwork technique, would be appropriate.
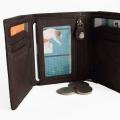
The needlewoman’s bedroom will be decorated with a panel of flowers, leather, fabric or buttons. A popular theme is a money tree, where you can add coins or green coffee to the buttons.

For a bathroom or toilet, an excellent decoration would be “sea” material – smooth colored pebbles, shells and coral branches.

The living room will be decorated with cork, bamboo, and ornamental stone. In skillful hands, any material will become the basis for a homemade masterpiece.