Papier-mâché is a type of mixture from which you can create an original craft at home. This French name literally translates to “chewed paper.”
Papier-mâché is a mixture of cardboard (paper) with adhesive materials (gypsum, starch). From such a mass you can make decorative jewelry, children's toys or furniture yourself at home.


Workplace
To create papier-mâché you will need a large, spacious table. It needs to be covered with oilcloth or paper (newspaper), which you won’t mind throwing away after work. Keep a dry cloth near your work area to wipe your hands from glue.

Before considering options for crafts made from papier-mâché and the tools necessary for this, it is worth studying in more detail the instructions on how to make papier-mâché correctly, production techniques and some nuances.

Papier-mâché techniques
Today, there are many techniques for making various papier-mâché crafts.

In order to make a large craft, you will need to work with paper and paste. What kind of papier-mâché craft can you make? Beginning handicrafts are advised to make small crafts and only then try to create toys and interior items.

The most popular technique for making such crafts is mashing. The basic principle is to glue torn paper in layers onto an object. After waiting for the paper to dry, remove it from the craft, paint and varnish.

This manufacturing technique is very simple to perform and can be mastered by children. Simple papier-mâché crafts are suitable for beginner needlewomen. A similar method is used to make plates or cups.

First you need to shred the paper, fill it with water and mix thoroughly. The prepared mixture is left for a day, then squeezed out and glue is added.

For maximum plasticity, experienced needlewomen advise adding 2-3 tablespoons of any of the oils. If you carefully pack the prepared mixture in cling film, you can keep it in working condition in the refrigerator.

What crafts can be made from papier-mâché
Similar techniques for making crafts allow you to create interesting interior items, children's toys, boxes, dishes, etc. Children between five and ten years old show the greatest interest in this hobby.


Such activities lift children's spirits, develop motor skills and the perception of beauty. This hobby does not involve any particularly complex activities. The main thing is perseverance.

How to make your own papier-mâché plate
Beginning handicrafts are advised to start this hobby by making a plate. Try to involve your children in this activity. This will make the process of making papier-mâché crafts of any complexity more exciting and fun.

First you need to cut paper (white) or newspaper into small strips. Next, prepare the base for the craft - a plate. In a separate bowl, mix water and PVA glue.

Grease the plate with butter or cream. This will make the paper come off easier from the base. Next, dip the cut pieces in water and glue them on. First, lay out one layer. It must be thoroughly coated with glue and the next one placed on it. The process should be repeated until the layer thickness reaches three to five millimeters.

Once the workpiece reaches the required thickness, it is left to dry at room temperature. After complete drying, carefully remove the workpiece from the base.


To make the surface beautiful and smooth, treat it with sandpaper and apply a layer of putty on top.


Such plates will perfectly decorate the interior of an apartment, house, or area in a photo studio. Show your imagination and be inspired by photos of papier-mâché crafts on the Internet. Creating a product from papier-mâché is inexpensive, but the fake will look interesting.


How to make a tiger piggy bank from papier-mâché
In Internet sources you can find a lot of master classes on papier-mâché. Here is one of them: creating a tiger piggy bank. For this you will need: white paper - 2 sheets, sheets of newspaper, plasticine, jar, glue, paste, gouache, acrylic varnish.

First of all, prepare a paste (boiled and cooled mixture of cold water and starch). The jar is turned over and placed on the floor or table. It is covered with plasticine, forming the animal’s face.


To make the piggy bank stronger, leave it to dry overnight. This is followed by gluing with white paper using PVA glue.

Let the workpiece dry a little, and then cut it into two parts. They must be removed from the can and reconnected using PVA glue and white paper.

We make a cut on top of a size suitable for coins. The workpiece is treated with white gouache on top, and after drying, you can begin to paint it. The tiger piggy bank is ready!
Photos of papier mache crafts


In contact with
Crafts made from papier-mâché are widely popular. This is with success of different ages and adults. There is nothing surprising.
From papier-mâché you can make simple ones for the holiday or, but you can also create real masterpieces that you won’t be ashamed of.
Features of the material
Papier-mâché is a mixture of paper pulp and adhesive. Any crushed one can serve as a base (filler). It is considered one of the most technologically advanced materials, because... it dissolves well in water, forming a homogeneous mass.
 Papier-mâché is a mixture of paper pulp and adhesive
 The binding agent is the adhesive composition. The most common options are:
- Regular office glue or . It is most suitable for simple crafts performed by children of primary preschool age.
- Wallpaper glue. Easy to prepare, which ensures wide application.
- Paste. You can prepare it yourself by dissolving starch in boiling water while stirring.
To impart certain properties to the mixture, other components are additionally introduced. The plasticity of the mass is given by vegetable oil and. To give strength to the crafts after hardening, gypsum, alabaster or putty is added to the raw material.
Attention! Each master has his own secrets for preparing papier-mâché and adjusts the recipe experimentally in his own way.
The technology for making papier-mâché crafts includes several stages:
- Preparation of starting material.
- Forming the foundation. Several options can be used. - the mass is laid out on a flat surface in the form. Thin-walled - a complex shape is covered with a thick mixture, and the mass repeats all the depressions and bulges. A typical example is masks. Volumetric figures - they are formed on a frame or by analogy with plasticine. This way you can make dolls and...
- Hardening of the craft in natural conditions. The process can take several days, during which the product must be left at rest.
- Coloring. After the figurine has completely hardened, its final painting is carried out, with all the details drawn. The best option is . Volumetric coloring is achieved by adding the required dye (pigments, gouache) to the prepared raw materials. Often the figures are coated with varnish (colorless or with a tinting effect).
Papier-mâché is a fairly pliable material. Depending on the consistency, it can fill and repeat the most.
Idea! From it you can make decorative dishes, vases, boxes, figurines, various masks and decorative elements in different styles with your own hands. The master's imagination is not limited.
 Papier-mâché is a fairly pliable material. Depending on its consistency, it can fill and repeat the most complex shapes
 Where to start
The inflated ball is pasted over with paper pieces, and after the workpiece has hardened, it is pierced and carefully removed out. After coloring, you get a funny Kolobok.
 Another simple craft - “Kolobok”
 Crafts for the New Year
New Year's crafts made from papier-mâché can replace Christmas tree decorations and decorate the room. Beautiful balls can be made using the mashing technique.
For such toys, you can take any base - rubber, plastic balls. Paper pieces are glued on top, painted and varnished. The papier-mâché surface can be decorated with sparkles or small colorful pictures.
 New Year's crafts made from papier-mâché can replace Christmas tree decorations and decorate the room
 To make three-dimensional figurines-decorations, a mixture is prepared. It is best to use toilet paper. A fairly plastic mass can be obtained by dissolving 1 roll of paper in 700-750 ml of water.
After obtaining a homogeneous mass, squeeze out the water and add a binder (PVA glue, wallpaper glue or paste). The mixture should resemble thick sour cream in consistency. You can make figures using children's sand molds. The mass is poured into them, and after hardening it is carefully removed and painted.
 Beautiful toys can be made using the mashing technique
 Features of making dolls
There are many options for making a papier-mâché doll, from very simple children's crafts to original artistic creations.
The mass is prepared on the basis of loose paper - toilet paper, napkins, egg containers, etc. PVA glue, wallpaper glue or paste is used as an adhesive composition. The consistency of the mass should correspond to soft plasticine.
 There are many options for making a papier-mâché doll, from very simple children's crafts to original artistic creations.
 A simple doll is made in the following order:
- A mold for the head is molded from plasticine. It is then covered with a thin layer of paper pulp. After it hardens, you need to make an incision through which to remove the plasticine. The final thickness of the workpiece is formed by adding the required amount of mass. The thickness should be 5-6 mm. The eye sockets, nose, mouth, and ears are formed.
- A wire frame is assembled for the body. The prepared mass is applied to it with the simultaneous formation of the neck, arms and legs.
- Connecting the body to the head using PVA glue.
- The doll's outfit is sewn from fabric of the desired color.
- The entire doll is painted with white acrylic paint. You can add a slight peach tint. Facial features are drawn.
- The hair is made from floss or woolen threads. They are glued to the head and a hairstyle is formed.
- Clothes are put on and secured.
You can also make a complex doll with movable elements from papier-mâché (jointed doll). This craft can be done by an experienced craftsman.
It is assembled according to pre-prepared drawings. The composition includes the following ingredients: toilet paper, PVA glue, gypsum-based putty, liquid detergent.
 You can also make a complex doll with movable elements from papier-mâché (jointed doll)
 The mass is prepared as follows. The paper is dissolved in hot water (55-65 degrees) for 5-6 hours; it is better to use a mixer for mixing. After obtaining a homogeneous mass, the water is squeezed out through gauze, glue and detergent are added (1 tbsp per 1 liter of mixture). The last thing to add to the mixture is putty (120-140 g/l).
All elements of the doll are molded from papier-mâché separately. To movably connect them together, a strong, tight elastic band or screw connection is used. In the latter case, a screw is inserted into one of the parts, and a nut is inserted into the adjacent element. The joint surfaces must be well machined to ensure a tight fit.
Steampunk technique
Recently, steampunk figures have come into fashion. In essence, this is a fantastic allegory with the transfer of ancient and outlandish elements.
In such figures, originality and irony are especially valued. The jumble of constituent elements may be the most unexpected, but they should create a unified impression.
 Steampunk figurines have come into fashion lately.
 As an example of a steampunk craft, consider making a fantastic Fish.
The materials used are papier-mâché, foam plastic panel, cardboard, hardboard sheets, leatherette, nails for upholstery, various small gears, shells and all kinds of spare parts for household appliances.
 As an example of a steampunk craft, consider making a fantastic Fish
 The base of the Fish is made of a foam plastic panel 1-1.5 cm thick. One longitudinal and several transverse corrugated cardboard ribs are placed on it. The entire base is covered with papier-mâché with the consistency of soft plasticine.
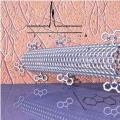
The fins are cut out of hardboard using a jigsaw according to a cardboard pattern and attached to papier-mâché. The scales can be formed from curtain rings and leatherette. Various mechanical parts are installed on top. Here you need to show your imagination, because... no specific order is provided.
 It is important that the fish looks like a mechanized monster
 It is important that the fish looks like a mechanized monster. Seashells are hung for decoration. You can sprinkle the figure with sand. Then the workpiece is primed to create a brown background, and some details are highlighted with golden acrylic paint. Finally, the Fish is coated with varnish in 3-4 layers. The length of this craft is 85-100 cm.
Making masks
Some of the most impressive papier-mâché crafts are African masks. Such handmade creations can decorate the interior of any apartment. Their size is 35-37 cm in height, 21-24 cm in width.
The mass is prepared on the basis of toilet paper. One mask will require 2 rolls. The paper is dissolved in hot water, and then mixed with PVA glue (420-440 g), and you need to take thick glue for construction work. To add plasticity, linseed oil (3 tbsp) is added. When mixing the mixture, it is advisable to use a mixer.
 Some of the most impressive papier-mâché crafts are masks.
 A spherical PVC food tray works well for the shape. Its configuration resembles a mask. A layer of pape-mâché is applied to this form. The main details are laid out separately - nose, eyebrows, lips. Eyes are formed.
Smoothing is provided by the fingers, as well as a stack and a knife. It will take 12-14 days for the craft to completely harden. Then the mask is puttyed with a thin layer and sanded after the putty has dried. The surface must be perfectly smooth.
 Such handmade creations can decorate the interior of any apartment.
 The mask is dyed in a special mode. First, a primer is applied, and then the entire front surface is painted with white acrylic paint. The next step is to apply black paint on top.
After drying, pearl enamel is applied to the desired places using a sponge. The final operation is coating with acrylic varnish. You can use glossy or matte varnish. The photo shows examples of crafts.
 The photo shows examples of crafts.
 In addition to the indicated colors, African masks can be painted in other colors. Elements of red, yellow and blue are often used. The craft will also be decorated with special details - piercings.
Papier-mâché is rightly considered an excellent material for various crafts. Even small children can make simple products. For teenagers and adults, such creativity develops into a hobby. Their creations can decorate the interior of any apartment.
Ekaterina Kalugina

To work in papier technique-mache we use cardboard egg cassettes, water, PVA glue.

We finely tear the cardboard egg cartons and fill them with water, leave them for several hours, and let them swell. Then grind with a blender. Squeeze out excess water, add a little PVA glue (or wallpaper glue). We have an excellent mass ready for any crafts.

Form a ball. If the mass is a little liquid, then squeeze out the excess water; if, on the contrary, it is a little dry, then add water and glue.

Make a hole in the ball for your finger. Leave the ball to dry, turning the ball over from time to time and adjusting the shape if it becomes deformed. Someone dries in the oven, dries well in the sun, we were in no hurry, so our bun dried for a couple of days naturally on the windowsill.

Dried bun cover with toilet paper or napkins (first tear into small pieces, dip in PVA glue diluted with water. Covered dry the bun again, it will take much less time. We bun They painted it with yellow gouache and laid it out to dry again.

They painted our face with gouache kolobok and varnished(ours is regular furniture). We dried the varnish for a couple of days and our Kolobok is ready.

To The bun didn't roll away, we made a foam for him To: a plastic yogurt cup was covered with several layers of napkins, roots were made from rolled newspaper tubes, covered with gouache and varnish.

Like this Gingerbread man on a stump Now he lives in our group in the theater corner, participates not only in theatrical performances, but is also often a guest at speech development classes, and plays various games with us. Guys I really like Kolobok, as soon as you put it on your finger, it comes to life.
Publications on the topic:
Master class: Making your own fruits using the papier-mâché technique. Goal: Formation of skills and abilities in product design.
Hello dear guests of my page! I bring to your attention a master class on making mushrooms using the papier-mâché technique.
Papier mache "Mushrooms for the plot" Free activity of children in the senior group "Bee". To complete this work we will need: Newspaper, white.
Since a wonderful New Year's holiday is approaching, the children and I decided to make a New Year's plate using the papier-mâché technique. Purpose: Formation.
Before the New Year, my group and I took part in the regional show - the competition "The best Christmas tree decoration for the Christmas tree in Vorontsovsky Park." (Yes.
Master Class. Co-creation between teacher and children. "Monkey using papier-mâché technique." My children and I take part in a city competition every year.
The material is designed for music directors and teachers of preschool educational institutions. Purpose: making an attribute for a surprise moment.
The area around the house should be positive and give a charge of vivacity. In addition to the desired vegetation, it’s great when unusual fairy-tale characters are located on it. Looking at their smiling faces, you always want to believe that everyone around wishes us happiness. Professional manufacturers offer an assortment of such figurines. Their products are impeccable, beautiful, practical and bright. But many people prefer to decorate their yard with homemade crafts. Even if they are not so professional, they are made with soul, according to their own views and tastes. A DIY papier-mâché bun at the dacha looks original and interesting. Moreover, you can decorate it to your liking. Additional parts are made from:
- fabrics;
- wires;
- foam rubber;
- wood and other materials.
Conclusion
Amateur craftsmen often resort to making figurines from plastic bottles. This is not the most suitable auxiliary material for Kolobok, but it can be used to decorate the external design of the lawn on which it stands, or the attributes with which it is decorated. For people who want to add originality to their site, there is always an option to make a Kolobok for the garden. This cheerful and intelligent fairy-tale character will make children's games interesting and the area around the house more well-groomed. Watch similar master classes:
Comments
Related posts:
DIY toys from scrap materials / DIY toys, patterns, videos, MK How to make a stork for the garden with your own hands, from bottles, master class / DIY toys, patterns, videos, MK The master class will teach you how to make an educational toy with your own hands from scrap materials