Name: Dragon Age: Origins (19 additional content)
Publication type: DLC license
Developer: BioWare
Year: 2009/2010
Platform: PC
Interface language: English and Russian
Tablet: Not required
System requirements: operating system: Windows® XP/Vista/Seven
CPU: Intel Core 2 1.4 GHz or AMD X2 1.8 GHz (Intel Core 2 1.6 GHz or AMD X2 2.2 GHz for Vista)
RAM: 1 GB (1.5 GB) for Vista
Video card: ATI Radeon X850 128 MB or NVIDIA GeForce 6600 GT 128 MB (Radeon X1550 256 MB or NVIDIA GeForce 7600 GT 256 MB for Vista)
Sound card: DirectX® 9.0c compatible sound device
Free hard disk space: 20 GB
Installation instructions: 1. Run the Dragon Age updater/bin_ship/daupdater.exe
2. In the updater, click “Select DAZIP” and select all .dazip files.
3. In the updater, select add-ons and click “Install selected”.
4. Rejoice)
If after installing the “Song of Leliana” content the error “failed to load module” appears, then do the following:
A. The distribution contains the DLC Decrypter folder, copy it to (C:/Users/your account name/My Documents/BioWare/Dragon Age/AddIns)
b. Go to the copied folder and run the file decrypt_all.
V. Next, go into the game, click “Other Campaigns”, select “Leliana’s Song” there, and click “Play” =)
P.S. For 100% operation of the “Song of Leliana” content, you should patch the game to version 1.03
Description: 19 additional content for Dragon Age.
Everything works 100%, I personally checked it myself, i.e., you can load any save and enjoy new things and new locations.
I would especially like to note the content “Leliana’s Song”, “Stone Captive”, “Soldier’s Peak” and of course “Return to Ostagar”.
Now you have a personal stone golem at your disposal, the opportunity to return to Ostagar for the armor of King Kaylan, fight there with the creatures of darkness and avenge the dead friends in the Battle of Ostagar! Visit "Soldier's Peak", the fortress of the guards, and plunge into the past of Leliana, a bard girl familiar to fans of the series from the original Dragon game Age: Origins. The action of the add-on "Leliana's Song" takes place in the past, where Leliana spent her youth and where she experienced events that changed her forever. Players will have to go on a dangerous mission with Leliana's mentor, Marjolaine, and find themselves in the very center of dangerous political intrigue.
Small clarification:
All additions except "Leliana's Song" are entirely in Russian.
"Leliana's Song" - voice acting (English), text (Russian), you just need to turn on the display of subtitles.
List of contents:
Leliana's Song [Leliana's Song]
The Stone Prisoner [ Stone prisoner]
Return to Ostagar
Warden's Keep [Fortress of the Guardians]
The Edge [Blade]
Embri's Many Pockets [Embry Pockets]
Helm of the Deep [Helm of the Depths]
The Lucky Stone
The Lion's Paw [Lion's Paw]
Amulet of the War Mage [Battle Mage Amulet]
The Wicked Oath [Black Oath]
Blood Dragon Armor
Mark of Vigilance
Bergen's Honor, Grimoire of the Frozen Wastes, Final Reason [Very useful books]
Memory Band
Feral Wolf Charm [Wild Wolf Talisman]
Guildmaster's Belt [Guildmaster's Belt]
Band of Fire
Dalish Promise Ring
P After installing the DLC, you will have a new location called Sulker Pass on the world map. The merchant stuck there will offer you the golem control rod and say the activation words. You will get the rod absolutely free, because the golem itself is located in the village of Honnlit, through which a horde of the Spawn of Darkness is about to pass.
By After this, the village itself will appear on the map, in which the Spawn of Darkness actually settled. When you have dealt with the creatures, you can try to activate the golem found in the square. Quite expectedly, the password will not work and you will need to find one of the surviving residents of Honnlith to try to find out the real one.
Walkthrough of the DLC “Stone Prisoner”
 Walkthrough of the DLC “Stone Prisoner”
ABOUT go to Wilhelm's basement. Having finished with the squad of the Spawn of Darkness, you will find local peasants behind a strange magical barrier, and among them is Matthias, son of Wilhelm. He will tell you in vivid colors how the golem crushed his father, and his mother sold the control rod in her hearts, deliberately telling him the wrong password. Matthias will agree to tell you the right words, but only if you return his daughter Amalia, who was frightened and fled to Wilhelm’s laboratory, which is equipped with all sorts of traps that did not allow other residents a chance to survive.
Walkthrough of the DLC “Stone Prisoner”
 Walkthrough of the DLC “Stone Prisoner”
H To get there, go further along the corridor, fighting off the Shadows. Eventually you will see another barrier. He is not a hindrance to you, and behind him you will find Amalia in the company of a talking cat, captured by some kind of demon. During the conversation, you will learn that the Demon is locked in this room by Wilhelm, and the girl will refuse to leave the basement without a new girlfriend. The demonic animal will require you to remove the barrier and release it in Amalia's body, moving the slabs on the floor in a special way.
Walkthrough of the DLC “Stone Prisoner”
 Walkthrough of the DLC “Stone Prisoner”
IN The following options are available to us:
Immediately attack the demon (as a result, she will possess Amalia, and the girl will have to be killed, but Stan will approve of your decision);
Promise to let the demon go if in return he promises not to touch Amalia (the demon will not keep his promise and will possess the girl as soon as you remove the barrier);
Agree to the deal;
Return and tell Matthias what happened, who, in order to save his daughter, will allow the demon to inhabit his own body(you will have to either release the demon or kill Matthias);
Lie that you agree to the deal, and after removing the barrier, attack the demon (the most favorable option).
Walkthrough of the DLC “Stone Prisoner”
 Walkthrough of the DLC “Stone Prisoner”
A Lister, Winn and Leliana will approve if you save the girl and her father, but Morrigan will be unhappy. If you agree to help the demon or allow Matthias to sacrifice himself, Approval will be distributed in the opposite way.
Walkthrough of the DLC “Stone Prisoner”
 Walkthrough of the DLC “Stone Prisoner”
H To free the demon you will need to solve a simple puzzle - draw a line of fire through the stone slabs on the floor from corner to corner. The puzzle is somewhat similar to tag. Each plate has an arrow in the direction in which the fire will go. All you have to do is move the plates so that the arrows on them point in the right direction. There are many solutions here, and here is one of them:
Walkthrough of the DLC “Stone Prisoner”
 Walkthrough of the DLC “Stone Prisoner”
E If you allow the demon to take over Amalia's body, he will give you a good belt, “Cord of Broken Dreams.” You can also demand an additional reward, and you will receive a mediocre magic staff. Or, after destroying the barrier, the demon will attack you along with four demons of rage, and from his body you will remove the best helmet in the game and the same belt. Also, if you allow a demon to take over someone's body, you will receive more money as a reward.
Walkthrough of the DLC “Stone Prisoner”
 Walkthrough of the DLC “Stone Prisoner”
IN In any case, you will receive the correct password (either Matthias will say it, or the demon who has taken over his body), and after that return to the square. Having activated the golem, after a short conversation you can either take it into the group (Alistair will not like this, but with the help of Influence you can reduce the decrease in Approval to a minimum), or send it home, or kill it.
Walkthrough of the DLC “Stone Prisoner”
 Walkthrough of the DLC “Stone Prisoner”
E If the golem Sheila remains in the group, you can receive an additional quest. You will have it after completing the “Perfect” story quest if you first talk to Sheila in the camp and then bring her to Deep Paths. Sheila will report that she has begun to remember some things from her past and will ask you to go to the Kadash teig.
To receive this task you must have the add-on installed called “Stone Prisoner”.
Go to the location called “Sulker Pass” and find a merchant standing there. He offers you a control rod for the golem. You can get this rod absolutely free, since this rod is mostly useless, but the golem is not included with the rod, you will have to find it separately. Go to a village called Honnlit. At the moment, this settlement is being attacked by a squad of creatures of darkness.
Golem in Honnlith
Go to the location that will open on your map. The village will actually be filled from top to bottom with various monsters, but mostly they will be archers and ordinary warriors. When you deal with all these monsters, you can try to activate the golem standing in the main square of this village. Using the found password. You will soon see that this password does not work at all, so let's move on. Not far from the golem there are doors that are marked "Wilhelm's Basement". Make your way through the next faces of the spawn of darkness, which are now headed by the Herlock emissary and the Alpha Harlock. Behind them you will find local residents who have taken refuge behind a barrier.
Behind this barrier you will find a man named Matthias, who is the son of Wilhelm. He will tell you that the golem killed his father a long time ago, so his mother sold the control rod and deliberately gave the wrong password. Matthias promises to tell you the correct password, but on the condition that you save his daughter from Vilhelm’s laboratory. When the creatures of darkness attacked the village, his daughter fled into the depths of this laboratory. Please note that the laboratory is protected by various magical traps, so other local residents cannot go there, and those who tried are now left there forever.
The laboratory is located in the basement a little further down the corridor. The traps will actually turn out to be Shadows, which from time to time will jump out at you to kill you. Move along the corridors all the way to the bridge and soon you will come across another barrier. But this barrier protects not from creatures like you, but from others, so you can safely pass through it. Immediately behind the barrier is Matthias's daughter along with a strange cat. But you, as an experienced adventurer and hero, know that this cannot be done without demons. The demon who lives here is imprisoned and cannot leave because of the barrier that Wilhelm once installed.
You can immediately challenge this demon to fight, but only when it takes over the body of a little girl and you will have to kill the demon along with her. There is an option to promise to let the demon go, but actually try to lie, in return the demon will promise you to leave the little girl alone, but will break its word as soon as you remove the barrier. There is also an option to go back to Matthias, who will sacrifice his body to the demon to save his daughter, then you can either kill him or let him go along with the demon.
In general, from the above you need to understand that it is best to do without victims, so you need to save both the father and the girl, so promise the demon to let her go. You have to solve a small puzzle - how to fire on the stone tiles in front, from one corner to another. The puzzle is not too difficult. So, you need to move the slabs with arrows. The fire will burn in the direction of the arrows, so all you need to do is bring the flame to the desired corner. There are a lot of options, so almost every scheme will be correct. After you remove this barrier, the demon will immediately break his own and attack you with a couple of rage demons. You can also allow the girl’s body to be taken over and then demand an additional reward for this - a magic staff, but the staff will not be as good as the slap that you can remove from the demon, and this helmet is one of the best in the game.
But if you immediately challenge the demon to a fight, then Stan will approve of your actions. If you agree to the deal and allow Mattias to sacrifice himself to save his daughter, then Morrigan will approve, but Wynn, Zevran, Leliana and of course Alistair will not approve. But if you save the girl and kill the demon, then everyone is happy except Morrigan.
Either way, you get the password to activate the golem, so go back to the square and get a golem named Sheila as a new companion. Unfortunately, Alistair will not approve of this, but you can reduce his displeasure to the loss of only -1 influence. But you can also destroy Sheila. Please note that when you leave the laboratory, two demons from the Shadow will finally attack you.
In addition, in Honnlith, in one of the houses you can find a locked chest. You can find the key to this chest on the body of one peasant woman, who lies not far from Sheila. In the chest you can find a dagger that has two slots.
At this point, the walkthrough of this DLC is complete.
The quest begins by touching the gravestone in the north of the eastern Brecilian Forest. You need to collect a set of Juggernaut Armor. Gloves, boots and a helmet are found in tombstones guarded by the Undead in western and eastern Brecilian. To get the armor you need to open a passage to the elven burial chamber, which is located on the lower level of the ruins.
To do this, you need to take a tablet describing the ritual from the sarcophagus, and then perform the ritual in the hall with the fountain.
Procedure for performing the ritual:
- take the jug from the fountain,
- fill it with water,
- get away from the fountain
- place the jug on the altar,
- pray,
- inspect the jug,
- take one sip
- take a jug
- leave the altar
- pour water into the fountain.
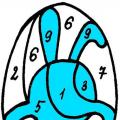
Puzzle in Wilhelm's Cellar (Honnliet)
You need to move the tiles by standing on them so as to direct the fire to the opposite corner. The direction of fire is determined by the arrow on the tile.
Key to the City (Orzammar)
Locations of documents:
- Hall of Heroes,
- Community halls,
- Diamond halls,
- Dusty city
- Test arena.
Life of the Guardians (Orzammar)
Location of the three rune stones:
- Community halls,
- Caridina Crossroads,
- Dead ditches.
Throne Room (Orzammar)
Sequence of actions to release the dragon:
- touch the throne
- place two characters on the pressure plates in the throne room (located next to each other to the left of the throne)
- put the third character on the third pressure plate, which is located in the hall in front of the throne room,
- touch the throne again.
Bloody Sacks (Deep Roads of Orzammar)
Location of bags. which need to be reunited in the Ortan teig: one - in the Educan teig and two - at the Caridin Crossroads.
Guardian of the Reach (Tower of Mages)
Location of three text fragments:
- three in the students' rooms,
- two in the Senior Wizards' Rooms,
- one in the Great Hall.
The sequence for activating the statues in the Great Hall:
- statue with a bowl
- statue with raised sword,
- statue with lowered sword,
- statue with a shield (located in another room in the center of the location).
After this, touching the basement door in the Students' Rooms will summon the demon Shah Wird.
Science of Summoning (Tower of Mages)
Find and read one of the two Science of Summoning text fragments in the Mage Tower, which are located in the Apprentice's Rooms. The summoning ritual takes place in the library
At the beginning of each call, touch the Font in the central branch of the library (this will cause all the necessary items in the library to appear). Then you need to activate the items listed in the list and touch the corresponding summoning spot on the floor (three are in the library, the fourth is in the adjacent central hall in the niche located to the left of the entrance).
Order of item activation:
First call:
- Directory of spiritual figures.
(A ghost boar will appear).
Second call:
- Mage Gorvish.
(A ghostly Artful Rogue will appear. This summon opens an additional quest on the preacher's board in Redcliffe).
Third call:
- Great Bestiary of Elvorn,
- Place for carving tables,
- Spiritorium Etherealis,
- Magician Gorvish,
- Beginner's amulet.
(Shadow-Tearing bereskarn will appear and attack you).
Fourth call:
(all items from the first three summons)
- Directory of spiritual figures
- The unusual profession of Roderkom,
- Mage Gorvish
- Great Bestiary of Elvorn,
- Place for carving tables,
- Spiritorium Etherealis,
- Magician Gorvish,
- Beginner's amulet.
(Earl Forshadow will appear, from whom you need to steal the note).
Test of Faith (Ruined Temple)
Correct answers to the questions:
- Brona - Dreams;
- Thane Shartan - Home;
- General Maferat - Jealousy;
- Archon Hessarian - Compassion;
- Disciple Kathair - Hunger;
- Student Havard - Mountains;
- Lady Vasily - Revenge;
- Elisha - Melody.
Phantom Bridge
Near the ghostly bridge, separate the squad. One person must walk along the appearing sections of the bridge, three (A, B and C) press the tiles.
Sequence of pressing tiles:
- (A) second from the right,
- (B) third from the left.
- (B) sixth from the left.
- (B) fourth from the right.
- (A) first from the left.
- (B) fifth from the right.
- (B) fifth from the left.
To receive this quest, you must have the Stone Captive add-on installed. Go to the Sulker's Pass location, and the merchant standing there will offer you a control rod for the golem. You can get it completely free, since by and large this rod is useless - the golem is not attached to it, you need to find it in the village of Honnlit, which is currently occupied by a detachment of the Spawn of Darkness.
Go to a new location that has opened on your map. It is truly filled with a variety of Fiends of Darkness, mainly archers and warriors. When you have dealt with everything, you can try to activate the golem standing in the square using the password given to you.
After making sure that the password does not work, go further, namely, to the door that is marked as “Wilhelm’s Basement”. Having made your way through another detachment of the Spawn of Darkness, led by a Herlock emissary and an Alpha Harlock, you will find surviving villagers behind a magical barrier.
Behind the barrier you will find Matthias, son of Wilhelm. He will tell you that the golem killed his father and his mother sold the control rod, most likely, deliberately giving the wrong password to it. Matthias will promise to reveal the correct password to you if you rescue his daughter from Vilhelm’s laboratory, who fled there during the attack on the village. The laboratory is protected by various kinds of magical traps, so that other villagers cannot go there (those who tried, alas, did not blow their heads).
The laboratory is located in the same basement further down the corridor, and the traps will turn out to be Shadows, jumping out at you from time to time from ambush. Move further along the corridor and the bridge (this Wilhelm has a very spacious basement, isn't it?) and you will find another magical barrier. It is not placed for you, so feel free to walk through it.
Behind the barrier you will find Amalia, Matthias's daughter, in the company of a talking cat. But you, as an experienced exterminator of evil spirits, know very well that it probably couldn’t have happened without some kind of demon. The demon is unable to leave the laboratory due to a magical barrier set up by Wilhelm.
You can immediately challenge the demon to a fight (but she will possess the girl and you will have to kill her) or promise to let her go (you can lie) if in return she promises to leave Amalia alone (but breaks her word after you remove the barrier) . You can also return and report the situation to Matthias, who will sacrifice himself to save Amalia, allowing the demon to take over his body (and then you will have to either kill him or let both him and the demon that owns him go).
In light of all of the above, if you want to save the girl and her father, promise the demon to let her go.
To do this, you have to solve a small puzzle - how to draw fire on stone slabs from one corner to another. The answer is simple: move the arrow tiles. The fire burns in the direction of the arrow, so all you have to do is line up the arrows so that they point the flame in the direction you want. There can be a lot of options for their location here.
One solution:
Once the barrier is removed, the demon will break his word and attack you along with several rage demons. Alternatively, you can let her take over Amalia's body, and you can even demand an additional reward for this - a magic staff. (Admittedly, the staff is not that good, but one of the best helmets in the game can be removed from the demon’s body.)
If you immediately challenge the demon to a fight, Stan will approve.
Making a deal with the demon or allowing Mattias to sacrifice himself will earn Morrigan's approval and the disapproval of Wynn, Zevran, Alistair and Leliana. Accordingly, if you kill the demon and save the girl, Morrigan will not approve, but the others will be quite happy.
In any case, the result will be to obtain the correct golem activation password. Return to the square and get a new companion into your group - the golem Sheila (Alistair won't particularly like this idea, but you can reduce the loss of influence to a minimum (-1) with the help of Persuasion).
If you want, you can also kill Sheila.
Note: When you walk back from the laboratory, the Shadows will attack you again twice.
In Honnlith, you can find a locked chest near one of the houses. The key to this chest is on the body of a peasant not far from Sheila. The chest contains a very good dagger with two slots.

Fortress of the Guardians
You receive this quest if you have the “Fortress of the Guardians” add-on installed. After it is installed, someone named Levi Dryden will appear in your camp. He will ask you to find an abandoned fortress with him Gray Wardens, in which his great-great-grandmother Sophia (at that time the Guardian-Commander of Ferelden) once fought in order to obtain evidence of her heroic life there and thereby restore the good name of the Drydens.
Go to the Soldier's Peak location that appears on your map. In the courtyard of the fortress you will see visions from the past - they will happen to you throughout your exploration of the fortress and will give a good idea of last days her defense. The corpses lying in the courtyard will very quickly rise up and attack you if you approach the staircase leading to the fortress. You can remove a good antique crossbow from the body of their elite commander.
Clear the first and second floors of the fortress, along the way learning more about its history from visions and notes and books scattered throughout. In the large hall on the first floor, you will see Sofia's very last battle, after which you will be attacked by a demon of rage. Keep in mind that he will continue to heal himself as long as there is at least one Guardian ghost alive to help him, so it makes sense to deal with the Guardians first (they will only be summoned by the demon twice).
The exit from the second floor is temporarily closed to you - go to Sofia’s office and talk to her herself - or what’s left of her. Now you have to make a choice - whether to accept her offer or not. If you refuse, then you will have to fight with her, if not, go through the door and bridge (beware of the traps on it) to the tower of Avernus and fight with him. If you killed Sophia, then Avernus, in turn, will offer you to patch up the holes in the Veil. Regardless of which side you take, you'll have to fight off four waves of demons while your chosen ally handles the Shroud, the last of which will be the Desire Demon.
After the battle, you can either leave your ally alive or kill him. If you leave them alive, you won't hear from them again (unless Levi might mention that Avernus doesn't stick his head out of his tower). Also, if you leave an ally alive, you will not receive either the Guardian Commander Armor Set (Sophia) or the Avernus Robe (Avernus).
After this, Levi will speak to you and your quest will be completed. Unfortunately, it was not possible to restore the good name of the Drydens, but now you and the Levi family can use the fortress as a base. If you leave Soldier Peak (at least to the camp) and return, you will receive a chest for your use in which you can keep things without filling your backpack with them, and two merchants - Levi himself and his blacksmith brother. The blacksmith can also forge you the beautiful Starfang sword if you find a meteorite during one of the random encounters on the world map (unfortunately, this does not happen in every game).
Note: At the entrance to the room where you meet Avernus, you will see a vial containing the results of his research on Blood Magic. If you drink its contents, you will receive two additional skills - which ones depend on the class of your hero.
Find four sources of information about the treasure hidden in the fortress, and then find the treasure itself. This quest is activated when you find any of four sources of information:
- statue in the western part of the courtyard
- book in the archive on the first floor
- a jar of raspberry jam on the second floor
- a corpse on the wall in the tower of Avernus.
I recommend activating the statue first (at least not last) - if you complete the Soldier’s Peak quest, you will no longer be able to return to the fortress itself and, accordingly, you will not be able to get the treasure there. If you have found all the information, then go to the second floor and search the large painting above the fireplace. Repeat the Oath of the Guardians and a chest with very good things will come out of the wall, of which it is worth noting the Sword of Asturian - a one-handed sword with one slot and the property of weakening Fiends of Darkness.

Return to Ostagar
This quest appears to you immediately after installing the Return to Ostagar DLC after you complete Lothering. The gist of it is that during your travels you have heard vague rumors about some soldier who survived the Battle of Ostagar and is hiding somewhere in the lands of Banna Loren and - perhaps out of pure curiosity or perhaps a sense of camaraderie - decided to find out more about him.
Go to the new location that appears on your map. You can intervene in what is happening or not, but this will not affect Elric’s fate - the Bann soldiers will stab him to death on the spot and the only difference will be whether they then leave in peace or attack you. In any case, talk to the dying person. Elric will tell you that before the battle, King Kaylan gave him the key to a chest with important documents and will ask you to find these documents, and at the same time try to recapture Kaylan’s armor and weapons from the Spawn of Darkness and, if the king’s body is found, give him a real burial.
Go to Ostagar. It is teeming with Spawn of Darkness of all sorts and sizes, and Kaylan's armor was divided among five of their commanders. Two of them are located in the western part of Ostagar, two are in the eastern part, and you will have to get a little longer to get to the last one.
In the western part of the fortress you will find the key that Elric mentioned. Kaylan's chest is located in the same place, slightly south of the key's location. The chest contains some very interesting documents...
In addition to Kaylan's chest, you will find another locked chest in the western part of the fortress, labeled "Mage Chest". You can only open it if you did NOT open the chest with the deserter's key at the very beginning of your adventures, following the quest "The Hungry Deserter". If you did not receive the key from the deserter earlier, then you can find it on the body of the poor fellow in the northwestern part of the map.
After clearing the western part of the fortress and receiving two pieces of Kailan's armor (from Harlock the Kolobrod in the northern part and Harlock the Guardian in the southeastern part), go across the bridge. There you will find the body of the king, but you will not be allowed to do anything with it, since a colorful Fiend Necromancer will appear on the battlefield, who will send several skeletons, including a magician, to attack you. Several enemies will also appear behind you, so be careful.
Having made your way through the enemy, go clear the eastern part of the fortress. In addition to the Spawn of Darkness, there are traps scattered across the surface in the southern part, almost immediately after the bridge, and ballistae are waiting behind them (fortunately, they have practically no maneuverability, so the main thing is not to stand in a direct line of fire). Behind the traps and ballistae you will find Harlock the Strategist, from whom you can remove another piece of the king's armor. Another piece of armor is located in the northern part of the map with General Harlock, protecting the approach to the Ishal tower.
After clearing the area of Spawns on the surface, go to the Tower of Ishal. Don't be alarmed - you don't need to go through all four floors, this time you only need the first. There you will be attacked by an ogre and many low-level Fiends, which should not cause you any problems. Explore the first floor. Not far from the barricaded door you will find a gap (you may remember that the guard in Ostagar told you about the underground tunnels discovered in the tower) - jump there.
In the tunnels you will find spiders and a couple of Herlock emissaries, but in general they are quite small and will very soon lead you to former field battle. Here you will have your final battle. The necromancer will raise from the dead the same ogre who killed Kaylan. In addition, the necromancer will call for help from the dead from those poor frozen bodies that lie in abundance around. Having dealt with the ogre, go to the necromancer - he is not very strong and attacks mainly with a staff - obviously, spending all his mana on raising the dead.
From the ogre you will get Duncan's dagger and sword, and from the necromancer you can remove the last piece of the king's armor. Go back to the tunnels - and you will automatically find yourself on the bridge near Kaylan's body. Now you have to decide what to do with it. You can give him a funeral pyre, you can leave him as is, or you can remove him, but not bury him, but leave him to the wolves. Depending on what you decide to do, your teammates may approve or not. Once you have made your decision, you can leave Ostagar. A small warning - you will not be able to return here, so if something is left unexamined and unfinished, it is better to do it now.