In this article I will tell you about such a chip as TDA1514A
Introduction
I'll start a little sad... At the moment, the production of the microcircuit has been discontinued... But this does not mean that it is now "worth its weight in gold", no. In almost any radio store or on the radio market, it can be obtained at a price of 100 - 500 rubles. Agree, a bit pricey, but the price is absolutely fair! By the way, on the world's Internet sites, such as they are much cheaper ...
The microcircuit has a low level of distortion and a wide range of reproducible frequencies, so it is better to use it on full-range speakers. People who assembled amplifiers on this chip praise it for its high sound quality. This is one of the few microcircuits that really "sounds good". In terms of sound quality, it is almost as good as the now popular TDA7293/94. However, if errors are made in the assembly - quality work not guaranteed.
Brief description and advantages
This chip is a single-channel Hi-Fi class AB amplifier with a power of 50W. Built-in SOAR protection, thermal protection (protection against overheating) and "Mute" mode
The advantages include the absence of clicks when turning on and off, the presence of protection, low harmonic and intermodulation distortion, low thermal resistance, and more. Of the shortcomings, there is practically nothing to single out, except for a failure with a "running" voltage (the power supply must be more or less stable) and a relatively high price
Briefly about the appearance
The chip is available in a SIP package with 9 long legs. The pitch of the legs is 2.54mm. There are inscriptions and a logo on the front side, and a heat sink on the back - it is connected to a 4-leg, and 4-leg is a "-" power supply. On the sides there are 2 eyelets for mounting the radiator.

The original or a fake?
Many people ask this question, I will try to answer you.
So. The microcircuit must be carefully made, the legs must be smooth, slight deformation is allowed, since it is not known how they were treated in a warehouse or in a store
The inscription... It can be done either with white paint or with an ordinary laser, two microcircuits are higher for comparison (both are original). In the event that the inscription is applied with paint, the chip must ALWAYS have a vertical strip separated by an eyelet. Don't let the inscription "TAIWAN" confuse you - it's okay, the sound quality of such specimens is just as good as those without this inscription. By the way, almost half of the radio components are made in Taiwan and neighboring countries. This inscription is not on all microcircuits.
I also advise you to pay attention to the second line. If it contains only numbers (there should be 5 of them), these are chips of the "old" production. The inscription on them is wider, and the heat sink can also have a different shape. If the inscription on the chip is laser printed and the second line contains only 5 digits, there must be a vertical stripe on the chip
The logo on the chip must be present, and only "PHILIPS"! As far as I know, production ceased long before the founding of NXP, and this is 2006. If you come across this microcircuit with the NXP logo, then one of two things - the microcircuit has started to be produced again or a typical "leftist"
It is also necessary to have depressions in the form of circles, as in the photo. If they don't, it's fake.
Perhaps there are other ways to identify the "leftist", but you should not strain so hard on this issue. There are only a few cases of marriage.
Specifications of the microcircuit
* Input impedance and gain adjustable by external elements
Below is a table of approximate output powers depending on the power supply and load resistance
| Supply voltage | Load resistance | ||
| 4 ohm | 8 ohm | ||
| 10W | 6W | ||
| +-16.5V |
28W |
12W | |
| 48W | 28W | ||
| 58W | 32W | ||
| 69W | 40W | ||
circuit diagram
Schematic taken from datasheet (May 1992)

It's too bulky... I had to redraw it:

The scheme is slightly different from that provided by the manufacturer, all the characteristics given above are exactly for THIS scheme. There are several differences, and all of them are aimed at improving the sound - first of all, filter capacitances are installed, the "voltage boost" is removed (about it a little later) and the value of the resistor R6 is changed.
Now in more detail about each component. C1 - input isolating capacitor. Passes through itself only the alternating voltage of the signal. It also affects the frequency response - the smaller the capacitance, the smaller the bass and, accordingly, the larger the capacitance, the greater the bass. I would not recommend setting more than 4.7uF, since the manufacturer has provided for everything - with a capacitance of this capacitor equal to 1uF, the amplifier reproduces the declared frequencies. Use a film capacitor, in extreme cases, an electrolytic one (non-polar is desirable), but not a ceramic one! R1 reduces the input impedance, and together with C2 forms an input noise filter.
As with any op amp, you can set the gain here. This is done with R2 and R7. At these values, the gain is 30dB (may vary slightly). C4 affects the activation of the SOAR and Mute protection, R5 affects the smooth charging and discharging of the capacitor, and therefore there are no clicks when the amplifier is turned on and off. C5 and R6 form the so-called Zobel chain. Its task is to prevent the self-excitation of the amplifier, as well as to stabilize the frequency response. C6-C10 suppress power supply ripples, protect against voltage drops.
Resistors in this circuit can be taken with any power, for example, I use the standard 0.25W. Capacitors for a voltage of at least 35V, except for C10 - I use 100V in my circuit, although 63V should be enough. All components before soldering must be checked for serviceability!
Amplifier circuit with "voltage boost"

This version of the circuit is taken from the datasheet. It differs from the above scheme by the presence of elements C3, R3 and R4.
This option will allow you to get up to 4W more than stated (at ± 23V). But with this inclusion, distortion may slightly increase. Resistors R3 and R4 should be used at 0.25W. I couldn't stand it at 0.125W. Capacitor C3 - 35V and above.

This circuit requires the use of two microcircuits. One gives a positive signal at the output, the other - a negative one. With this inclusion, you can remove more than 100W at 8 ohms.
According to the attendees, this scheme absolutely functional and I even have a more detailed plate of approximate output powers. She is below:
And if you experiment, for example, at ± 23V connect a load of 4 ohms, you can get up to 200W! Provided that the radiators do not get very hot, 150W will be easily pulled into the bridge of the microcircuit.
This design is good to use in subwoofers.
Work in external output transistors
The microcircuit is, in fact, a powerful operational amplifier and it can be made more powerful by adding a pair of complementary transistors to the output. This option has not yet been tested, but theoretically it is possible. You can also power up the bridge circuit of the amplifier by hanging a pair of complementary transistors on the output of each microcircuit
Operation with single supply
At the very beginning of the datasheet, I found lines that say that the microcircuit also works with unipolar power. Where is the diagram then? Alas, I don’t have it in the datasheet, I didn’t find it on the Internet ... I don’t know, maybe such a scheme exists somewhere, but I haven’t seen one ... The only thing I can advise is TDA1512 or TDA1520. The sound is excellent, but they are powered by a unipolar power supply, and the output capacitor can slightly spoil the picture. Finding them is quite problematic, they were produced a very long time ago and were long out of production. The inscriptions on them can be of various shapes, it is not worth checking them for "fake" - there were no cases of refusal.
Both chips are Hi-Fi class AB amplifiers. Power is about 20W at + 33V into a load of 4 ohms. I will not give diagrams (the topic is still about TDA1514A). You can download printed circuit boards for them at the end of the article.
Nutrition
For stable operation of the microcircuit, a power source with a voltage of ± 8 to ± 30V with a current of at least 1.5A is needed. Power should be supplied with thick wires, the input wires should be removed as far as possible from the output wires and the power source
You can eat normally simple block power supply, which includes a network transformer, a diode bridge, filter capacitances and optional chokes. To obtain ± 24V, a transformer is required with two secondary windings of 18V each with a current of more than 1.5A for one microcircuit.
You can use switching power supplies, for example, the simplest one, on the IR2153. Here is his diagram:

This UPS is half-bridge, frequency 47kHz (set using R4 and C4). Diodes VD3-VD6 ultrafast or Schottky
It is possible to use this amplifier in a car using a boost converter. On the same IR2153, here is the schematic:

The converter is made according to the Push-Pull scheme. Frequency 47kHz. Rectifier diodes need ultra-fast or Schottky. The transformer calculation can also be done in ExcellentIT. Chokes in both circuits will be "advised" by ExcellentIT itself. You need to count them in the Drossel program. The author of the program is the same -
I want to say a few words about the IR2153 - the power supplies and converters are pretty good, but the microcircuit does not provide stabilization of the output voltage and therefore it will change depending on the supply voltage, and it will sag.
It is not necessary to use IR2153 and switching power supplies in general. You can do it easier - as in the "old days", an ordinary transformer with a diode bridge and huge power capacities. This is what his scheme looks like:

C1 and C4 at least 4700uF, for a voltage of at least 35V. C2 and C3 - ceramics or film.
Printed circuit boards
Right now I have the following board collection:
a) the main one - it can be seen in the photo below.
b) slightly modified first (main). All tracks have been increased in width, the power tracks are much wider, the elements have been slightly moved.
c) bridge circuit. The board is not drawn very well, but it works
d) the first version of the software - the first trial version, there is not enough Zobel chain, but as it was assembled, it works. There is even a photo (below)
e) printed circuit board fromXandR_man - found on the forum site "Soldering iron". What can I say ... Strictly the scheme from the datasheet. Moreover, I have seen kits based on this seal with my own eyes!
In addition, you can draw the board yourself if you are not satisfied with the provided ones.
Soldering
After you have made the board and checked all the details for serviceability, you can start soldering.
Tin the entire board, and tin the power tracks with as thick a layer of solder as possible
All jumpers are soldered first (their thickness should be as large as possible in the power sections), and then all components increase in size. the last chip is soldered. I advise you not to cut the legs, but to solder it as it is. You can then bend it for ease of landing on the radiator.
The microcircuit is protected from static electricity, so you can solder with the included soldering iron, sitting even in woolen clothes.
However, it is necessary to solder so that the microcircuit does not overheat. For reliability, you can attach one eye to the radiator during soldering. It is possible for two, there will be no difference, if only the crystal inside does not overheat.
Setup and first start
After all the elements and wires are soldered, a "test run" is necessary. Screw the chip onto the heatsink, short the input wire to ground. As a load, you can connect future speakers, but in general, so that they do not "fly out" in a split second in case of marriage or installation errors, use a powerful resistor as a load. If it crashes, know that you made a mistake, or you got a marriage (the microcircuit means). Fortunately, such cases almost never occur, unlike the TDA7293 and others, which you can pick up a bunch from one batch in the store and, as it turns out later, they are all marriages.
However, I want to make a small remark. Keep your wires as short as possible. It was such that I just extended the output wires and began to hear a hum in the speakers that looked like a "permanent". Moreover, when the amplifier was turned on, due to the "permanence" the speaker gave out a hum, which disappeared after 1-2 seconds. Now I have wires coming out of the board, a maximum of 25 cm and go straight to the speaker - the amplifier turns on silently and works without problems! Also pay attention to the input wires - put a shielded wire, you should not make it long either. Follow the simple requirements and you will succeed!
If nothing happened to the resistor, turn off the power, attach the input wires to the signal source, plug in your speakers and apply power. You can hear a small background in the speakers - this indicates that the amplifier is working! Give a signal and enjoy the sound (if everything is perfectly assembled). If it “grunts”, “farts” - look at the food, at the correctness of the assembly, because as revealed in practice - there are no such “nasty” specimens that, with proper assembly and excellent nutrition, worked crookedly ...
What does the finished amplifier look like?
Here is a series of photos taken in December 2012. Boards just after soldering. Then I collected to make sure that the microcircuits were working.


But my first amplifier, only the board survived to this day, all the details went to other circuits, and the microcircuit itself failed due to an alternating voltage on it


Below are recent photos:


Unfortunately, my UPS is at the manufacturing stage, and I powered the microcircuit earlier from two identical batteries and a small transformer with a diode bridge and small power capacities, in the end it was±25V. Two such microcircuits with four speakers from the Sharp music center played so that even the objects on the tables "danced to the music", the windows rang, and the body felt good power. I can’t remove it now, but there is a ±16V power supply, from it you can get up to 20W at 4 ohms ... Here is a video for you as proof that the amplifier is absolutely working!
Thanks
I express my deep gratitude to the users of the Soldering Iron site forum, and specifically, many thanks to the user for some help, I also thank you, and many others (sorry for not calling you by nickname) for honest reviews that prompted me to assemble this amplifier. Without all of you, this article could not have been written.
Completion
The microcircuit has a number of advantages, excellent sound in the first place. Many microcircuits of this class may even be inferior in sound quality, but this depends on the quality of the assembly. Bad build means bad sound. Come to assembly electronic circuits seriously. I strongly do not recommend soldering this amplifier by surface mounting - this can only worsen the sound, or lead to self-excitation, and subsequently a complete failure.
I collected almost all the information that I checked myself and could ask other people who collected this amplifier. It is a pity that I do not have an oscilloscope - without it, my statements about sound quality mean nothing ... But I will continue to say that it sounds just fine! Those who assembled this amplifier will understand me!
If you have any questions, write to me on the forum site "Soldering Iron". to discuss amplifiers on this chip, you can ask there.
I hope the article was useful for you. Good luck to you! Regards, Yuri.
List of radio elements
| Designation | Type | Denomination | Quantity | Note | Shop | My notepad | |
|---|---|---|---|---|---|---|---|
| Chip | TDA1514A | 1 | To notepad | ||||
| C1 | Capacitor | 1 uF | 1 | To notepad | |||
| C2 | Capacitor | 220 pF | 1 | To notepad | |||
| C4 | 3.3uF | 1 | To notepad | ||||
| C5 | Capacitor | 22 nF | 1 | To notepad | |||
| C6, C8 | electrolytic capacitor | 1000uF | 2 | To notepad | |||
| C7, C9 | Capacitor | 470 nF | 2 | To notepad | |||
| C10 | electrolytic capacitor | 100uF | 1 | 100V | To notepad | ||
| R1 | Resistor | 20 kOhm | 1 | To notepad | |||
| R2 | Resistor | 680 ohm | 1 | To notepad | |||
| R5 | Resistor | 470 kOhm | 1 | To notepad | |||
| R6 | Resistor | 10 ohm | 1 | Chosen at setup | To notepad | ||
| R7 | Resistor | 22 kOhm | 1 | To notepad | |||
| Scheme with a voltage boost | |||||||
| Chip | TDA1514A | 1 | To notepad | ||||
| C1 | Capacitor | 1 uF | 1 | To notepad | |||
| C2 | Capacitor | 220 pF | 1 | To notepad | |||
| C3 | electrolytic capacitor | 220uF | 1 | From 35V and above | To notepad | ||
| C4 | electrolytic capacitor | 3.3uF | 1 | To notepad | |||
| C5 | Capacitor | 22 nF | 1 | To notepad | |||
| C6, C8 | electrolytic capacitor | 1000uF | 2 | To notepad | |||
| C7, C9 | Capacitor | 470 nF | 2 | To notepad | |||
| C10 | electrolytic capacitor | 100uF | 1 | 100V | To notepad | ||
| R1 | Resistor | 20 kOhm | 1 | To notepad | |||
| R2 | Resistor | 680 ohm | 1 | To notepad | |||
| R3 | Resistor | 47 ohm | 1 | Chosen at setup | To notepad | ||
| R4 | Resistor | 82 ohm | 1 | Chosen at setup | To notepad | ||
| R5 | Resistor | 470 kOhm | 1 | To notepad | |||
| R6 | Resistor | 10 ohm | 1 | Chosen at setup | To notepad | ||
| R7 | Resistor | 22 kOhm | 1 | To notepad | |||
| Bridging | |||||||
| Chip | TDA1514A | 2 | To notepad | ||||
| C1 | Capacitor | 1 uF | 1 | To notepad | |||
| C2 | Capacitor | 220 pF | 1 | To notepad | |||
| C4 | electrolytic capacitor | 3.3uF | 1 | To notepad | |||
| C5, C14, C16 | Capacitor | 22 nF | 3 | To notepad | |||
| C6, C8 | electrolytic capacitor | 1000uF | 2 | To notepad | |||
| C7, C9 | Capacitor | 470 nF | 2 | To notepad | |||
| C13, C15 | electrolytic capacitor | 3.3uF | 2 | To notepad | |||
| R1, R7 | Resistor | 20 kOhm | 2 | To notepad | |||
| R2, R8 | Resistor | 680 ohm | 2 | To notepad | |||
| R5, R9 | Resistor | 470 kOhm | 2 | To notepad | |||
| R6, R10 | Resistor | 10 ohm | 2 | Chosen at setup | To notepad | ||
| R11 | Resistor | 1.3 kOhm | 1 | To notepad | |||
| R12, R13 | Resistor | 22 kOhm | 2 | To notepad | |||
| Impulse power block | |||||||
| IC1 | Power driver and MOSFET | IR2153 | 1 | To notepad | |||
| VT1, VT2 | MOSFET transistor | IRF740 | 2 | To notepad | |||
| VD1, VD2 | rectifier diode | SF18 | 2 | To notepad | |||
| VD3-VD6 | Diode | Any Schottky | 4 | Ultrafast Diodes or Schottky | To notepad | ||
| VDS1 | Diode bridge | 1 | Diode bridge for the required current | To notepad | |||
| C1, C2 | electrolytic capacitor | 680uF | 2 | 200V | To notepad | ||
| C3 | Capacitor | 10 nF | 1 | 400V | To notepad | ||
| C4 | Capacitor | 1000 pF | 1 | To notepad | |||
| C5 | electrolytic capacitor | 100uF | 1 | To notepad | |||
| C6 | Capacitor | 470 nF | 1 | To notepad | |||
| C7 | Capacitor | 1 nF | 1 | ||||
At present, a wide range of imported low-frequency integrated amplifiers has become available. Their advantages are satisfactory electrical parameters, the ability to select microcircuits with a given output power and supply voltage, stereo or quad performance with the possibility of bridging.
For the manufacture of a structure based on an integral ULF, a minimum of attachments is required. The use of known-good components ensures high repeatability and typically no further tuning is required.
The given typical switching circuits and the main parameters of integrated ULF are designed to facilitate the orientation and selection of the most suitable microcircuit.
For quadraphonic ULF, the parameters in the bridged stereo connection are not indicated.
TDA1010
Supply voltage - 6...24 V
Output power (Un \u003d 14.4 V, THD \u003d 10%):
RL=2 ohm - 6.4W
RL=4 Ohm - 6.2 W
RL=8 ohm - 3.4 W
Quiescent current - 31 mA
Switching scheme
TDA1011
Supply voltage - 5.4...20 V
Maximum current consumption - 3 A
Un=16V - 6.5W
Un=12V - 4.2 W
Un=9V - 2.3 W
Un=6B - 1.0 W
SOI (P=1 W, RL=4 Ohm) - 0.2%
Quiescent current - 14 mA
Switching scheme
TDA1013
Supply voltage - 10...40 V
Output power (THD=10%) - 4.2 W
SOI (P=2.5 W, RL=8 Ohm) - 0.15%
Switching scheme
TDA1015
Supply voltage - 3.6 ... 18 V
Output power (RL=4 ohm, THD=10%):
Un=12V - 4.2 W
Un=9V - 2.3 W
Un=6B - 1.0 W
SOI (P=1 W, RL=4 Ohm) - 0.3%
Quiescent current - 14 mA
Switching scheme
TDA1020
Supply voltage - 6...18 V
RL=2 ohm - 12W
RL=4 Ohm - 7 W
RL=8 ohm - 3.5W
Quiescent current - 30 mA
Switching scheme
TDA1510
Supply voltage - 6...18 V
Maximum current consumption - 4 A
THD=0.5% - 5.5 W
THD=10% - 7.0 W
Quiescent current - 120 mA
Switching scheme
TDA1514
Supply voltage - ±10...±30 V
Maximum current consumption - 6.4 A
Output power:
Un \u003d ± 27.5 V, R \u003d 8 Ohm - 40 W
Un \u003d ± 23 V, R \u003d 4 Ohm - 48 W
Quiescent current - 56 mA
Switching scheme
TDA1515
Supply voltage - 6...18 V
Maximum current consumption - 4 A
RL=2 ohm - 9W
RL=4 ohm - 5.5W
RL=2 ohm - 12W
RL4 Ohm - 7W
Quiescent current - 75 mA
Switching scheme
TDA1516
Supply voltage - 6...18 V
Maximum current consumption - 4 A
Output power (Un =14.4 V, THD=0.5%):
RL=2 ohm - 7.5W
RL=4 Ohm - 5 W
Output power (Un =14.4 V, THD=10%):
RL=2 ohm - 11W
RL=4 Ohm - 6 W
Quiescent current - 30 mA
Switching scheme
TDA1517
Supply voltage - 6...18 V
Maximum current consumption - 2.5 A
Output power (Un=14.4B RL=4 ohm):
THD=0.5% - 5 W
THD=10% - 6 W
Quiescent current - 80 mA
Switching scheme
TDA1518
Supply voltage - 6...18 V
Maximum current consumption - 4 A
Output power (Un =14.4 V, THD=0.5%):
RL=2 ohm - 8.5W
RL=4 Ohm - 5 W
Output power (Un =14.4 V, THD=10%):
RL=2 ohm - 11W
RL=4 Ohm - 6 W
Quiescent current - 30 mA
Switching scheme
TDA1519
Supply voltage - 6...17.5 V
Maximum current consumption - 4 A
Output power (Up=14.4 V, THD=0.5%):
RL=2 ohm - 6W
RL=4 Ohm - 5 W
Output power (Un =14.4 V, THD=10%):
RL=2 ohm - 11W
RL=4 Ohm - 8.5W
Quiescent current - 80 mA
Switching scheme
TDA1551
Supply voltage -6...18 V
THD=0.5% - 5 W
THD=10% - 6 W
Quiescent current - 160 mA
Switching scheme
TDA1521
Supply voltage - ±7.5...±21 V
Output power (Un=±12V, RL=8 ohm):
THD=0.5% - 6 W
THD=10% - 8 W
Quiescent current - 70 mA
Switching scheme
TDA1552
Supply voltage - 6...18 V
Maximum current consumption - 4 A
Output power (Un = 14.4 V, RL = 4 ohms):
THD=0.5% - 17 W
THD=10% - 22 W
Quiescent current - 160 mA
Switching scheme
TDA1553
Supply voltage - 6...18 V
Maximum current consumption - 4 A
Output power (Up=4.4 V, RL=4 Ohm):
THD=0.5% - 17 W
THD=10% - 22 W
Quiescent current - 160 mA
Switching scheme
TDA1554
Supply voltage - 6...18 V
Maximum current consumption - 4 A
THD=0.5% - 5 W
THD=10% - 6 W
Quiescent current - 160 mA
Switching scheme
TDA2004
Output power (Un=14.4V, THD=10%):
RL=4 Ohm - 6.5W
RL=3.2 ohm - 8.0 W
RL=2 ohm - 10W
RL=1.6 ohm - 11W
KHI (Un=14.4V, P=4.0 W, RL=4 Ohm) - 0.2%;
Bandwidth (by level -3 dB) - 35...15000 Hz
Quiescent current -<120 мА
Switching scheme
TDA2005
Dual integrated ULF, designed specifically for use in a car and allowing operation at a low-resistance load (up to 1.6 Ohm).
Supply voltage - 8...18 V
Maximum current consumption - 3.5 A
Output power (Up = 14.4 V, THD = 10%):
RL=4 Ohm - 20W
RL=3.2 Ohm - 22W
SOI (Up = 14.4 V, P = 15 W, RL = 4 Ohm) - 10%
Bandwidth (by level -3 dB) - 40...20000 Hz
Quiescent current -<160 мА
Switching scheme
TDA2006
The pinout matches the pinout of the TDA2030 chip.
Supply voltage - ±6.0...±15 V
Maximum current consumption - 3 A
Output power (Ep=±12V, THD=10%):
at RL=4 Ohm - 12 W
at RL=8 Ohm - 6...8 W SOI (Ep=±12V):
at P=8 W, RL= 4 Ohm - 0.2%
at P=4 W, RL= 8 Ohm - 0.1%
Bandwidth (by level -3 dB) - 20...100000 Hz
Consumption current:
at Р=12 W, RL=4 Ohm - 850 mA
at P=8 W, RL=8 Ohm - 500 mA
Switching scheme
TDA2007
A dual integral ULF with a single in-line arrangement of pins, specially designed for use in television and portable radio receivers.
Supply voltage - +6...+26 V
Quiescent current (Ep=+18 V) - 50...90 mA
Output power (THD=0.5%):
at En=+18 V, RL=4 Ohm - 6 W
at En=+22 V, RL=8 Ohm - 8 W
SOI:
at En=+18 V P=3 W, RL=4 Ohm - 0.1%
at En=+22 V, P=3 W, RL=8 Ohm - 0.05%
Bandwidth (by level -3 dB) - 40...80000 Hz
Switching scheme
TDA2008
Integral ULF, designed to operate on a low-resistance load, providing a high output current, very low harmonic content and intermodulation distortion.
Supply voltage - +10...+28 V
Quiescent current (Ep=+18 V) - 65...115 mA
Output power (Ep=+18V, THD=10%):
at RL=4 Ohm - 10...12 W
at RL=8 Ohm - 8 W
THD (Ep= +18 V):
at Р=6 W, RL=4 Ohm - 1%
at P=4 W, RL=8 Ohm - 1%
Maximum consumption current - 3 A
Switching scheme
TDA2009
Dual integrated ULF, designed for use in high-quality music centers.
Supply voltage - +8...+28 V
Quiescent current (Ep=+18 V) - 60...120 mA
Output power (Ep=+24 V, THD=1%):
at RL=4 Ohm - 12.5 W
at RL=8 Ohm - 7 W
Output power (Ep=+18 V, THD=1%):
at RL=4 Ohm - 7 W
at RL=8 Ohm - 4 W
SOI:
at Ep = +24 V, P = 7 W, RL = 4 Ohm - 0.2%
at En= +24 V, P=3.5 W, RL=8 Ohm - 0.1%
at Ep = +18 V, P = 5 W, RL = 4 Ohm - 0.2%
at En= +18 V, P=2.5 W, RL=8 Ohm - 0.1%
Maximum consumption current - 3.5 A
Switching scheme
TDA2030
Integral ULF providing high output current, low harmonics and intermodulation distortion.
Supply voltage - ±6...±18 V
Quiescent current (Ep=±14 V) - 40...60 mA
Output power (Ep=±14 V, THD=0.5%):
at RL=4 Ohm - 12...14 W
at RL=8 Ohm - 8...9 W
SOI (Ep=±12V):
at P=12 W, RL=4 Ohm - 0.5%
at P=8 W, RL=8 Ohm - 0.5%
Bandwidth (by level -3 dB) - 10...140000 Hz
Consumption current:
at P=14 W, RL=4 Ohm - 900 mA
at P=8 W, RL=8 Ohm - 500 mA
Switching scheme
TDA2040
Integral ULF providing high output current, low harmonics and intermodulation distortion.
Supply voltage - ±2.5...±20 V
Quiescent current (Ep=±4.5...±14 V) - mA 30...100 mA
Output power (Ep=±16 V, THD=0.5%):
at RL=4 Ohm - 20...22 W
at RL=8 Ohm - 12 W
SOI (Ep=±12V, P=10W, RL=4 Ohm) - 0.08%
Maximum consumption current - 4 A
Switching scheme
TDA2050
Integral ULF, providing high output power, low harmonics and intermodulation distortion. Designed to work in Hi-Fi stereo complexes and high-end TVs.
Supply voltage - ±4.5...±25 V
Quiescent current (Ep=±4.5...±25 V) - 30...90 mA
Output power (Ep=±18, RL=4 Ohm, THD=0.5%) - 24...28 W
THD (Ep=±18V, P=24W, RL=4 Ohm) - 0.03...0.5%
Bandwidth (by level -3 dB) - 20...80000 Hz
Maximum consumption current - 5 A
Switching scheme
TDA2051
Integral ULF, which has a small number of external elements and provides a low content of harmonics and intermodulation distortion. The output stage operates in class AB, which allows you to get more output power.
Output power:
at Ep=±18 V, RL=4 Ohm, SOI=10% - 40 W
at Ep=±22 V, RL=8 Ohm, SOI=10% - 33 W
Switching scheme
TDA2052
Integral ULF, the output stage of which operates in class AB. Allows a wide range of supply voltages and has a large output current. It is intended for work in television and radio receivers.
Supply voltage - ±6...±25 V
Quiescent current (En = ±22 V) - 70 mA
Output power (Ep = ±22 V, THD = 10%):
at RL=8 Ohm - 22 W
at RL=4 Ohm - 40 W
Output power (En = 22 V, THD = 1%):
at RL=8 Ohm - 17 W
at RL=4 Ohm - 32 W
SOI (with a bandwidth of -3 dB 100 ... 15000 Hz and Pout = 0.1 ... 20 W):
at RL=4 Ohm -<0,7 %
at RL=8 Ohm -<0,5 %
Switching scheme
TDA2611
Integral ULF, designed to work in household equipment.
Supply voltage - 6...35 V
Quiescent current (Ep=18 V) - 25 mA
Maximum consumption current - 1.5 A
Output power (THD=10%): at Ep=18 V, RL=8 Ohm - 4 W
at Ep=12V, RL=8 0m - 1.7 W
at Ep=8.3 V, RL=8 Ohm - 0.65 W
at Ep=20 V, RL=8 Ohm - 6 W
at Ep=25 V, RL=15 Ohm - 5 W
SOI (at Рout=2 W) - 1%
Bandwidth - >15 kHz
Switching scheme
TDA2613
SOI:
(Ep=24 V, RL=8 Ohm, Pout=6 W) - 0.5%
(Ep=24 V, RL=8 Ohm, Рout=8 W) - 10%
Quiescent current (Ep=24 V) - 35 mA
Switching scheme
TDA2614
Integral ULF, designed to work in household equipment (television and radio receivers).
Supply voltage - 15...42 V
Maximum consumption current - 2.2 A
Quiescent current (Ep=24 V) - 35 mA
SOI:
(Ep=24 V, RL=8 Ohm, Pout=6.5 W) - 0.5%
(Ep=24 V, RL=8 Ohm, Pout=8.5 W) - 10%
Bandwidth (by level -3 dB) - 30...20000 Hz
Switching scheme
TDA2615
Dual ULF, designed to work in stereo radios or TVs.
Supply voltage - ±7.5...21 V
Maximum current consumption - 2.2 A
Quiescent current (Ep=7.5...21 V) - 18...70 mA
Output power (Ep=±12 V, RL=8 ohm):
THD=0.5% - 6 W
THD=10% - 8 W
Bandwidth (by level-3 dB and Рout=4 W) - 20...20000 Hz
Switching scheme
TDA2822
Dual ULF, designed to work in portable radio and television receivers.
Quiescent current (Ep=6 V) - 12 mA
Output power (THD=10%, RL=4 ohm):
En \u003d 9V - 1.7 W
En \u003d 6V - 0.65 W
En \u003d 4.5V - 0.32 W
Switching scheme
TDA7052
ULF, designed to work in battery-powered portable audio devices.
Supply voltage - 3...15V
Maximum current consumption - 1.5A
Quiescent current (E p \u003d 6 V) -<8мА
Output power (Ep \u003d 6 V, R L \u003d 8 Ohm, THD \u003d 10%) - 1.2 W
Switching scheme
TDA7053
Dual ULF, designed to work in portable audio devices, but can also be used in any other equipment.
Supply voltage - 6...18 V
Maximum current consumption - 1.5 A
Quiescent current (E p \u003d 6 V, R L \u003d 8 Ohms) -<16 mA
Output power (E p \u003d 6 V, RL \u003d 8 Ohm, THD \u003d 10%) - 1.2 W
SOI (E p \u003d 9 V, R L \u003d 8 Ohm, Pout \u003d 0.1 W) - 0.2%
Operating frequency range - 20...20000 Hz
Switching scheme
TDA2824
Dual ULF, designed to work in portable radio and television receivers
Supply voltage - 3...15 V
Maximum current consumption - 1.5 A
Quiescent current (Ep=6 V) - 12 mA
Output power (THD=10%, RL=4 ohm)
En \u003d 9 V - 1.7 W
En \u003d 6 V - 0.65 W
En \u003d 4.5 V - 0.32 W
SOI (Ep=9 V, RL=8 Ohm, Pout=0.5 W) - 0.2%
Switching scheme
TDA7231
ULF with a wide range of supply voltages, designed to work in portable radios, cassette recorders, etc.
Supply voltage - 1.8 ... 16 V
Quiescent current (Ep=6 V) - 9 mA
Output power (THD=10%):
En=12V, RL=6 Ohm - 1.8 W
En=9B, RL=4 Ohm - 1.6W
Ep=6 V, RL=8 Ohm - 0.4 W
Ep=6 V, RL=4 Ohm - 0.7 W
En \u003d Z V, RL \u003d 4 Ohm - 0.11 W
Ep=3 V, RL=8 Ohm - 0.07 W
SOI (Ep=6 V, RL=8 Ohm, Pout=0.2 W) - 0.3%
Switching scheme
TDA7235
ULF with a wide range of supply voltages, designed to work in portable radio and television receivers, cassette recorders, etc.
Supply voltage - 1.8...24 V
Maximum current consumption - 1.0 A
Quiescent current (Ep=12 V) - 10 mA
Output power (THD=10%):
Ep=9 V, RL=4 Ohm - 1.6 W
Ep=12 V, RL=8 Ohm - 1.8 W
Ep=15 V, RL=16 Ohm - 1.8 W
Ep=20 V, RL=32 Ohm - 1.6 W
SOI (Ep=12V, RL=8 Ohm, Pout=0.5 W) - 1.0%
Switching scheme
TDA7240
Quiescent current (Ep=14.4 V) - 120 mA
RL=4 Ohm - 20W
RL=8 Ohm - 12W
SOI:
(Ep=14.4 V, RL=8 Ohm, Pout=12W) - 0.05%
Switching scheme
TDA7241
Bridge ULF, designed for use in car radios. It has protection against short circuit in the load, as well as against overheating.
Maximum supply voltage - 18 V
Maximum current consumption - 4.5 A
Quiescent current (Ep=14.4 V) - 80 mA
Output power (Ep=14.4 V, THD=10%):
RL=2 ohm - 26W
RL=4 Ohm - 20W
RL=8 Ohm - 12W
SOI:
(Ep=14.4 V, RL=4 Ohm, Pout=12 W) - 0.1%
(Ep=14.4 V, RL=8 Ohm, Pout=6 W) - 0.05%
Level bandwidth -3 dB (RL=4 Ohm, Рout=15 W) - 30...25000 Hz
Switching scheme
TDA1555Q
Supply voltage - 6...18 V
Maximum current consumption - 4 A
Output power (Up = 14.4 V. RL = 4 ohms):
- THD=0.5% - 5 W
- THD=10% - 6 W Quiescent current - 160 mA
Switching scheme
TDA1557Q
Supply voltage - 6...18 V
Maximum current consumption - 4 A
Output power (Up = 14.4 V, RL = 4 ohms):
- THD=0.5% - 17 W
- THD=10% - 22 W
Quiescent current, mA 80
Switching scheme
TDA1556Q
Supply voltage -6...18 V
Maximum current consumption -4 A
Output power: (Up=14.4 V, RL=4 Ohm):
- THD=0.5%, - 17 W
- THD=10% - 22 W
Quiescent current - 160 mA
Switching scheme
TDA1558Q
Supply voltage - 6..18 V
Maximum current consumption - 4 A
Output power (Up=14 V, RL=4 Ohm):
- THD=0.6% - 5 W
- THD=10% - 6 W
Quiescent current - 80 mA
Switching scheme
TDA1561
Supply voltage - 6...18 V
Maximum consumed current - 4 A
Output power (Up=14V, RL=4 Ohm):
- THD=0.5% - 18 W
- THD=10% - 23 W
Quiescent current - 150 mA
Switching scheme
TDA1904
Supply voltage - 4...20 V
Maximum consumed current - 2 A
Output power (RL=4 ohm, THD=10%):
- Up=14 V - 4 W
- Up=12V - 3.1 W
- Up \u003d 9 V - 1.8 W
- Up \u003d 6 V - 0.7 W
SOI (Up=9 V, P<1,2 Вт, RL=4 Ом) - 0,3 %
Quiescent current - 8...18 mA
Switching scheme
TDA1905
Supply voltage - 4...30 V
Maximum current consumption - 2.5 A
Output power (THD=10%)
- Up=24 V (RL=16 Ohm) - 5.3 W
- Up=18V (RL=8 Ohm) - 5.5 W
- Up=14 V (RL=4 Ohm) - 5.5 W
- Up \u003d 9 V (RL \u003d 4 Ohm) - 2.5 W
SOI (Up=14 V, P<3,0 Вт, RL=4 Ом) - 0,1 %
Quiescent current -<35 мА
Switching scheme
TDA1910
Supply voltage - 8...30 V
Maximum consumed current - 3 A
Output power (THD=10%):
- Up=24 V (RL=8 Ohm) - 10 W
- Up=24 V (RL=4 Ohm) - 17.5 W
- Up=18 V (RL=4 Ohm) - 9.5 W
SOI (Up=24 V, P<10,0 Вт, RL=4 Ом) - 0,2 %
Quiescent current -<35 мА
Switching scheme
TDA2003
Supply voltage - 8...18 V
Maximum current consumption - 3.5 A
Output power (Up=14V, THD=10%):
- RL=4.0 Ohm - 6 W
- RL=3.2 Ohm - 7.5 W
- RL=2.0 Ohm - 10 W
- RL=1.6 Ohm - 12 W
SOI (Up=14.4 V, P<4,5 Вт, RL=4 Ом) - 0,15 %
Quiescent current -<50 мА
Switching scheme
TDA7056
ULF, designed to work in portable radio and television receivers.
Supply voltage - 4.5 ... 16 V Maximum current consumption - 1.5 A
Quiescent current (E p \u003d 12 V, R \u003d 16 Ohm) -<16 мА
Output power (E P \u003d 12 V, R L \u003d 16 Ohm, THD \u003d 10%) - 3.4 W
SOI (E P \u003d 12 V, R L \u003d 16 Ohm, Pout \u003d 0.5 W) - 1%
Operating frequency range - 20...20000 Hz
Switching scheme
TDA7245
ULF, designed to work in portable audio devices, but can also be used in any other equipment.Supply voltage - 12...30 V
Maximum current consumption - 3.0 A
Quiescent current (E p \u003d 28 V) -<35 мА
Output power (THD = 1%):
-E p \u003d 14 V, R L \u003d 4 ohms - 4 W
-E P \u003d 18 V, R L \u003d 8 Ohm - 4 W
Output power (THD = 10%):
-E P \u003d 14 V, R L \u003d 4 ohms - 5 W
-E P \u003d 18 V, R L \u003d 8 Ohm - 5 W
THD,%
-E P \u003d 14 V, R L \u003d 4 Ohm, Pout<3,0 - 0,5 Вт
-E P \u003d 18 V, R L \u003d 8 Ohm, Pout<3,5 - 0,5 Вт
-E P \u003d 22 V, RL \u003d 16 Ohm, Pout<3,0 - 0.4 Вт
Bandwidth by level
-ZdB (E =14 V, PL = 4 Ohm, Pout = 1 W) - 50...40000 Hz
TEA0675
Dual channel Dolby B squelch designed for automotive applications. It contains preamplifiers, an electronically controlled equalizer, an electronic pause detection device for the Automatic Music Search (AMS) scanning mode. Structurally, it is carried out in SDIP24 and SO24 cases.Supply voltage, 7.6,..12 V
Current consumption, 26...31 mA
Ratio (signal+noise)/signal, 78...84 dB
THD:
at a frequency of 1 kHz, 0.08 ... 0.15%
at a frequency of 10 kHz, 0.15...0.3%
Output impedance, 10 kOhm
Voltage gain, 29...31 dB
TEA0678
Dolby B dual-channel integrated noise suppressor designed for automotive audio applications. Includes preamp stages, electronic equalizer, electronic source switcher, Automatic Music Search (AMS) system.Available in SDIP32 and SO32 packages.
Current consumption, 28 mA
Preamp Gain (at 1 kHz), 31 dB
Harmonic coefficient
< 0,15 %
at a frequency of 1 kHz with Uout=6 dB,< 0,3 %
Noise voltage, reduced to the input, in the frequency range 20...20000 Hz at Rist=0, 1.4 µV
TEA0679
Two-channel integrated amplifier with Dolby B noise reduction, designed for use in various car audio equipment. Includes pre-amplification stages, an electronically controlled equalizer, an electronic signal source switcher, an Automatic Music Search (AMS) system. The main adjustments of the IC are controlled via the I2C busAvailable in SO32 package.
Supply voltage, 7.6...12 V
Current consumption, 40 mA
Harmonic coefficient
at a frequency of 1 kHz with Uout=0 dB,< 0,15 %
at a frequency of 1 kHz with Uout=10 dB,< 0,3 %
Crosstalk attenuation between channels (Uout = 10 dB, at a frequency of 1 kHz), 63 dB
Signal + noise / noise ratio, 84 dB
TDA0677
Dual preamplifier-equalizer designed for use in car radios. Includes a preamplifier and a corrector amplifier with an electronic time constant switch. It also contains an electronic input switch.The IC is manufactured in the SOT137A package.
Supply voltage, 7.6.,.12 V
Current consumption, 23...26 mA
Signal+noise/noise ratio, 68...74 dB
Harmonic coefficient:
at a frequency of 1 kHz with Uout = 0 dB, 0.04 ... 0.1%
at a frequency of 10 kHz with Uout = 6 dB, 0.08 ... 0.15%
Output impedance, 80... 100 Ohm
Gain:
at a frequency of 400 Hz, 104...110 dB
at a frequency of 10 kHz, 80..86 dB
TEA6360
Two-channel five-band equalizer, controlled via 12C bus, designed for use in car radios, TVs, music centers.Manufactured in SOT232 and SOT238 packages.
Supply voltage, 7... 13.2 V
Current consumption, 24.5 mA
Input voltage, 2.1 V
Output voltage, 1 V
Frequency response range -1dB, 0...20000 Hz
Nonlinear distortion factor in the frequency range 20...12500 Hz and output voltage 1.1 V, 0.2...0.5%
Gain, 0.5...0 dB
Operating temperature range, -40...+80 С
TDA1074A
Designed for use in stereo amplifiers as a two-channel tone control (low and medium frequencies) and sound. The microcircuit consists of two pairs of electronic potentiometers with eight inputs and four separate output amplifiers. The adjustment of each potentiometric pair is carried out individually by applying a constant voltage to the corresponding outputs.The IC is manufactured in SOT102, SOT102-1 packages.
Maximum supply voltage, 23 V
Current consumption (no load), 14...30 mA
Gain, 0 dB
Harmonic coefficient:
at a frequency of 1 kHz with Uout = 30 mV, 0.002%
at a frequency of 1 kHz with Uout = 5 V, 0.015 ... 1%
Noise output voltage in the frequency range 20.. .20000 Hz, 75 µV
Interchannel isolation in the frequency range 20.. .20000 Hz, 80 dB
Maximum power dissipation, 800 mW
Operating temperature range, -30...+80°C
TEA5710
A functionally complete IC that performs the functions of an AM and FM receiver. Contains all the necessary stages: from a high frequency amplifier to an AM / FM detector and a low frequency amplifier. It features high sensitivity and low current consumption. It is used in portable AM / FM receivers, radio timers, radio headphones. The IC is manufactured in the SOT234AG (SOT137A) package.Supply voltage, 2..,12 V
Consumption current:
in AM mode, 5.6...9.9 mA
in FM mode, 7.3...11.2 mA
Sensitivity:
in AM mode, 1.6 mV/m
in FM mode at a signal-to-noise ratio of 26 dB, 2.0 μV
Harmonic coefficient:
in AM mode, 0.8..2.0%
in FM mode, 0.3...0.8%
Low frequency output voltage, 36...70 mV
The article is dedicated to lovers of loud and high-quality music. TDA7294 (TDA7293) is a low-frequency amplifier chip manufactured by the French company THOMSON. The circuit contains field-effect transistors, which ensures high sound quality and soft sound. A simple circuit, few additional elements makes the circuit accessible to any radio amateur. A properly assembled amplifier from serviceable parts starts working immediately and does not need to be adjusted.

The audio frequency power amplifier on the TDA 7294 chip differs from other amplifiers of this class:
- high output power
- wide supply voltage range,
- low percentage of harmonic distortion,
- "soft sound,
- few "mounted" parts,
- low cost.
It can be used in amateur radio audio devices, when modifying amplifiers, acoustic systems, audio equipment devices, etc.
The figure below shows typical circuit diagram power amplifier for one channel.


The TDA7294 chip is a powerful operational amplifier whose gain is set by a negative feedback circuit connected between its output (pin 14 of the chip) and the inverted input (pin 2 of the chip). A direct signal is input (pin 3 of the microcircuit). The circuit consists of resistors R1 and capacitor C1. By changing the values of the resistances R1, you can adjust the sensitivity of the amplifier to the parameters of the preamplifier.
Structural diagram of the amplifier on the TDA 7294

Technical characteristics of the TDA7294 chip
Technical characteristics of the TDA7293 chip
Schematic diagram of the amplifier on the TDA7294

To assemble this amplifier, you will need the following parts:
1. Chip TDA7294 (or TDA7293)
2. 0.25 watt resistors
R1 - 680 Ohm
R2, R3, R4 - 22 kOhm
R5 - 10 kOhm
R6 - 47 kOhm
R7 - 15 kOhm
3. Film capacitor, polypropylene:
C1 - 0.74 mkF
4. Electrolytic capacitors:
C2, C3, C4 - 22 mkF 50 volt
C5 - 47 mkF 50 volt
5. Resistor variable dual - 50 kOm
On one chip, you can assemble a mono amplifier. To assemble a stereo amplifier, you need to make two boards. To do this, we multiply all the necessary details by two, except for the dual variable resistor and the PSU. But more on that later.
Amplifier printed circuit board on a TDA 7294 chip
The circuit elements are mounted on a printed circuit board made of one-sided foil fiberglass.

A similar circuit, but a little more elements, mostly capacitors. The turn-on delay circuit is enabled at the “mute” input, pin 10. This is done for a soft, pop-free turn-on of the amplifier.


A microcircuit is installed on the board, in which unused conclusions are removed: 5, 11 and 12. Mount with a wire with a cross section of at least 0.74 mm2. The microcircuit itself must be installed on a radiator with an area of at least 600 cm2. The radiator should not touch the amplifier case as it will have a negative supply voltage. The case itself must be connected to a common wire.
If you use a smaller area of the radiator, you must make forced airflow by placing a fan in the amplifier case. The fan is suitable from a computer, with a voltage of 12 volts. The microcircuit itself should be mounted on a heatsink using heat-conducting paste. Do not connect the radiator to live parts, except for the negative power bus. As mentioned above, the metal plate at the back of the microcircuit is connected to the negative power circuit.
Microcircuits for both channels can be installed on one common radiator.
Power supply for the amplifier.
The power supply is a step-down transformer with two windings with a voltage of 25 volts and a current of at least 5 amperes. The voltage on the windings must be the same and the filter capacitors too. Voltage surge must not be allowed. When applying bipolar power to the amplifier, it must be supplied at the same time!

Diodes in the rectifier are better to put ultra-fast, but in principle, conventional ones like D242-246 for a current of at least 10A are also suitable. It is advisable to solder a capacitor with a capacity of 0.01 microfarads in parallel with each diode. You can also use ready-made diode bridges with the same current parameters.
Filter capacitors C1 and C3 have a capacitance of 22,000 microfarads for a voltage of 50 volts, capacitors C2 and C4 have a capacitance of 0.1 microfarads.
The supply voltage of 35 volts should only be at a load of 8 ohms, if you have a load of 4 ohms, then the supply voltage must be reduced to 27 volts. In this case, the voltage on the secondary windings of the transformer should be 20 volts.
You can use two identical transformers with a power of 240 watts each. One of them is used to obtain a positive voltage, the second - a negative one. The power of two transformers is 480 watts, which is quite suitable for an amplifier with an output power of 2 x 100 watts.
Transformers TBS 024 220-24 can be replaced by any other transformers with a capacity of at least 200 watts each. As mentioned above, nutrition should be the same - transformers must be the same!!! The voltage on the secondary winding of each transformer is from 24 to 29 volts.
Amplifier circuit increased power on two TDA7294 chips in a bridge circuit.

According to this scheme, four microcircuits are needed for the stereo version.
Amplifier Specifications:
- Maximum output power at a load of 8 ohms (power supply +/- 25V) - 150 W;
- Maximum output power at a load of 16 ohms (power supply +/- 35V) - 170 W;
- Load resistance: 8 - 16 Ohm;
- Coef. harmonic distortion, at max. power 150 watts, e.g. 25V, load 8 Ohm, frequency 1 kHz - 10%;
- Coef. harmonic distortion, at a power of 10-100 watts, e.g. 25V, load 8 Ohm, frequency 1 kHz - 0.01%;
- Coef. harmonic distortion, at a power of 10-120 watts, e.g. 35V, load 16 Ohm, frequency 1 kHz - 0.006%;
- Frequency range (with non-frequency response 1 db) - 50Hz ... 100kHz.
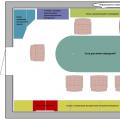
View of the finished amplifier in a wooden case with a transparent plexiglass top cover.

To operate the amplifier at full power, you need to apply the required signal level to the input of the microcircuit, and this is at least 750mV. If the signal is not enough, then you need to assemble a preamplifier for buildup.
Preamplifier circuit on TDA1524A

Setting up the amplifier
A properly assembled amplifier does not need to be adjusted, but no one guarantees that all the parts are absolutely in good order; when you turn it on for the first time, you need to be careful.
The first power-up is carried out without load and with the input signal source turned off (it is better to short the input with a jumper altogether). It would be nice to include fuses of the order of 1A in the power circuit (both in the "plus" and "minus" between the power source and the amplifier itself). We briefly (~0.5 sec.) apply the supply voltage and make sure that the current consumed from the source is small - the fuses do not burn out. It is convenient if the source has LED indicators - when disconnected from the mains, the LEDs continue to burn for at least 20 seconds: the filter capacitors are discharged for a long time by a small quiescent current of the microcircuit.
If the current consumed by the microcircuit is large (more than 300 mA), then there can be many reasons: short circuit in the installation; poor contact in the "ground" wire from the source; mixed up "plus" and "minus"; the pins of the microcircuit touch the jumper; microcircuit is faulty; capacitors C11, C13 are incorrectly soldered; capacitors C10-C13 are faulty.
After making sure that everything is fine with the quiescent current, safely turn on the power and measure the constant voltage at the output. Its value should not exceed + -0.05 V. A large voltage indicates problems with C3 (less often with C4), or with a microcircuit. There were cases when the "inter-ground" resistor was either poorly soldered, or instead of 3 ohms it had a resistance of 3 kOhm. At the same time, the output was a constant of 10 ... 20 volts. By connecting an AC voltmeter to the output, we make sure that the AC voltage at the output is zero (this is best done with the input closed, or simply with the input cable not connected, otherwise there will be noise at the output). The presence of an alternating voltage at the output indicates problems with the microcircuit, or circuits C7R9, C3R3R4, R10. Unfortunately, often ordinary testers cannot measure the high-frequency voltage that appears during self-excitation (up to 100 kHz), so it is best to use an oscilloscope here.
All! You can enjoy your favorite music!
An old friend is better than two new ones!
Proverb
The TDA2822M integrated circuit, due to the small number of strapping elements, is one of the simple amplifiers that can be assembled in a short time, connected to an MP3 player, laptop, radio receiver - and immediately evaluate the result of your work.
Here's how attractive the description looks:
“TDA2822M is a stereo, two-channel low-voltage amplifier for portable equipment, etc.
It can be bridged, used as a headphone or control amplifier, and much more.
Operating supply voltage: 1.8 V to 12 V, power up to 1 W per channel, distortion up to 0.2%. No radiator required.
Contrary to the superminiature size, it produces an honest bass. The perfect chip for inhuman experiments for beginners.”
With my article, I tried to help my fellow radio amateurs make experiments with this interesting chip more conscious and humane.
Let's deal with the microcircuit case
There are two microcircuits: one TDA2822, the other with the index "M" - TDA2822M.Integral chip TDA2822(Philips) is designed to create simple audio power amplifiers. Permissible supply voltage range 3…15 V; at Upit=6 V, Rn=4 Ohm, the output power is up to 0.65 W per channel, in the frequency band of 30 Hz…18 kHz. Chip housing Powerdip 16.
Chip TDA2822M made in a different Minidip 8 package and has a different pinout with a slightly lower maximum power dissipation (1 W versus 1.25 W for the TDA2822).
Please note that there are no other built-in protection circuits for the output stage, which is done for reasons of better use of the power supply, unfortunately at the expense of reliability.
Conclusions 5 and 8 of the microcircuit are connected to a common wire for alternating current. In this case, the gain of the amplifier with negative feedback will be:
Ku=20lg(1+R1/R2)= 20lg(1+R5/R4)=39 dB.
The block diagram of the IP is shown in fig. 2.

Rice. 2. Structural diagram of TDA2822M
It has been experimentally determined that the sum of the resistances of the resistors R1+R2 and R5+R4 is 51.575 kOhm. Knowing the gain, it is easy to calculate that R1=R5=51 kOhm, and R2=R4=0.575 kOhm.
To reduce the gain of the OOS microcircuit, an additional resistor is usually included in series with R2 (R4). In this case, open transistor keys on transistors Q12 (Q13) “interfere” with such a circuitry technique.
But even if we assume that the keys do not affect the feedback gain, the maneuver to reduce the gain is negligible - no more than 3 dB; otherwise, the stability of the amplifier covered by the CNF is not guaranteed.
Therefore, you can experiment with changing the gain of the amplifier, given that the resistance of the additional resistor lies in the range of 100 ... 240 Ohms.
Rice. 3. Schematic diagram of an experimental stereo amplifier
The amplifier has the following characteristics:
Supply voltage Up=1.8…12 V
Output voltage Uout=2…4 V
Current consumption in idle mode Io=6…12 mA
Output power Pout=0.45…1.7 W
Gain Ku=36…41 (39) dB
Input resistance Rin=9.0 kOhm
Crosstalk attenuation between channels 50 dB.
From a practical point of view, for reliable operation of the amplifier, it is advisable to set the supply voltage to no more than 9 V; at the same time, for the load Rn=8 Ohm, the output power will be 2x1.0 W, for Rn=16 Ohm - 2x0.6 W and for Rn=32 Ohm - 2x0.3 W. With a load resistance Rн=4 Ohm, the supply voltage up to 6 V (Pout=2x0.65 W) will be optimal.
The microcircuit gain of 39 dB, even with a slight downward adjustment by resistors R5, R6, turns out to be excessive for modern signal sources with a voltage of 250 ... 750 mV. For example, for Up \u003d 9 V, Rn \u003d 8 Ohm, the sensitivity from the input is about 30 mV.
On fig. 4, a shows an amplifier switching circuit that allows you to connect a personal computer, an MP3 player or a radio receiver with a signal level of about 350 mV. For devices with an output signal of 250 mV, the resistance of resistors R1, R2 must be reduced to 33 kOhm; at an output signal level of 0.5 V, resistors R1 \u003d R2 \u003d 68 kOhm, 0.75 V - 110 kOhm should be installed.
The double resistor R3 sets the required volume level. Capacitors C1, C2 are transitional.
Rice. 4. UMZCH connection diagram: a) - to acoustic systems, b) - to head phones (headphones)
On fig. 4b shows the connection to the headphone jack amplifier. Resistors R4, R5 eliminate clicks when connecting stereo phones, resistors R6, R7 limit the volume level.
During the experiments, I tried to feed the UMZCH both from a stabilized power supply (on an integrated circuit and a BD912 transistor), fig. 5, and from a battery with a capacity of 7.2 Ah for a voltage of 12 V with a power supply for fixed voltages, fig. 6.
The supply voltage is supplied by the shortest possible pair of wires twisted together.
A properly assembled device does not need adjustment.
Excluded fragment. Our magazine exists on donations from readers. The full version of this article is only available
Rice. 5. Schematic diagram of a stabilized power supply
Excluded fragment. Our magazine exists on donations from readers. The full version of this article is only available
Rice. 6. Rechargeable battery - laboratory power supply
A subjective assessment of the noise level showed that when the volume control is set to the maximum level, the noise is barely noticeable.
A subjective assessment of the quality of sound reproduction was made without comparison with the standard. The result is a good sound, listening to phonograms does not cause irritation.
I looked at the microcircuit forums on the Internet, where I met many posts about the search for obscure sources of noise, self-excitation and other troubles.
As a result, he developed a printed circuit board, the distinguishing feature of which is the grounding of the elements with a "star". A photo view of the printed circuit board from the Sprint-Layout program is shown in fig. 7.
Excluded fragment. Our magazine exists on donations from readers. The full version of this article is only available
Rice. 7. Placement of parts on the experimental printed circuit board
When experimenting with this signet, none of the artifacts described on the forums could be found.
Details of the stereo UMZCH on the TDA2822M chip
The printed circuit board is designed to install the most common parts: MLT, S2-33, S1-4 or imported resistors with a power of 0.125 or 0.25 W, film capacitors K73-17, K73-24 or imported MKT, imported oxide capacitors.
I used inexpensive, but reliable electrolytic capacitors with low impedance, long service life (5000 hours) and the ability to operate at temperatures up to +105 ° C from the Hitano ESX, EHR and EXR series. It should be remembered that the larger the outer diameter of the capacitor in the series, the longer its service life.
The DA1 chip is installed in an eight-pin socket. The TDA2822M chip can be replaced with KA2209B (Samsung) or K174UN34 (Angstrem OJSC, Zelenograd). Chip capacitor C8 (SMD) is located on the side of the printed tracks.
R5, R6 - Res.-0.25-160 Ohm (Brown, blue, brown, golden) - 2 pcs.,
С3 - С5 - Cond.1000/16V 1021+105°C - 3 pcs.,
C6, C7 - Cond. 0.1 / 63V K73-17 - 2 pcs.,
C8 - Cond.0805 0.1µF X7R smd - 1 pc.
Many radio amateurs, not without reason, believe that it is best to turn on the microcircuits in accordance with the Datasheet and use the printed circuit boards offered by the developers.
Below are diagrams and printed circuit boards made on the basis of the documentation with the only modification - to increase the stability of the amplifier, a film capacitor is connected in parallel with the oxide capacitor in the power circuit (Fig. 8, 9).
Excluded fragment. Our magazine exists on donations from readers. The full version of this article is only available
Rice. 8. Typical scheme for switching on a microcircuit in stereo mode
Excluded fragment. Our magazine exists on donations from readers. The full version of this article is only available
Rice. 9. Placement of elements of a typical stereo UMZCH
Details of a typical stereo UMZCH
When installing elements on a printed circuit board, I advise you to use the simple technological methods described in the Datagor article.
DA1 - TDA2822M ST Housing: DIP8-300 - 1 pc.,
SCS-8 Dip socket narrow - 1 pc.,
R1, R2 - Res.-0.25-10k (Brown, black, orange, golden) - 2 pcs.,
R3, R4 - Res.-0.25-4.7 Ohm (Yellow, purple, golden, golden) - 2 pcs.,
С1, С2 - Cond.100/16V 0611 +105°C - 2 pcs.,
С3 - Cond.10/16V 0511 +105°C (Capacity can be increased up to 470 uF) - 1 pc.,
С4, С5 - Cond.470/16V 1013+105°C - 2 pcs.,
C6 - C8 - Cond. 0.1 / 63V K73-17 - 3 pcs.
Rice. 10. Schematic diagram of the experimental bridge amplifier
Unlike the stereo amplifier circuit (Fig. 3), which assumes that coupling capacitors are present at the output of the previous device, a coupling capacitor is included at the input of the bridge amplifier, which determines the lower frequency reproduced by the amplifier.
Depending on the specific application, the capacitance of capacitor C1 can be from 0.1 μF (fn = 180 Hz) to 0.68 μF (fn = 25 Hz) or more. With capacitance C1 indicated on the circuit diagram, the lower frequency of the reproduced frequencies is 80 Hz.
Internal resistors connected to the inverting inputs of the amplifier through a coupling capacitor C2 are interconnected, which provides the outputs with equal in magnitude, but opposite in phase signals.
Capacitor C3 corrects the frequency response of the amplifier at high frequencies.
Since the potentials of the DC outputs of the amplifier are equal, it became possible to directly connect the load, without coupling capacitors.
The purpose of the remaining elements was described earlier.
For the stereo version, you will need two bridge amplifiers on the TDA2822M chip. The switching circuit is easy to obtain, based on Fig. 4.
Reliable operation of the amplifier in bridge mode is ensured by selecting the appropriate supply voltage depending on the load resistance (see table).

All parts of the bridge amplifier are placed on a printed circuit board measuring 32 x 38 mm from one-sided foil-coated fiberglass 2 mm thick. A drawing of a possible board option is shown in fig. eleven.

Rice. 11. Placement of elements on the bridge amplifier board
DA1 - TDA2822M ST Housing: DIP8-300 - 1 pc.,
SCS-8 Dip socket narrow - 1 pc.,
R1 - Res.-0.25-10k (Brown, black, orange, golden) - 1 pc.,
R2, R3 - Res.-0.25-4.7 Ohm (Yellow, purple, golden, golden) - 2 pcs.,
C1 - Cond. 0.22/63V K73-17 - 1 pc.,
С2 - Cond.10/16V 0511 +105°C - 1 piece,
C3 - Cond. 0.01/630V K73-17 - 1 pc.,
C4 - C6 - Cond. 0.1 / 63V K73-17 - 3 pcs.,
С7 - Cond.1000/16V 1021+105°C - 1 pc.
A schematic diagram of a typical bridge UMZCH and the placement of elements on a printed circuit board are shown, respectively, in fig. 12 and 13.
Making a good power amplifier has always been one of the hardest parts of audio design. Sound quality, bass softness and clear mid and high frequencies, musical instrument detail - all these are empty words without a quality low-frequency power amplifier.
Foreword
Of the variety of homemade low-frequency amplifiers on transistors and integrated circuits that I made, the circuit on the driver chip showed itself best of all TDA7250 + KT825, KT827.
In this article, I will show you how to make an amplifier amplifier circuit that is perfect for use in homemade audio equipment.
Amplifier parameters, a few words about TDA7293
The main criteria by which the ULF circuit for the Phoenix-P400 amplifier was selected:
- Power is approximately 100W per channel at a load of 4 ohms;
- Power supply: bipolar 2 x 35V (up to 40V);
- Small input impedance;
- Small dimensions;
- High reliability;
- Manufacturing speed;
- High sound quality;
- Low noise level;
- Small cost.
Not a simple combination of requirements. At first I tried a variant based on the TDA7293 chip, but it turned out that this is not what I need, and here's why ...
For all the time I had a chance to collect and test different ULF circuits - transistor ones from books and publications of the Radio magazine, on various microcircuits ...
I want to say my word about TDA7293 / TDA7294, because a lot has been written about it on the Internet, and I have met more than once that the opinion of one person contradicts the opinion of another. Having collected several clones of the amplifier on these microcircuits, I made some conclusions for myself.
The microcircuits are really good, although a lot depends on the successful layout of the printed circuit board (especially the ground lines), good power supply and the quality of the strapping elements.
What immediately pleased me in it was the rather large power delivered to the load. As for a single-chip integrated bass amplifier, the output power is very good, I also want to note the very low noise level in the no signal mode. It is important to take care of good active cooling of the chip, since the chip operates in the "boiler" mode.
What I didn’t like about the 7293 amplifier was the low reliability of the microcircuit: out of several purchased microcircuits, at various points of sale, only two remained working! I burned one by overloading the input, 2 burned out immediately when turned on (it seems like a factory defect), another one burned out for some reason when it was turned on again for the 3rd time, although before that it worked fine and no anomalies were observed ... Maybe just bad luck.
And now, the main reason why I did not want to use modules on the TDA7293 in my project is the "metallized" sound that is noticeable to my hearing, it does not hear softness and saturation, the mids are a little dull.
I concluded for myself that this chip is perfect for subwoofers or bass amplifiers that will hum in the trunk of a car or at discos!
I will not touch on the topic of single-chip power amplifiers further, I need something more reliable and of high quality, so that it is not so expensive with experiments and mistakes. Collecting 4 channels of an amplifier on transistors is a good option, but rather cumbersome in execution, and it can also be difficult to set up.
So what to assemble on if not on transistors and not on integrated circuits? - and on both, skillfully combining them! We will assemble a power amplifier on a TDA7250 driver chip with powerful composite Darlington transistors at the output.
Low-frequency power amplifier circuit on the TDA7250 chip
Chip TDA7250 in a DIP-20 package, this is a reliable stereo driver for Darlington transistors (high-gain composite transistors), on the basis of which you can build a high-quality two-channel stereo UMZCH.
The output power of such an amplifier can reach and even exceed 100W per channel with a load resistance of 4 ohms, it depends on the type of transistors used and the supply voltage of the circuit.
After assembling a copy of such an amplifier and the first tests, I was pleasantly surprised by the sound quality, power and how the music published by this microcircuit came to life in the company with KT825, KT827 transistors. In the compositions, very small details began to be heard, the instruments sounded rich and "easy".
You can burn this chip in several ways:
- Reversal of power lines;
- Exceeding the level of the maximum allowable supply voltage ± 45V;
- Input overload;
- High static voltage.

Rice. 1. Chip TDA7250 in a DIP-20 package, appearance.
Datasheet (datasheet) for the TDA7250 chip - (135 KB).
Just in case, I immediately purchased 4 microcircuits, each of which is 2 amplification channels. Microcircuits were bought in an online store at a price of about $ 2 per piece. At the market for such a microcircuit, they already wanted more than $ 5!
The scheme according to which my version was assembled is not much different from the one given in the datasheet:

Rice. 2. Low-frequency stereo amplifier circuit based on the TDA7250 chip and KT825, KT827 transistors.
For this UMZCH circuit, a self-made bipolar power supply for +/- 36V was assembled, with capacities of 20,000 microfarads in each arm (+ Vs and -Vs).
Power Amplifier Parts
I'll tell you more about the features of the parts of the amplifier. The list of radio components for assembling the circuit:
| Name | Quantity, pcs | Note |
| TDA7250 | 1 | |
| KT825 | 2 | |
| KT827 | 2 | |
| 1.5 kOhm | 2 | |
| 390 ohm | 4 | |
| 33 ohm | 4 | power 0.5W |
| 0.15 ohm | 4 | power 5W |
| 22 kOhm | 3 | |
| 560 ohm | 2 | |
| 100 kOhm | 3 | |
| 12 ohm | 2 | power 1W |
| 10 ohm | 2 | power 0.5W |
| 2.7 kOhm | 2 | |
| 100 ohm | 1 | |
| 10 kOhm | 1 | |
| 100uF | 4 | electrolytic |
| 2.2uF | 2 | mica or film |
| 2.2uF | 1 | electrolytic |
| 2.2 nF | 2 | |
| 1 uF | 2 | mica or film |
| 22 uF | 2 | electrolytic |
| 100 pF | 2 | |
| 100 nF | 2 | |
| 150 pF | 8 | |
| 4.7uF | 2 | electrolytic |
| 0.1uF | 2 | mica or film |
| 30 pf | 2 |
The inductors at the output of the UMZCH are wound on a frame with a diameter of 10 mm and contain 40 turns of enameled copper wire with a diameter of 0.8-1 mm in two layers (20 turns per layer). To prevent the turns from falling apart, they can be fastened with fusible silicone or glue.
Capacitors C22, C23, C4, C3, C1, C2 must be designed for a voltage of 63V, the rest of the electrolytes - for a voltage of 25V. Input capacitors C6 and C5 are non-polar, film or mica.
Resistors R16-R19 must be designed for a power of at least 5Watt. In my case, miniature cement resistors are used.
Resistances R20-R23, as well as RL can be set with a power of 0.5W. Resistors Rx - with a power of at least 1W. All other resistances in the circuit can be set with a power of 0.25W or more.
It is better to select pairs of transistors KT827 + KT825 with the closest parameters, for example:
- KT827A(Uke=100V, h21E>750, Pk=125W) + KT825G(Uke=70V, h21E>750, Pk=125W);
- KT827B(Uke=80V, h21E>750, Pk=125W) + KT825B(Uke=60V, h21E>750, Pk=160W);
- KT827V(Uke=60V, h21E>750, Pk=125W) + KT825B(Uke=60V, h21E>750, Pk=160W);
- KT827V(Uke=60V, h21E>750, Pk=125W) + KT825G(Uke=70V, h21E>750, Pk=125W).
Depending on the letter at the end of the marking, only the voltages Uke and Ube change for KT827 transistors, while the rest of the parameters are identical. But KT825 transistors with different letter suffixes already differ in many parameters.
![]()
Rice. 3. Pinout of powerful transistors KT825, KT827 and TIP142, TIP147.
It is advisable to check the transistors used in the amplifier circuit for serviceability. Darlington transistors KT825, KT827, TIP142, TIP147 and others with high gain contain two transistors inside, a couple of resistances and a diode, so the usual continuity with a multimeter may not be enough here.
To test each of the transistors, you can assemble a simple circuit with an LED:
![]()
Rice. 4. Scheme for checking transistors of the P-N-P and N-P-N structure for operability in the key mode.
In each of the schemes, when the button is pressed, the LED should light up. Power can be taken from + 5V to + 12V.
![]()
Rice. 5. An example of checking the performance of the KT825 transistor, P-N-P structure.
Each of the pairs of output transistors must be installed on radiators, since already at the average ULF output power, their heating will be quite noticeable.
The datasheet on the TDA7250 chip provides the recommended pairs of transistors and the power that can be extracted using them in this amplifier:
| With a load of 4 ohms | ||||
| ULF power | 30 W | +50 W | +90 W | +130 W |
| transistors | bdw93, BDW94A |
bdw93, BDW94B |
bdv64, BDV65B |
MJ11013, MJ11014 |
| Corps | TO-220 | TO-220 | SOT-93 | TO-204 (TO-3) |
| With 8 ohm load | ||||
| ULF power | 15 W | +30 W | +50 W | +70 W |
| transistors | bdx53, BDX54A |
bdx53, BDX54B |
bdw93, BDW94B |
TIP142, TIP147 |
| Corps | TO-220 | TO-220 | TO-220 | TO-247 |
Mounting transistors KT825, KT827 (TO-3 package)
Particular attention should be paid to the installation of output transistors. A collector is connected to the case of transistors KT827, KT825, therefore if the cases of two transistors in one channel are accidentally or intentionally closed, then a power short circuit will result!
![]()
Rice. 6. Transistors KT827 and KT825 are prepared for mounting on radiators.
If the transistors are planned to be mounted on one common radiator, then their cases must be isolated from the radiator through mica gaskets, having previously smeared them with thermal paste on both sides to improve heat transfer.
![]()
Rice. 7. Radiators that I used for transistors KT827 and KT825.
In order not to describe for a long time how it is possible to perform an isolated mounting of transistors on radiators, I will give a simple drawing on which everything is shown in detail:
![]()
Rice. 8. Isolated fastening of transistors KT825 and KT827 on radiators.
Printed circuit board
Now let's talk about the printed circuit board. It will not be difficult to separate it, since the circuit is almost completely symmetrical for each channel. It is necessary to try to move the input and output circuits as far as possible from each other - this will prevent self-excitation, a lot of interference, and save you from unnecessary problems.
Fiberglass can be taken with a thickness of 1 to 2 millimeters, in principle, the board does not need special strength. After etching, the tracks need to be well tinned with solder with rosin (or flux), do not ignore this step - this is very important!
I did the layout of the tracks for the printed circuit board manually, on a sheet of paper in a box using a simple pencil. I have been doing this since the days when SprintLayout and LUT technology could only be dreamed of. Here is a scanned stencil of a PCB design for ULF:


Rice. 9. The circuit board of the amplifier and the location of the components on it (click - open in full size).
Capacitors C21, C3, C20, C4 are not on the hand-drawn board, they are needed to filter the voltage by supply, I installed them in the power supply itself.
UPD: Thank you Alexander for PCB layout in Sprint Layout!

Rice. 10. Printed circuit board for UMZCH on the TDA7250 chip.
In one of my articles, I told how to make this printed circuit board using the LUT method.
Download printed circuit board from Alexander in *.lay(Sprint Layout) format - (71 KB).
UPD. I give here other printed circuit boards mentioned in the comments to the publication:
As for the connecting wires for power supply and at the output of the UMZCH circuit, they should be as short as possible and with a cross section of at least 1.5 mm. In this case, the shorter the length and the greater the thickness of the conductors, the less current losses and interference in the power amplification circuit.
The result is 4 amplification channels on two small scarves:

Rice. 11. Photo of finished UMZCH boards for four channels of power amplification.
Setting up the amplifier
Correctly assembled and from serviceable parts, the circuit starts working immediately. Before connecting the structure to the power source, you need to carefully inspect the printed circuit board for short circuits, and also remove excess rosin with a piece of cotton wool soaked in solvent.
I recommend connecting speakers to the circuit when you first turn on and during experiments through resistors with a resistance of 300-400 Ohms, this will save the speakers from damage in case something goes wrong.
It is desirable to connect a volume control to the input - one dual variable resistor or two separately. Before turning on the UMZCH, we set the slider of the resistor (s) to the left extreme position, as in the diagram (minimum volume), then by connecting the signal source to the UMZCH and supplying power to the circuit, you can gradually increase the volume, observing how the assembled amplifier behaves.

Rice. 12. Schematic representation of the connection of variable resistors as volume controls for ULF.
Variable resistors can be used with any resistance from 47 KΩ to 200 KΩ. In the case of using two variable resistors, it is desirable that their resistances be the same.
So, we check the performance of the amplifier at a low volume. If everything is fine with the circuit, then the fuses along the power lines can be replaced with more powerful ones (2-3 Amperes), additional protection during operation of the UMZCH will not hurt.
The quiescent current of the output transistors can be measured by including an ammeter or multimeter in the current measurement mode (10-20A) in the collector gap of each of the transistors. Amplifier inputs must be connected to common ground (complete absence of input signal), speaker systems should be connected to amplifier outputs.
![]()
Rice. 13. Ammeter switching circuit for measuring the quiescent current of the output transistors of the sound power amplifier.
The quiescent current of transistors in my UMZCH using KT825 + KT827 is approximately 100mA (0.1A).
When setting up an amplifier, power fuses can also be replaced with powerful incandescent lamps. If any of the channels of the amplifier behaves inappropriately (hum, noise, overheating of transistors), then it is possible that the problem lies in the long conductors going to the transistors, try reducing the length of these conductors.
In conclusion
That's all for now, in the following articles I'll tell you how to make a power supply for an amplifier, output power indicators, protection circuits for speakers, about the case and the front panel...
P.S. A lot of comments have already been collected under the article, they contain useful information on experiments, adjustment and use of the amplifier.