A large number of housewives seek to install a hood in their kitchen. The device provides clean air in the room, and the ventilation pipe for the hood harmoniously fits into the interior of a modern kitchen. The kitchen hood protects not only the human body, but also furniture, walls, windows from the effects of fats and combustion products.
Hood classification
Currently, all kitchen hoods can be classified according to:
- method of mounting the exhaust structure;
- according to the basic principle of operation of the hood.
Types of hoods differing in the method of installation
Depending on the installation method, there are:
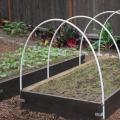
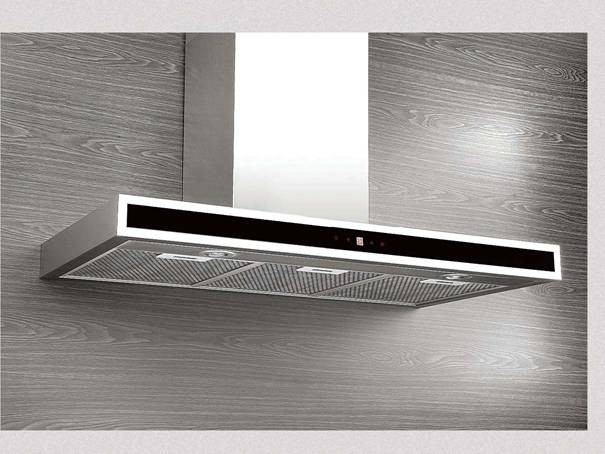
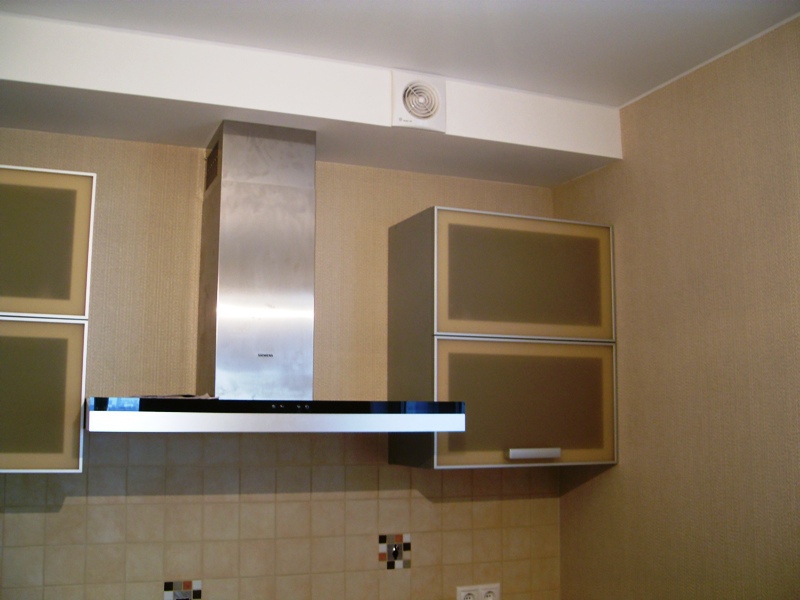
- Suspended or ceiling hoods. Such devices are mounted on the ceiling, wall or cabinet. The hood is installed above the stove.
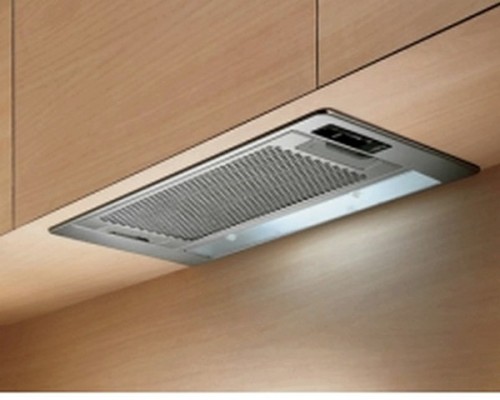
- Built-in hoods. Mounted inside a cabinet or a special box. Outside, you can see only part of the lower part of the device and the remote control for its control.
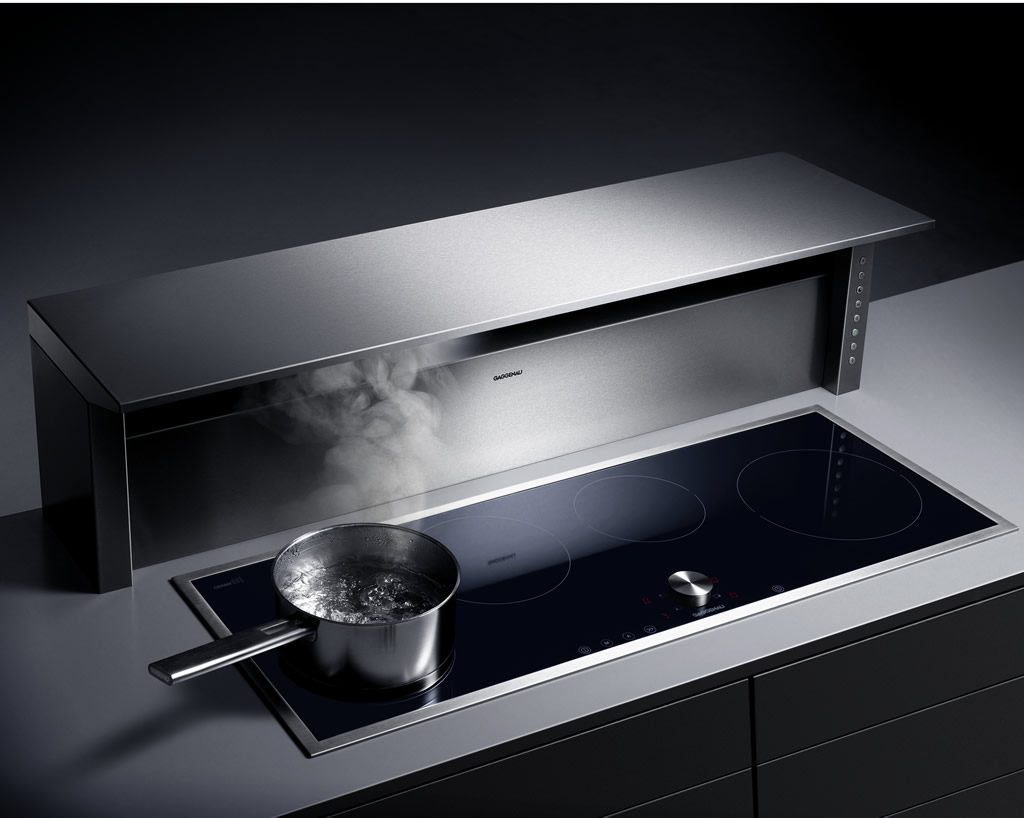
- Desktop. Most often used in catering establishments and are an integral part of the installed kitchen equipment.
Types of hoods differing in the principle of operation
According to the principle of operation, all hoods can be divided into:
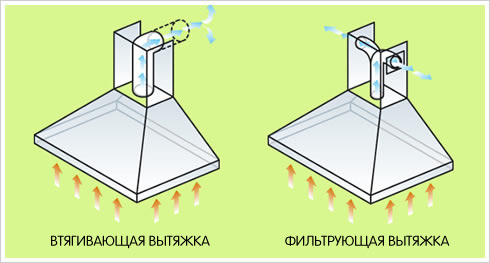
- filtering devices. Air is purified by passing it through a filter. The most commonly used carbon filters, the cleanliness of which must be constantly monitored. Such equipment is suitable for a small kitchen, where most often food is not cooked, but simply heated.
- Retractors. The exhaust ventilation pipe of such equipment removes harmful substances directly into the ventilation duct provided for by the building structure or specially equipped for installing the hood.
For home cooking, retractable suspended or built-in hoods are the most popular.
Selection of hood and air duct
When choosing the right device, you should pay attention to several factors:
- extract power;
- hood dimensions;
- selection of the necessary air ducts;
- kitchen Design.
The minimum power of the device is calculated as ten times the volume of the kitchen. For example, if the parameters of the kitchen are 3 * 4 m, and the ceiling height is 2 m, then the volume of the room will be 24 m³. For such a kitchen, the minimum hood performance is 240 m³ / h.
Experts in the field of selection and installation of a kitchen hood recommend purchasing a device with a small margin of performance.
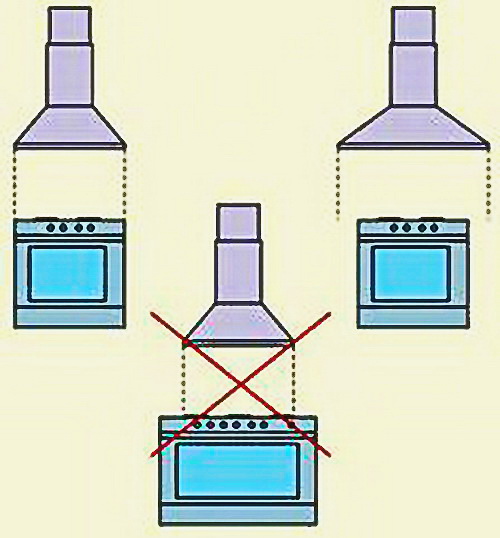
The size of the exhaust device must match the dimensions of the surface of the gas stove. If you do not follow this rule, then part of the harmful substances and odors emitted during cooking will not enter the ventilation and the hood will be useless.
Air ducts for exhaust ventilation can be:
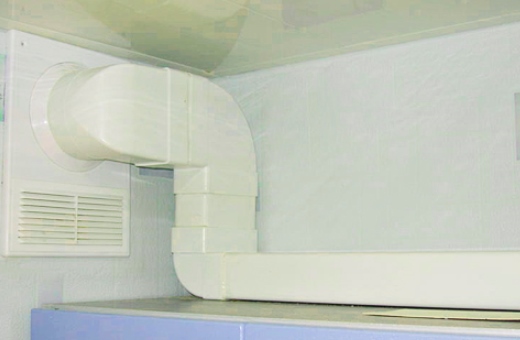
- Made from plastic. Such material is not subject to corrosion, light enough, easy to install, not afraid of large changes in ambient temperature and exposure to harmful chemical compounds. Moreover, they do not have a negative effect on the human body.
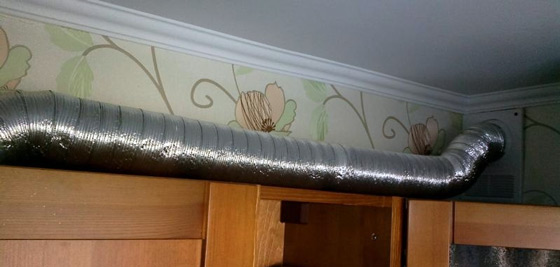
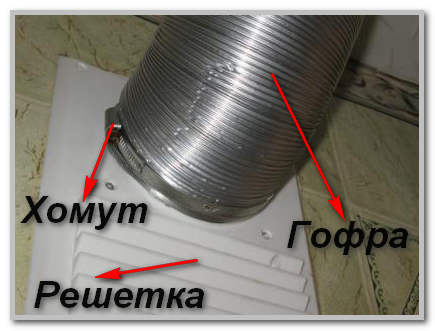
- Made from corrugated aluminum pipe. The corrugated pipe for the hood has the main advantage - the complete absence of sound that occurs when powerful air flows pass through the duct. In addition, the shape of such a pipe can be easily changed according to the parameters of the hole outlet from the hood. The only significant drawback is that the corrugated ventilation pipe has an unaesthetic appearance, but it can always be hidden in a box.
The choice of a pipe for an exhaust hood completely depends on the desire of the consumer.
The next important factor when choosing kitchen exhaust ventilation is the design of the previously equipped kitchen. The hood should not stand out from the overall picture, but harmoniously fit in and complement the existing appearance of the room. Manufacturers produce a large range of kitchen hoods, so the problem of aesthetics and harmony is completely solved.
Hood installation
Before proceeding with the process of installing the hood, it is necessary to prepare all the components of the system and the necessary tools. For the ventilation system you will need:
- exhaust device, selected at will and parameters;
- brackets for mounting the hood;
- pre-selected exhaust pipe for ventilation;
- clamps for fastening the air duct;
- ventilation grill, which is intended for closing
ventilation shaft and facilitating the connection of an air duct to it;
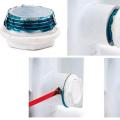
- check valve installed in an existing ventilation shaft to ensure the non-return of polluted air and unpleasant odors.
Of the tools you may need:
- perforator for attaching the hood to the wall;
- screwdriver for assembling the structure;
- tape measure for accurate measurements;
- marking pencil;
- sharp knife;
- hacksaw or electric jigsaw;
- level.
Ensuring the electrical safety of the device
The kitchen hood is one of the most dangerous appliances. First of all, this is due to the location of the device. Water vapor constantly accumulates in the kitchen, and fats from cooking get on electrical equipment. These factors can cause unintentional electric shock.
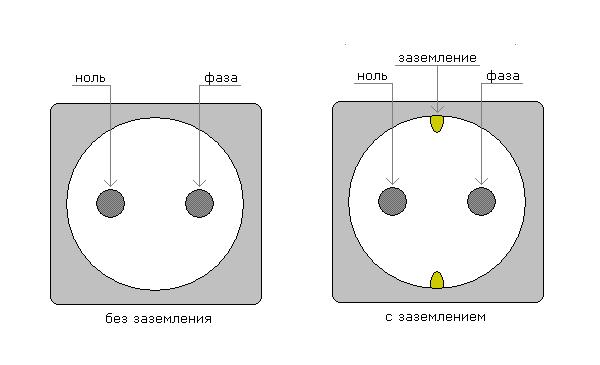
To prevent this from happening, and human safety is at a high level, the kitchen hood is connected using grounding.
In new buildings, the function of grounding electrical equipment is already present. It is enough to install a socket with grounding next to the exhaust device.
In older houses, you will have to connect the ground yourself or with the help of electricians. To connect the device with your own hands, you need:
- In the electrical panel, located, as a rule, in the stairwell, find a deaf neutral. It is a walled-in metal pipe or a special tire with a built-in pin-shaped mount.
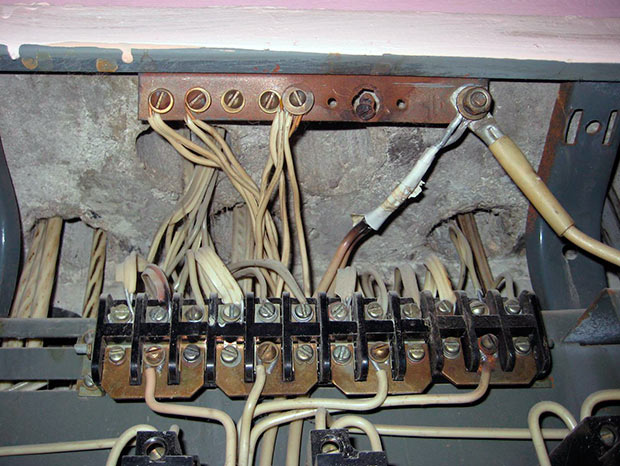
- Carefully (voltage 220V) connect an electrical wire with a minimum cross section of 2.5 mm² to the pin.
- Tighten it securely with the control nut.
- Run the wire through the apartment to the kitchen hood. For aesthetic clarity, you can use channels in skirting boards or cable channels.
- Connect the exhaust device to the other end of the cable through a machine with a power of 6.3A.
If it is impossible to figure out how to connect the device to ground on your own, then seek help from specialists. The voltage of 220 V is dangerous for human life!
Installation of a built-in hood
To assemble a built-in hood yourself, you must take the following steps:
- At the first stage, we prepare a cabinet for mounting the hood. Such a device can be purchased at the store or make your own. The cabinet should consist of top and side walls. The dimensions of the structure must fully correspond to the dimensions of the hood.
- Using a jigsaw or a hacksaw, a hole is made in the top panel of the cabinet for the air duct, in which the adapter ring is attached.
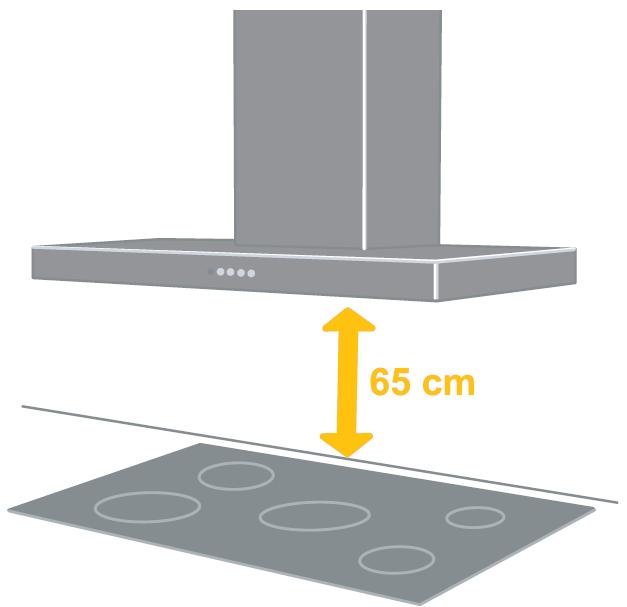
- With the help of brackets, the cabinet is attached to the wall in the right place. The height of the hood above the gas stove must correspond to that specified in the instructions. Usually this figure is 65 cm if the hood is installed above a gas stove, and may vary if an electric stove is used.
- The hood panel is attached to the manufactured cabinet. Connections must be secure. This will help to get rid of vibration and excessive noise during operation of the device.
- In a place protected from moisture, a power outlet is mounted. This equipment must be earthed. To do this, you can use either a special socket or an additional wire for autonomous grounding. The power cord of the hood is connected to the socket.
- At the last stage, pipes for the kitchen hood are mounted. One end of the duct is connected to the exhaust device, and the other to the ventilation system. The connection is equipped with clamps and a ventilation grill.
For the correct operation of the kitchen hood, it is necessary to maintain the distance between the stove and the device and securely connect all the elements of the system.
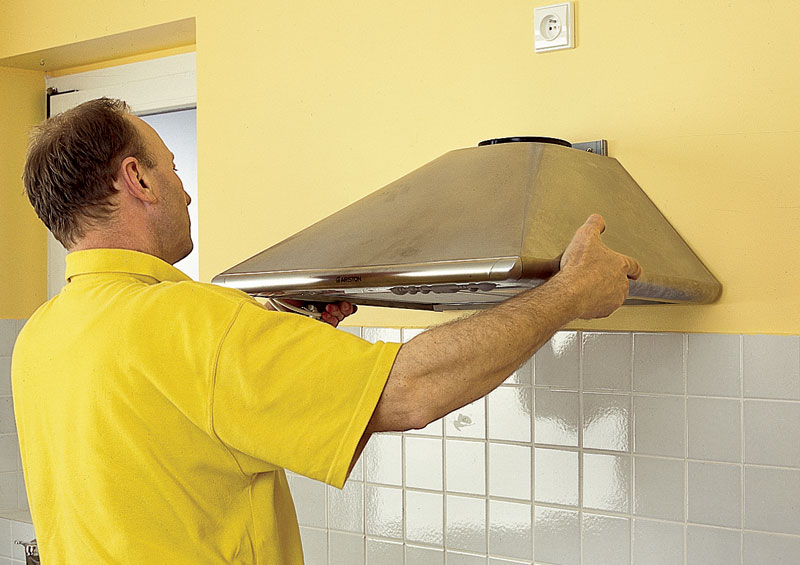
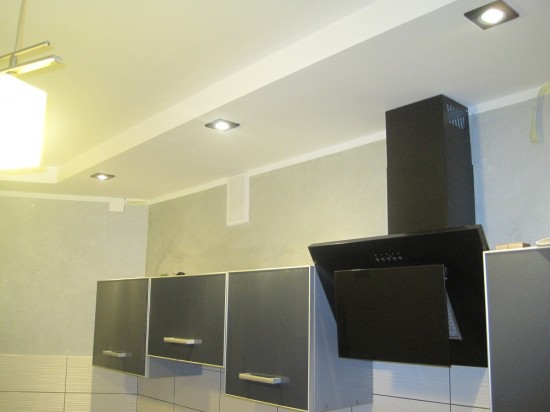
Installation of a hinged hood
In contrast to the built-in hood, the installation of attachments is somewhat simpler. This design of the exhaust device does not require the manufacture of a special cabinet. To mount your own hinged kitchen hood, you must take the following steps:
- On the wall at the desired level, markings are applied for mounting the hood mounts.
- A separate grounded socket is installed near the intended attachment point.
- The exhaust device is mounted on prepared brackets.
- A corrugated pipe for ventilation is screwed to the outlet of the hood.
- The second end of the pipe is mounted in an existing ventilation hole using a special and grille.
- To obtain a more aesthetic appearance, the ventilation pipe in the kitchen is attached with brackets or clamps along its entire length.
When installing the duct, remember an important rule: each bend in the pipe reduces the performance of the exhaust device by an average of 10%. This means that the ventilation pipe should be as straight as possible.
Decorative works
Many people are not satisfied with the appearance of large pipes in the kitchen, and they are wondering how to hide the pipe from the hood. There are several ways to improve the duct:
- Do . The simplest solution to the problem. The box can be painted in the main color of the kitchen interior. Mount various lamps or LED strips in it.
- If the hood is installed before finishing work in the room, then the main part of the ventilation pipes can be hidden under the structure of any type of false ceiling.
- The plastic ventilation pipe for the hood can be retrofitted into an additional shelf or into something else.
Decorative finishing of air pipes depends on the desire and imagination of the consumer.
If you choose and install the exhaust device in the kitchen correctly, you can get rid of excessive accumulation of water vapor and unpleasant odors.