Very often, owners of private buildings attach a canopy to their house in order to take advantage of all its practical advantages, as well as to make their property look attractive. The only drawback of such an area is that it cannot be used in winter (perhaps an attached winter garden would be more suitable for you), but the rest of the time it will be pleasant to relax here, enjoy fresh air, relax with your family and receive guests.
Today we will look at options on how to properly build a canopy in the yard at minimal cost and in a short time.
Purpose and design features
Serving a variety of functions, a beautiful yard canopy can be made in different ways. The classification of such extensions is carried out taking into account the following factors.
Based on this feature, canopies are divided into:
- single- and double-slope inclined types;
- multifaceted and straight. The first include pyramids, original arcs, graceful domes, exotic arches, and polygons.
Location
This feature distinguishes between a free-standing landscape element and a canopy attached to the house in front of the entrance or representing a continuation of the terrace.
Material
Here you can highlight popular options for stone and wooden extensions. Sometimes polycarbonate or a combined technique is used for installation.
For a long time, metal tile and slate components were used for roofing, but now almost everyone prefers polycarbonate. Such demand for this material is due to its flexibility and ease of installation, resistance to mechanical stress and the vagaries of weather. When constructing a canopy near a house using polycarbonate, it is very easy to cut this material into parts of any shape. To perform such an operation, it is enough to have a stationery knife or jigsaw.
It will not be difficult to attach the sheets to the base of the different types made of wood, plastic or metal. Polyurethane glue perfectly holds polycarbonate parts together.
So what to make it out of? original canopy to your home at the lowest cost? Let's look at the two most popular methods.
Canopy with slate on a metal frame base
If you read the instructions, building an object adjacent to the house is not as difficult as it sometimes seems. First of all, you should pay attention to the fact that we are using all the free space in front of the house. We determine the size of the territory used and the volume of necessary materials.
In our case, we will consider the option of working on an area of 6.5 square meters. m.
Tools and materials
To carry out the entire range of activities, you will need to purchase:
- Profile pipe with parameters 40x40x1.5 mm. 3 pipes 6 m long are required.
- We will prepare a pipe of 80x40x2 mm in the same quantity and the same length.
- Binding material – 2 bags of cement.
- Edged boards - 9 pieces of 6 meters each with dimensions 40x150 mm.
- Slate of eight-wave modification 1.15x1.75 m in the amount of 20 sheets.
- 50 pieces of slate nails.
- About a cubic meter of sand and crushed stone.
- 2 kg of primer for metal.
- A bayonet shovel and a rake, a brush.
A set of high-quality tools will make the process of constructing a canopy along the house pleasant and easy. To do this you will need a set of certain equipment:
- reliable welding machine;
- 1 pack of electrodes with a diameter of 3 mm;
- face shield;
- convenient hammer;
- 4 pieces of cutting discs for metal with a diameter of 125 mm and one for grinding. Disc thickness – from 1.6 to 2 mm;
- Bulgarian.
The canopy of the designated area will be simple in design due to the lack of dimensional parts.
Installation work
How to properly make a canopy for your house with your own hands and get the desired result in a short time? The solution to this problem is achieved by strictly observing the sequence of all stages of the production process:
- A beautiful canopy for a wall always begins with a simple but very important process - marking for future supporting components and checking the identity of the distances between opposite corners of the perimeter, checking the required dimensions. Taking into account the selected dimensions of the pipes, we dig holes under the supports. The dimensions of the holes are one and a half bayonet widths and 0.6-0.9 meters deep. To ensure water drainage from the roof, we calculate the slope with parameters of 10 cm per linear meter of the roof. For our option, we plan the upper racks to be 3.3 m long, and the lower ones will be 2.7 m long.
- Square flanges are welded onto the supporting elements of the canopies near the house. A support element at the bottom and a platform for welding plugs and rafter components at the top will provide protection against subsidence. In addition, plugs on the 80x40x2 pipe will prevent the appearance of internal rust. Cleaned and primed areas of welding application are coated with paint.
- Before installation, check the dimensions and fill the supporting units with cement mortar. After giving the material a day to harden, we lay 80x40 mm rafter pipes. In this case, welding requires a slight exit beyond the perimeter of the rack.
- How to further build a canopy for the house using only your own strength? First you need to lay out the entire board and slate so that the sheet at the bottom has an outlet roofing material within 150-200 mm, and each lower roofing element overlapped the upper one by 100-120 mm. We cut the issue of boards on the sides to the same length, approximately 5-15 cm. After this, we calculate, not forgetting the need to overlap one wave, the length of the slate row. Connecting boards using nailing and subsequent welding on the inside remains the most affordable option. You can attach the board with self-tapping screws. A hole is drilled at the connection point and a countersunk hole is made for screwing.
Construction of a canopy made of wood
This method is very popular due to the minimal cost of improvement. Let's look at how to properly make a beautiful canopy for your house.
Design stage
To avoid problems during the work, it is important to take the development stage of the canopy project with full responsibility.
It is necessary to take into account the characteristics of the façade and foundation of a permanent structure. It is important to take into account such climatic factors as the wind rose, the amount of snow cover in this zone, and access to a certain part of the world. You need to clarify in advance the design of the canopy in the yard, the shape and dimensions of the structure. An extension made from this material will look perfect and be conveniently mounted above the porch.
Careful determination of the parameters of a clean roof is mandatory for easy and quick installation.
Arrangement of racks and rafters
One of the important stages in the construction of wooden canopies for a house is the choice of construction material. Any option will do, but try to use pine if possible. The wood for this type of construction is distinguished by good durability, low weight and pleasant appearance.
A cross-section of 75x75 mm or more is recommended. The material is carefully inspected to ensure that there is no bark. The part installed in the ground is covered with agents that prevent rotting. The main rule during installation is to maintain the placement parameters of about 100 cm between the pillars and arrange them in a certain order so that the roof in the side parts has 50-100 mm of protrusion, and in the front - up to 200.
Half-meter wells are prepared along a common straight line while simultaneously checking suspended diagonals. A level is used to maintain the strict verticality of the racks. For reliable fixation, auxiliary bars are used. After completion of work, these elements can be easily removed.
During construction, the internal space of the recesses is filled with concrete mortar or crushed stone. The method of using crushed stone looks more economical.
Trimming with a bevel according to the angle of inclination of the plane is done in the upper part of the pillars. This will allow the rafters to lie tightly on the ends of the beam.
The minimum height of the racks at the bottom of the slope is 1800 mm. Below this parameter is allowed when planning in this part of the rack or table.
150x50 mm beams, called rafters, are needed for installing the system. The indicated dimensions are optimal for a span with parameters of 6 meters, if the design weight and slope of the canopy adjacent to the house are correctly calculated.
The spacing between the rafters is 1 meter. You can attach the canopy to the wall or support board with one side of the rafters, and the other rests on the posts. For fixation, self-tapping screws or steel angles are used.
Final stage
How to properly make the roof of a canopy for a house with your own hands? To do this, it is important to arrange the sheathing strictly at right angles. 900 mm between the axes of the elements is a mandatory requirement for installing 30x160 mm edged boards. It is important that it is located at the joint areas and in the center of the slate or metal tiles.
We begin laying the covering. 11 screws are required for each sheet for screwing. Special gaskets ensure reliable fixation. Rows with 100 mm overlapping each other are laid starting from the bottom of the structure. Cutting is conveniently performed with a diamond-coated wheel installed in the grinder.
Now you have a wonderful extension! Now you can take care of the beautiful design and arrangement for a pleasant stay.
Any owner of a country plot of land, coming to his property from a stuffy metropolis, strives to spend as much time as possible on fresh air, and not in a country house. However, a pleasant pastime is often hampered by the scorching midday sun or light but cold rain. Gazebos and awnings for summer cottages will help you cope with these troubles - it’s not at all difficult to make them yourself, and the resulting conveniences can hardly be overestimated.
Types of canopies
Before you begin making a protective structure, you need to select the appropriate material and design of the canopy. This element of landscape design can stand alone, or be attached to the house, imitating a wide porch or terrace.

The main types of canopies are shown in the table.
| View | Design Features |
| Attached | This structure is located close to one of the walls of the country house. The result is a canopy with one closed and three open sides. The design is very functional: located on the side of the front door, it can serve as a veranda or porch, and on the other side it can serve as an elegant patio. |
| Standing separately | The design is a kind of pergola equipped with a durable roof. Regardless of how this country canopy is made: with your own hands or with the help of a hired team, its scope can be quite wide: from a gazebo to a car park. You can even equip a path in this way connecting the entrance to the house with a gate leading outside the site. |
| With straight roof | This structure is being built according to the most simplified scheme. Well suited for those summer residents who do not know how to build a canopy at the dacha with their own hands. Among other things, the price of materials in this case, as well as the estimate for the entire construction, will be minimal. |
| With sloping roof | Such a canopy is more difficult to manufacture, but the inclined planes of the roof do not allow water or large masses of snow to accumulate on the roof. |
| Complex shape | This canopy carries not only a functional, but also an aesthetic load, being an element of landscape design. An example is a gazebo with a curved arched roof. The instructions for its manufacture are quite simple, because the profiled roofing sheet and metal supports bend perfectly without the use of special equipment. |

Another issue that needs to be addressed is the materials used.
Here are just the most common types of roof coverings:
- corrugated sheets;
- plexiglass;
- polycarbonate;
- slate;
- metal tiles;
- thick textiles.
Wooden awnings for summer cottages are very common: even an inexperienced craftsman can make them with his own hands.

Advice!
In addition to wood, you can use brick, stone or metal pipes to build supports.
Making your own canopies
Polycarbonate construction
This material is considered one of the most modern and is perfect for constructing a protective canopy in the country.
The main advantages of polycarbonate:
- strength;
- durability;
- excellent resistance to cold, heat and precipitation;
- ability to take any geometric shape;
- ease of installation (to secure the sheets, ordinary self-tapping screws equipped with a rubber washer are required).
Using the described plastic sheets, you can protect any area of the site from precipitation. The main thing is to design and build a reliable frame, the material for which can be a wooden beam or a metal profile.
This design looks best right next to the house. Adjacent to the wall, the canopy creates, and the sloping roof allows rainwater to flow down without leaving unpleasant and unsightly puddles on the polycarbonate surface.

The entire manufacturing process can be divided into several stages.
- For support pillars, take a wooden beam with a cross-section of 90x90 mm (the quantity is determined based on the size of the canopy). Remember that the front supports must be slightly shorter than the rear ones to create a bevel.
Note!
To prevent wood rotting, all parts of the canopy must be treated with antiseptic compounds before installation.
- To ensure that the supports are in the right place, you should make an initial marking of the area. Then, in designated places, it is necessary to dig holes about half a meter deep and 10 cm larger than the cross-section of the timber.
Concrete pillars for the foundation are cast at this location. You can use special blanks sold in construction supermarkets. It is enough to dig them into the soil, which is then compacted well.
The support beams will be fixed to the foundation using special brackets or metal corners. - Considering that the structure is adjacent to the house, it is necessary to attach a horizontal cross member to the wall of the residential building, which will serve as a support for the rafters and sheathing. The latter are also attached to the crossbar using corners. If you limit yourself to self-tapping screws, the structure may collapse due to insufficient reliability of the connections.
- A beam of 70x70 mm is suitable for rafters, and no more than 50x50 mm for lathing. You should not use more massive lumber, as this will make the structure heavier.

- Polycarbonate is attached to the frame using self-tapping screws. It is also advisable to provide a device for water drainage. Very elegant gutters can be purchased at construction supermarkets.
Using corrugated sheets
Galvanized sheets, distinguished by their excellent appearance and painted in various colors, are often used for the construction of canopies that protect personal vehicles from bad weather. Remember that, unlike polycarbonate, this material does not allow sunlight to pass through, so it creates a completely shaded area.
To make the structure more durable, it is better to make the frame from metal blanks. You can stop at four support posts, fastened along the upper edge with beams and sheathing.
The construction process is not much different from the construction of a polycarbonate canopy described above. The only point is that such a structure is rarely adjacent to the house, more often it stands at some distance from it.
Let's look at some small details:
- As in the previous case, you should mark places for attaching vertical metal posts, onto which a profiled pipe with a cross-section of 40x60 mm will go. The distance between the posts is about 1 meter, but depends on the thickness and weight of the profiled sheet used.
- In this case, a concrete foundation is required. Crushed stone is poured into a hole up to 60 cm deep, a support is installed and the pit is filled with concrete.
Advice!
While the concrete is curing, do not forget to control the vertical position of the post.
Otherwise, the canopy will come out crooked and may collapse during operation.
- After the concrete has completely hardened, which takes from 1 to 2 weeks, you can continue working on the construction of the canopy. For horizontal beams, a profile with a section of 50x30 mm is suitable. In this case, it is necessary to use welding, which sometimes becomes a problem for novice craftsmen.
- The last stage is the installation of the sheathing and installation of corrugated sheets. The best choice is ordinary self-tapping screws.

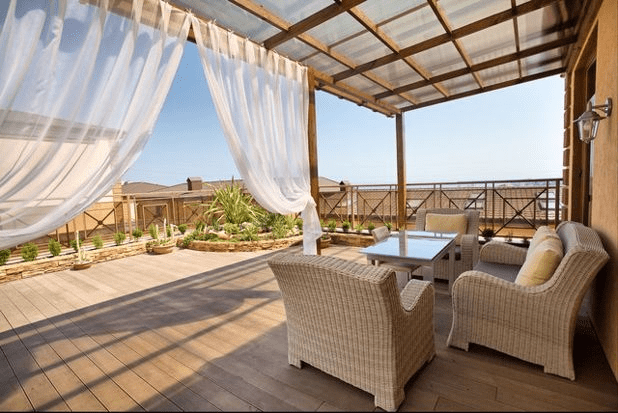
Fabric awnings
When you don’t want to waste precious time making complex and bulky structures, your choice is a lightweight fabric canopy.
The store sells ready-made frame structures, which include everything you need. You just need to mount it on the wall and enjoy your holiday.
The main advantage is the ability to quickly and without much effort using specially designed levers and mechanisms.
You can make a fabric canopy yourself, in which case its design will not differ much from the options discussed above. Unlike the polycarbonate model, it is possible to purchase brighter and more picturesque textiles, enlivening and refreshing appearance plot.
On a note!
Remember that the fabric must be impregnated with a water-repellent composition, otherwise the first rain will force you to seek shelter in the house.

Conclusion
There are many different models of awnings that can satisfy even the most sophisticated taste. A self-created canopy will become not only protection from the sun, but also a source of pride for the dacha owner.
You can learn more about various canopies and how to make them by watching the video in this article.


Immediately after building a house, and sometimes even before, the problem of parking arises. It is not always possible to build a permanent garage, but installing a roof on poles - a canopy - is easier and cheaper. The carport can be a free-standing structure. Then it is placed in the yard, usually not far from the entrance gate or garage. The second option is attached to the house, when one or more sides of the roof rest on the wall of the building. From a functional point of view, both options are equivalent; everyone just chooses based on personal requirements and preferences.
Dimensions
Since the dimensions of cars can vary significantly, in each case the optimal dimensions are determined depending on the car available.
The height is usually around 2.5 meters. This is more than enough even for an SUV with a loaded trunk. And to determine the length and width of the canopy, at least a meter is added to the external dimensions of the machine. Agree, it is quite enough if there is a distance of half a meter to the pillars.

But to protect against precipitation, it is better to make the roof overhangs longer: they will also protect from slanting rain and snow.
When determining the size of a canopy for two cars, take the distance between the rear-view mirrors to be 50 cm. The same amount is calculated for the pillars. And the length of the canopy is determined by the longest car.

Frame materials
Wood is mainly used for supports - timber or logs, metal pipe round or rectangular cross-section. Sometimes the supporting columns are made of brick or stone. They are more massive, attract more attention, and therefore must fit into the style of the building that is located nearby.
There are also options when the bottom of the support column is made of brick, and the top is made of wood or metal. And in this case, everything is determined by the style of the house and the site. You should not make brick supports if there are restrictions on the size of the site: they are quite massive and take up a decent amount of space.
All materials (except brick) are processed before use. Wood is necessarily coated with fire retardants (reducing the flammability of the material). Then it is impregnated with compounds that will protect it from damage by wood-boring insects, as well as from all weather conditions.


Its implementation
Particular attention should be paid to the processing of wood that will be buried in the ground. It can be impregnated with special compounds for wood in contact with the ground (for example, Senezh Ultra and its analogues). The impregnation performed well during testing. The ends of the pillars that will be buried are immersed in a container with mining for a couple of days. After drying, they can be used without additional measures. 10 years is enough.
The second option is to pour a concrete pillar into the ground, and install a mounting plate, shoe or pin into it, to which a wooden beam is then attached.
Metal poles are cleaned of rust and coated with primer. After welding, the seams are additionally processed and everything is coated with paint in two layers. The second is applied after the first layer of paint has dried to a touch-touch state.
Types of roofing (with drawings and dimensions)
The most economical and simplest is a pitched roof. It is usually used if the carport is attached to the house: this is the easiest way to organize a normal connection to the wall.

They also make a pitched roof for free-standing sheds. In regions with little snow in winters, you can make a roof without a slope; in those where there is a lot of snow, a slope of at least 8-10° is required. In this case, the lower side is made from the south or east: so that there is more shadow. Also in this case, on the south side you can sew up the canopy on the side (or plant tall plants there).

If a canopy is made from polycarbonate, then the roof is vaulted. It is also optimal from the point of view of precipitation and is easily implemented due to the flexibility of this material.

A more complex gable roof. If made of metal, it has a relatively simple structure.

In the case of a wooden canopy under gable roof the system turns out to be multicomponent.

>
Roofing material
If the carport is attached to the house, it makes sense to make its roof from the same material. For soft types of roofing ( flexible tiles, ondulin, etc.) a continuous sheathing is required, for rigid sheathing - sparse, and the pitch is chosen depending on the wind and snow loads in the region, also focusing on the recommendations of roofing material manufacturers.

If complete shading is not required, polycarbonate can be used. By the way, he is the most popular in Lately material. You just need to choose it correctly: take a multi-chamber one that has at least three layers of plastic and two rows of cells. It’s not hot under such a polycarbonate canopy even on a sunny day.
Also, the degree of heating depends on the color. Look specifications and choose the one that absorbs sunlight more. Transparent ones are needed for greenhouses to warm the plants. For canopies, on the contrary, you need polycarbonate with low light transmittance.
How to lay out the site
The easiest and most inexpensive way to make a platform under a carport is to fill it with gravel. To do this, you will need to remove the turf, dig the curb, pour crushed stone and compact it well using tamping platforms. Then the platform will be rigid and ruts will not form.

Compacted crushed stone - good coverage for car parking
Recently, areas paved with paving slabs or paving stones have become more popular. They have a more attractive appearance, but their construction is more expensive. Preparation begins the same way: first the soil is removed. But the pit is made about 20-25 cm deep. Crushed stone is poured onto the bottom, which is also compacted well. Then it is advisable to spread a layer on the crushed stone. This is a non-woven material that will prevent the sand that will be poured on top from spilling out and mixing with gravel. Geotextiles also redistribute the load more evenly, preventing the base from sagging under the wheels of a car (it is used in road construction). A layer of sand is already poured onto it, which is also compacted. Lay in the sand paving slabs, clinker bricks, cobblestones and other similar materials.

In the middle in terms of costs is a concrete site. The base is also prepared from compacted crushed stone. Wooden planks are laid on it at a distance of 1 m, which are set level or with a slight slope to drain water. These strips serve as beacons during pouring, and then play the role of damping joints, compensating for the thermal expansion of concrete. With this structure, cracks appear less frequently.
A metal mesh made of galvanized wire is laid between the slats. You can, of course, use stainless steel, but it is expensive. Wire thickness 3-4 mm, cell 10*10 cm. Pour on top. The thickness of the concrete layer is 7-10 cm.

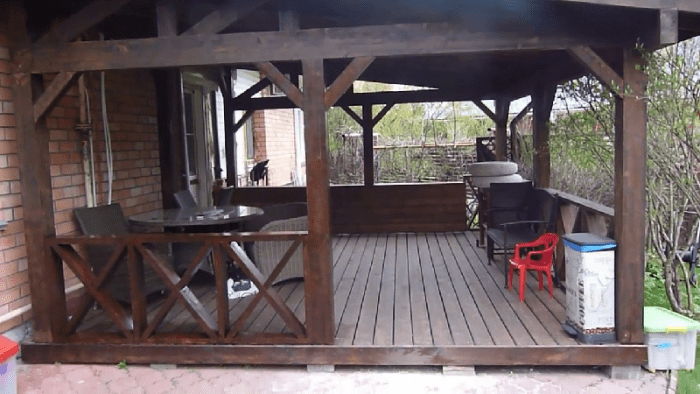
DIY canopy attached to the house (photo report)
It was decided to attach a canopy to the house, under which to hide favorite equipment - a car and a boat. First, using a motor drill, we dug holes 1.5 m deep - below the freezing depth.

We inserted waterproofing sleeves, a frame made of 10 mm rods with welded mortgages, and filled them with concrete.

The installation step of the pillars is 2 meters.

When the concrete set, the pillars and top trim were installed. They are sanded and treated with protective impregnation. To prevent the frame from moving, we secured it with what we had - aluminum corners. The joint between the posts and the frame was reinforced with metal plates.

The pillars are screwed to the “heels”
A support board was nailed to the wall of the house. Roof beams (50-200 cm board) were attached to it. The slope turned out to be small, about 9°, but it was enough. Small cuts were made in the beams to fit the size of the timber - for support, the edges were cut off to create an even overhang.

The beams were fastened to the frame with nails diagonally, 2 pieces on each side.

The beams on the wall are fixed to U-shaped metal plates.

The rafter system was assembled - the beams were installed with a small pitch - 40 cm, they were made from 50 * 200 mm boards.

OSB was attached to the rafters on top. Roofing material - soft tiles. It needs a continuous sheathing underneath.

A board was nailed to the side between the posts: for greater rigidity and so that the rain would wet the site less.

The sidewall was sewn up with a board - so that the rain would get in less
Soft tiles were laid. It worked - at least dance.

Now there's competition in the parking lot.

How to make a canopy for polycarbonate (photo report)
Used materials:
- professional pipe
- for racks 80*80 14.6 m;
- for arches 50*25 - 4 pcs. 6 m each + 50*25 - 10 pcs. 6 m each for spacers;
- sand concrete - 3 bags of 40 kg.
- crushed stone - 4 bags of 25 kg.
- red lead - 3 cans of 1 liter each.
The canopy was built over the already finished path. The posts were buried in the gap between the curb and the fence. It turned out that the supports of the canopy were placed near the fence posts. It was decided to use them when setting the level: they attached them with anchors so as not to suffer when pouring.


The metal pillars of the racks were buried 1.2 m into the ground, covered with crushed stone, and filled with concrete. When the concrete set, the top trim was welded.

Afterwards the production of trusses began. First, profiles with the required radius were bent on a pipe bender (rise at the highest point 1.2 m). Afterwards, the assembly of the “constructor” began.

Clamps were useful; they were used to hold parts together so that they would not move during work. They fixed it to the first truss so that everything was done accurately. There were a lot of clamps)))

Once all the trusses were complete, they were cleaned, sanded down to white metal, then primed and painted twice. Then the acrobatics began. It is necessary to install heavy trusses on poles, align them vertically, without knocking down the diagonals.

As soon as we managed to set it correctly, we quickly tacked it by welding, leaving the thorough welding of the seams “for later,” after the final inspection: everything should be on the same level.

A miracle happened, everything turned out to be almost on the same level. We do not take into account a small difference of a few millimeters.

Now we weld the sheathing from profile pipe 50*25 mm for polycarbonate. We place them along the long side of the canopy. The installation step was chosen to be 0.8 m.

All that remains is to attach the polycarbonate. It is attached to self-tapping screws through special thermal washers (sold in the same place as polycarbonate). The two sheets are connected using special profiles. They are detachable and non-detachable. One-piece ones are cheaper, but then you won’t be able to make anything else out of this polycarbonate. So we used detachable ones.

It is also necessary to cover the edges of all sheets, otherwise dust and midges will get inside, then moisture will appear due to evaporation, and then mold. And the coating will look deplorable. Therefore, we install special plugs on the edges.
Video on the topic
Canopy structures made from profile pipes can be found in many places: in the courtyards of country houses, on the territory of summer cafes, in parking lots and others. in public places. Their main advantage is that you can do it all with your own hands. To do this, you do not need to have special skills or knowledge, just follow the detailed instructions.
Scope of application and construction of a canopy made from a profile pipe
Metal profiles today have become one of the most popular and sought-after materials for the manufacture of canopies of various types and types with polycarbonate coating, since its main advantage is its long service life. If such a building is properly cared for, it can last for decades. Such canopies can be used in a variety of places:
- in parking lots;
- in country private houses to create large covered areas;
- in various public places.
The scope of application of canopies made of metal profiles is quite extensive, since they are universal structures with a large number of different modifications.
The most popular today is the arched type of product. It is much more difficult to make than a single or double slope, but it looks very impressive. Such a canopy is built separately from the house or adjacent to its side.
When choosing the type of roof, it is necessary to take into account the fact that the snow does not linger on it, but falls freely to the ground, without creating a large load on the roof.
In addition, there are canopies of dome, arc, pyramidal shape, as well as single-pitched and double-pitched.
In addition to polycarbonate, slate or metal corrugated sheeting can be used to construct the roof. Therefore, we can say that the complexity of erecting a canopy from corrugated pipe directly depends on the choice of frame design and materials chosen for the roofing.
Preparatory work: drawing development
First, you need to accurately determine the location of the canopy, as this is very important for choosing the material for the future structure and roof covering. It is best to place them on a flat area or hill, as it will be easier to provide the necessary drainage there. If you decide to build a structure in a lowland, then the collecting water will “force” you to make additional storm sewer, which will entail unforeseen expenses.
It is also important to make a preliminary drawing of a canopy made of a metal profile. In addition to the location of the racks, it is necessary to take into account the cross-section of the profile pipes. If the length of the structure does not exceed 6 m and the width 4 m, then for the installation of supports you can take a pipe with a cross-section of 60x60 mm. To erect a structure large sizes take a pipe with a cross section of 80x80 mm.
List of required tools
To make a metal canopy you will need a certain set of tools:
- building level;
- bayonet shovel;
- welding machine;
- roulette;
- rule(level);
- drill;
- Bulgarian;
- perforator;
- bolts and washers;
- profile metal pipes;
- roofing screws with special gaskets;
- construction corner;
- polycarbonate, corrugated sheet or slate;
- cement, sand, medium gravel;
- flange.
Calculation of the required number of profile pipes
To erect a small lean-to canopy, it is necessary to make accurate calculations and draw up a preliminary drawing:
- A 6 m long canopy must have 8 metal support posts. To do this, you can use a metal profile with a cross-section of 80x80 mm. The thickness of the pipe walls should be more than 3 mm for greater stability of the structure.
- One side of the structure should be higher than the other, depending on the selected roofing material. So, for example, for polycarbonate, an inclination angle of 20 to 25 degrees will be sufficient.
- Reinforcement structures called trusses must be provided for each pair of racks. They are made from equal angles or profiles with a section of 60x60 mm.
- The sheathing is welded in increments of 1 m from a metal profile pipe with a cross-section of 40x40 mm. Such a canopy can withstand about 400 kg of snow, provided that the structure is installed permanently.
- To install the racks you will need 8 profile pipes.
- To sheath the roof you will need 12 profiles. In some cases, home owners save money by installing only 6 racks instead of 8. It is also possible to reduce the number of pipes for the sheathing, but experts do not recommend this, since this will lead to a loss of rigidity, and in the future, to the destruction of the entire structure.
- The base of a lean-to canopy is a triangle of profile pipes, which has one angle of 90 degrees. Its larger leg should be equal to the distance that corresponds to the length from the end edge of the post to the wall of the building or to the outside of the opposite post if the shed is built away from other houses.
Step-by-step instructions for making a do-it-yourself canopy structure from corrugated pipe
The sequence of work depends on the type.
Single-pitch canopy
This design is the simplest. To make it you need:
- Install supports and fill the wells. The distance between the posts should be from 1 to 1.5 m. If slate, corrugated sheeting or natural tiles are used for the roof, then this value is 1.2 m.
- Mark the location of the support pillars, stretch the construction rope between them in a straight line. For each rack, dig holes at least 60 cm deep and 20 cm in diameter. Reinforce the pipes with special strips (heels), which are welded to the bottom of each pipe. They will then be completely filled with concrete and will hold the entire structure in an upright position.
- Place and compact a small layer of sand at the bottom of each hole. Then install the support strictly vertically and fill it with concrete (mix sand, cement and gravel in a ratio of 3:1:3). After this, slightly raise and lower the support several times so that the mixture penetrates completely into the internal cavity of the profile.
- Check the vertical position of all supports with a building level and leave them until the concrete has completely dried. This usually takes 3-7 days, depending on weather conditions. If you are building a canopy on an existing concrete surface, then the metal posts can simply be screwed to the base, having first welded special square plates onto the bottom of the pipes.
- Form the top part of the lean-to canopy. To do this, you need to weld two pipes, which are located along the legs of the structure. Then measure the hypotenuse of the truss, cut the profile to the required length, and weld it to a certain place. If a pipe with a rectangular cross-section is used, then it is necessary to mount it in such a way that its larger side is turned upward, which will make it easier to attach the cladding.
- Reinforce the finished suspended structure. To do this, weld pieces of profile pipe in a metal triangle between the largest leg and its hypotenuse.
- Calculate and install all frame elements. To do this, weld metal strips to the smaller leg of each triangular element. In this case, the side of the frame should divide the planks into two identical parts.
- Make four identical holes in this frame element in order to attach the canopy to the wall of the house. To do this, you will need another person who will help install the base and mark the position of the holes for the anchor bolts. But since single-pitch structures with corrugated sheets or slate are very heavy, this fastener may not be enough, so you will have to install additional racks that are screwed to the wall. A lean-to canopy, in which the roof is made of polycarbonate sheets, is much lighter and therefore additional fastenings near the wall are not needed.
- The polycarbonate is attached to the roof of the canopy without removing the protective film. Using a drill, you need to drill holes on the sheets. In this case, you will have to retreat 4 cm from the edge. Special thermal washers with sealing rings and plugs are used. In the process of attaching polycarbonate to the roof of the canopy, you need to place a thermal washer on the drilled hole, then tighten it with a self-tapping screw, and close it with a special cap with a plug. The fastening must enter strictly perpendicular to the surface of the roofing sheet. You need to twist it tightly, but do not overtighten it, so as not to spoil the surface of the sheet.
- All polycarbonate sheets on the roof of the canopy are joined using a special split profile. Screw the bottom onto the sheathing before laying the roof. Fasten the lid using a toothed lock, in which the “claws” are located on two parts of the profile.
- Then cover all side sections of the polycarbonate sheets with a special perforated tape and end profile. This way you can protect the roof air ducts from dirt and moisture penetration.
Video: how to make farms with your own hands
Arched design
The construction of an arched canopy is carried out in almost the same way as a lean-to canopy, but they are distinguished by greater aesthetics and functionality.
It is quite difficult to build an arched canopy on your own, since for this you need to have special manual or electrical equipment so that you can easily bend the metal profile. It is almost impossible to perform such actions at home.
Gable awnings
A gable canopy is mounted in the same way as a lean-to canopy, however, the design contains two triangles, which are located mirror-image relative to each other. The roof of such a canopy is formed by two inclined planes at a certain angle.
Due to the presence of a ridge unit, this design has a more complex structure system, but it can cover a much larger area of the site.
Multi-slope awnings
Such structures are used to cover large areas such as parking lots, exhibition pavilions, etc. At their core, they are a series of sequentially located gable structures. Here, in addition to the ridge unit, which is located at the highest points, it will be necessary to create a drainage system.
How to weld a professional pipe
During any welding work, safety precautions must be observed. Also, after completing all work, each weld seam must be cleaned of slag so that there are no joints. This can be done with a regular grinder with a special metal hedgehog attachment.
To connect metal structures from a profile with a wall thickness of more than 3 mm, it is best to use gas welding, since an electric analogue may simply not be able to handle such a volume of work.
How to bend a metal pipe
A special pipe bender is used for this. It can be used to bend easily different kinds metal profile. But if you don’t have such a tool at hand, then an angle grinder and welding will help you cope with the task.
It is very important when bending various pipes to prevent the appearance of cracks and large kinks, which should not be in the structure of the canopy. Also, they should not be flattened. When working with a manual pipe bender, considerable physical effort must be applied, so it cannot be used to bend profiles with a cross-section of more than 40 mm.
External finishing of the structure
After the canopy frame structure is completely welded and free of scale, it is necessary to degrease all metal elements before painting them. To do this, you can use a regular solvent, acetone or gasoline, which needs to be allowed to dry. After this, you can begin the priming process.
A light gray primer is suitable for any type of paint. Dark is used for bright materials. White is usually used when painting a metal profile with pastel colors.
The primer will be able to protect the metal from premature corrosion, and thereby significantly extend its service life, and also reduce paint consumption.
Video: how to make your own canopy
Photo gallery: finished structures from profile pipes
An arched canopy in the form of a canopy is ideal for the porch of a house.  A gable canopy will perfectly hide your car
  An arched canopy for a gazebo can be made from multi-colored polycarbonate
  An arched canopy can act as a canopy for a home.
  An arched canopy is ideal for country house
  A lean-to canopy is used for arranging park areas
  On personal plots you can often find a lean-to canopy
You can build a metal canopy from a profile pipe yourself quite quickly, without much effort, if you have the appropriate materials, drawings and the necessary tools. The simplest structure that can be erected on the territory of a country house is a lean-to canopy. The main thing is to follow all installation rules and strictly follow the developed project diagram.
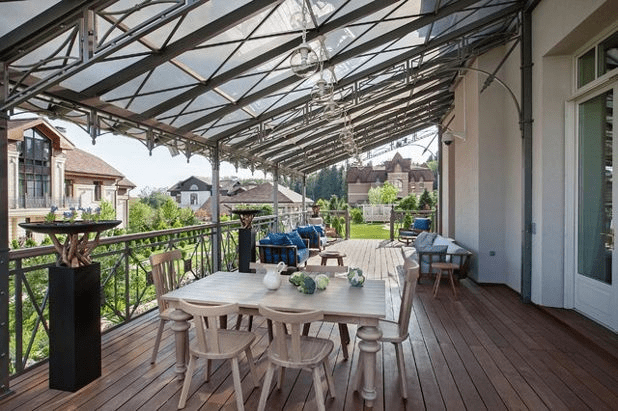
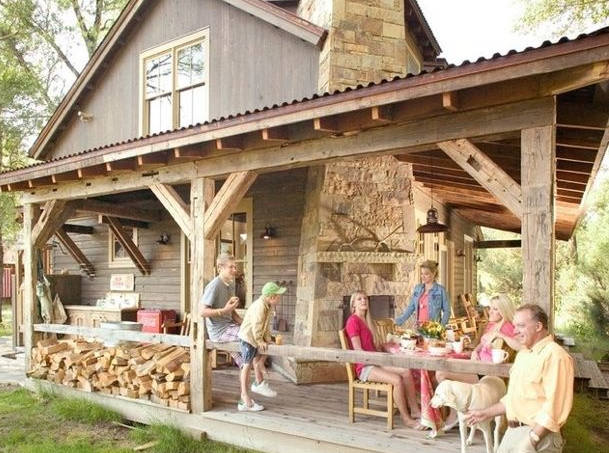
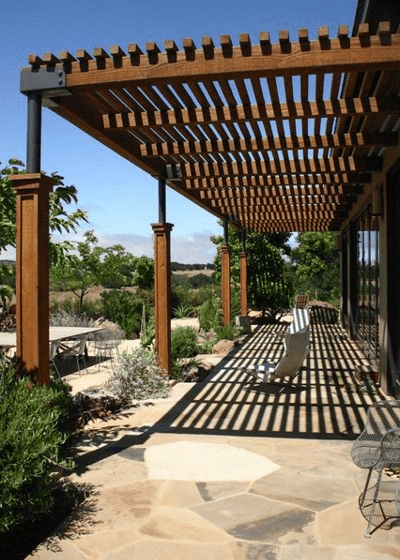
The local area always remains an implicit continuation of the living space of the house. From spring to late autumn, children and adults spend more time on the area in front of the house than in the room itself. If you're lucky with the weather. The problem of dependence on the whims of nature and climate can be solved quite simply with the help of a canopy attached to the house. Actually, the volume of work itself to make a light extension is not much; much more time has to be spent studying photos of canopies attached to the house. I want to choose the best option Moreover, there is plenty to choose from; as practice shows, a person’s imagination in the field of extension design is almost inexhaustible.
What kind of canopy should a house have?
If you start making a canopy, then only in the form of a full-size roof attached to the house. It will not be possible to get by with a small canopy over the porch area or elongated overhangs of the roof slopes; there will still not be enough space under the improvised roof, so it is better to immediately choose a normal stationary structure with a shading area of at least 12-15 m2. The larger the canopy, the better; sometimes even 30 square meters are not enough to accommodate everyone, and at the same time hide a car, building materials and harvested crops.
In order for the construction of the building to be reliable and convenient, experts advise adhering to a few simple rules:
- Be sure to make the canopy attached to the house. Using one of the walls of the house as a support allows you to save on material and at the same time ensure high rigidity of the protective structure;
- A canopy attached to a house must have at least two free passages to ensure air movement in the shaded area. Any, even the most beautiful structure, placed in a corner, closed on three sides by a solid fence in the summer, automatically turns into a “sauna”.
- The best materials for attached canopy Polycarbonate sheets, corrugated sheets, profile pipes, wooden beams and natural stone are considered.
These materials, especially wood and polycarbonate, are considered the best option for any protective roofs and canopies. Approximately 80% of all structures attached to the house are made of metal and timber, and only 15-20% of attached sheds are assembled using supports made of stone and red brick.
In theory, a protective canopy for a garage or bathhouse can be built from any material. But you need to be a real professional to be able to make beautiful canopies attached to the house, made of concrete, asbestos-cement slate, sand-lime brick and roofing felt.
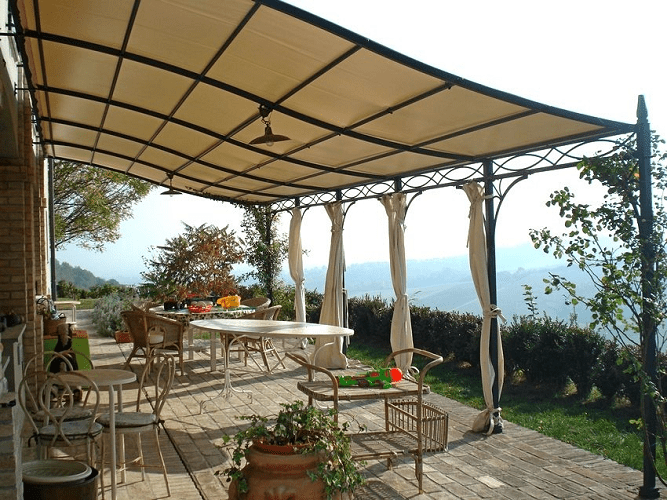
The canopy, which is schematically attached, is a cantilever-support structure, one edge of which rests on the wall of the building, and the other on vertical support posts. Unlike the porch canopy, the size and weight of the protective roof are too large to attempt to secure it only by cantilever pinching, so you have to put up with the inevitable presence of two vertical posts.
How to properly design a canopy attached to a house
With all the freedom of fantasy and imagination, design development and planning the construction of a canopy attached to a house is always carried out in compliance with certain rules:
- A canopy attached to a house should look like an organic continuation of the main building, so usually the style and shape of the supporting structures are selected so that from the outside the extension looks like one with the frame of the house;
- According to the same criteria, the material for the canopy and color schemes, one has to take into account even the color and nature of the covering of the area under the canopy, the presence of a porch group and even shading from nearby trees.
Important! The height and width of the attached canopy must correspond to the size of the building and the actual needs for shaded areas.
A canopy attached to a house that is too high and has a large roof area may be too heavy for the walls of the building and create certain problems with removing snow cover and rainwater.

In heavy rain or hail, a polycarbonate canopy attached to a house sounds no worse than an orchestra of drummers, so you have to pull up a protective mesh or use arched roof structures.
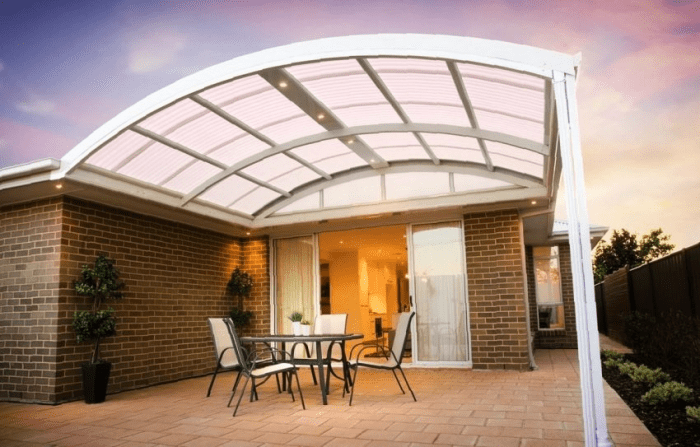
Options for attached flat roof sheds
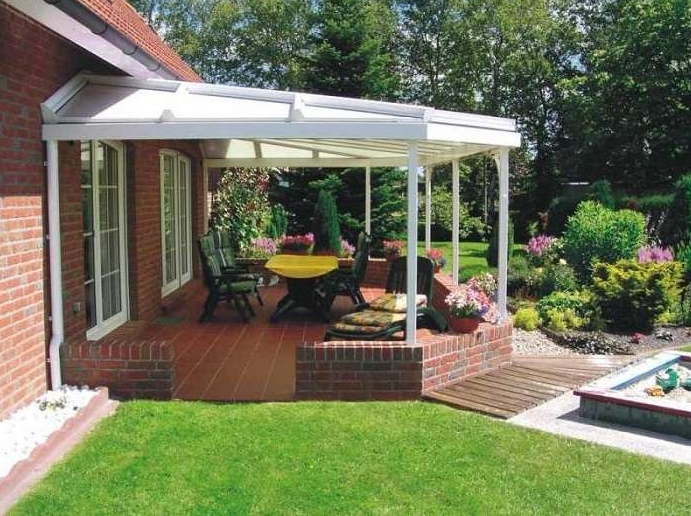
The polycarbonate canopy attached to the house is very popular among structures with a flat pitched roof, photo.
A simple frame structure made of aluminum profile, attached to the facade of the house, perfectly protects the site from the sun and at the same time does not shade the premises of the first floor. This is the so-called evening canopy, the main purpose of which is to protect from rain and provide maximum light in the evening. It is used as a coating with a high light transmittance. A similar structure can also be attached to the sunny side of the building, but in this case it will be necessary to use a sun protection net or tinted film.
To protect from the sun, you can use translucent milky polycarbonate, which removes ultraviolet radiation and gives soft diffused light as in the photo.
The designers of the attached canopy were able to accurately guess the color and shape of the roof. White color fits perfectly with the red brick walls. The thin lines of the roof profile pipe go well with the white window frames.
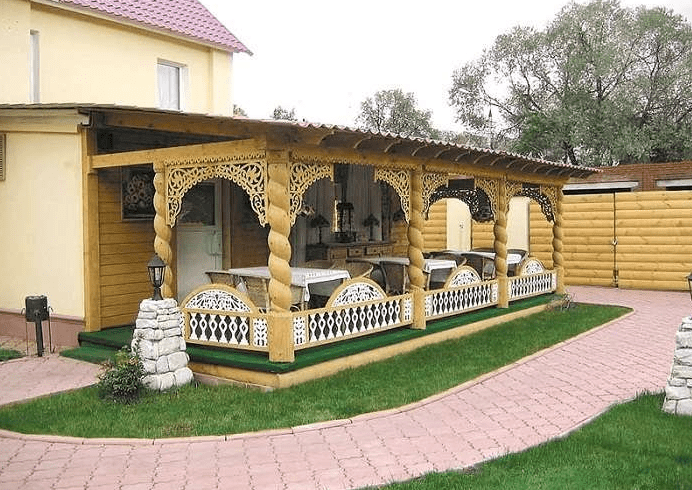
The easy-to-manufacture design of an attached canopy with a flat roof makes it quite easy to connect with the roofing and overhangs of a house or summer kitchen. The wooden canopy attached to the house photo becomes an organic continuation of the interior, and carved patterns on the racks somewhat enliven the appearance of the extension.
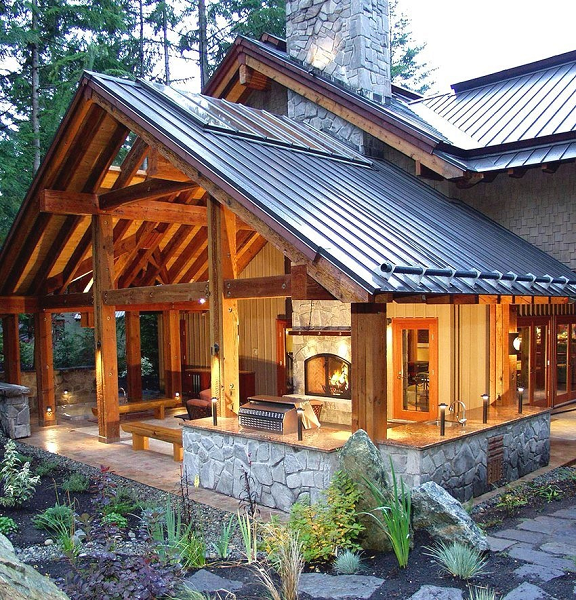
Using a canopy attached to country house you can easily solve the problem of evening rest. A structure made of rough massive timber, covered with ondulin, replaces both a summer terrace and a gazebo at the same time, and the presence of a fireplace provides comfortable conditions for relaxation even on cold autumn evenings.
The deliberately rough style of awnings made of huge beams and logs is quite popular for houses and buildings made of wood. Massive posts and floor beams combined with a polycarbonate slate roof only enhance the impression of the attached canopy.
The use of massive timber allows you to make canopies attached to a house made from corrugated photo boards bright and expressive. If you simply weld a metal frame from a corner and cover it with corrugated sheets, then the attached structure will look too much like a garage. Varnished wood and windows on the roof automatically give the appearance of a full-fledged recreation area.
If the attached canopy is planned to protect a fairly large wooden terrace, a more elegant option would be a roof with a regular size of timber, covered with smoky-colored cellular polycarbonate.
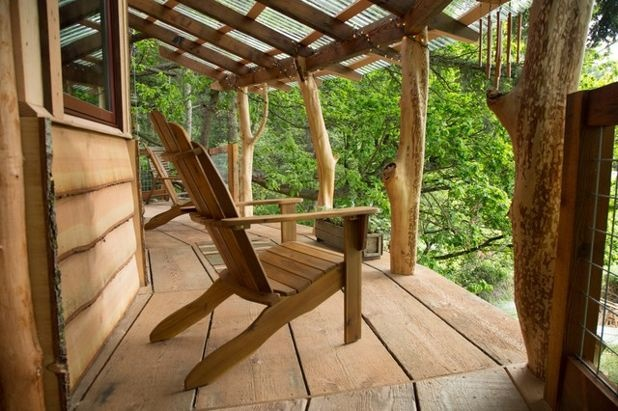
The versatility of wood is so great that an attached shed can be made without any roofing at all. The sheathing slats provide at least fifty percent shading of the site.
The idea of an additional canopy attached to the house is ideal for small country houses. An additional pitched roof and a huge wooden terrace allow you to at least double the usable space of the dacha.

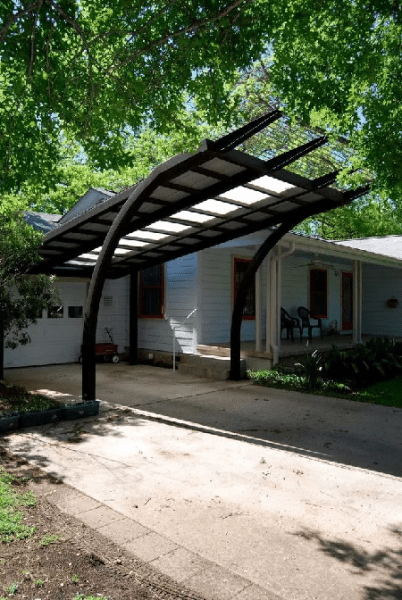
Structures with arched and profiled roofs
Unlike structures with a flat roof, models of an attached canopy with an arch are much more difficult to build for two reasons:
- Firstly, it will be necessary to make at least an approximate calculation of the stability of the arched roof, otherwise the structure will either be too heavy to be mounted according to the attached scheme, or unstable and then there is a risk of collapse;
- Secondly, to make a curved base for the sheathing, you will have to look for a professional bending machine, since it is difficult to make 10-15 arcs of the same curvature on a homemade machine.
But what cannot be taken away is that, despite all the difficulties, an attached canopy with a domed or arched roof looks much more impressive and spectacular. In the wake of the increasingly popular fashion for asymmetrical shapes, you can assemble an attached version of a protective dome supported on two walls at once.
Roof arches bend according to the usual scheme, and to give an asymmetry effect, plastic overlays with a variable profile section are used.
The simplest version of an attached canopy can be made from two-inch steel pipe for one day. The frame is welded from arcs and installed on vertical posts made of a 70x70mm square. True, to ensure the stability of the attached structure, the openwork supports had to be embedded in brickwork, lined to match the walls of the house. Reed or any similar plant is used as roofing. As a result, the roof has excellent air permeability even at 90% shading.

In order to emphasize the graceful curved profile of the canopy, the attached roof does not have to be bent into the shape of a church dome. It is enough to make only a small smooth transition of a large radius to get rid of the annoying flat roof.
A serious advantage of curved roofs over flat ones is the increased rigidity of the curved tubular profile. If for an attached flat roof you have to install supports just a couple of meters from the wall of the house, then for structures with curved arches the supports can be placed 3 or even 4 m from the wall.
In addition, an attached frame with an arched or curved roof can withstand bad weather much better, especially heavy snowfall or gusty winds.
Not only roof rafters can be curved; supports and struts can also be made in a curved line. As a result, an ordinary flat roof made of corrugated sheets, attached to a house on crooked supports, attracts attention with a new design.
There is one more trick to this design. The author made a roof covering with an insert made of milky polycarbonate. As a result, we managed to get rid of the disadvantage of all canopies - the monotony of lighting. Well-lit areas and areas with complete shading appeared under one roof. Such a solution will come in handy if you have to perform any delicate work, for example, repairs or assembling parts.
Conclusion
An attached frame can only be installed on buildings with brick block or log walls. Frame buildings, timber houses, walls made of foam concrete and wood concrete can be used as support for an extension only if embedded load-bearing elements were pre-installed in the building frame, transferring the weight from the attached canopy not to the frame, but directly to the foundation. Otherwise, the roof may cause cracks and breaks.