The chimney is a key link in the heating system of a house. The quality of functioning of the chimney is determined by the efficiency, economy and safety of heating. These properties are laid down at the stages of project development, material selection and construction of the heating system. The decision to perform the listed work independently or with the involvement of professionals is decided by the customer. It is important to make this choice rationally and carefully.
How does a chimney work and why is it needed?
Let's look at the chimney structure using the example of a brick stove. It is a single structure on a separate foundation. The blower hole provides a controlled air flow to the firebox, thereby setting the combustion intensity. The chimney masonry must ensure maximum heat transfer to the room, and the passage through the roof and attic must be reliably insulated to protect against fire. All dimensions that affect safety and at the same time ensure the efficiency of the heating system are defined in special building codes (SNiP).
When designing stoves and chimneys, unconditional compliance with fire safety standards is required
The topic of efficient use of energy resources is an important task both in the country’s economy and for each separate family. Therefore, the efficiency of use various devices for heating living space and using heat for domestic needs is always relevant.
The chimney in a balanced and tuned heating system provides a normal combustion mode, in which the maximum amount of fuel is converted into thermal energy. This means that the maximum heat from the stored fuel is used to heat the room, and combustion products are discharged into the atmosphere with minimum quantity harmful substances. Thus, more complete combustion of fuel helps to normalize the environment and reduces risks for people living nearby. It is known that carbon monoxide is the most dangerous. To exclude its release into the living area is the main purpose of the chimney. For this reason, there cannot be any small details during installation or construction.
Chimneys from steel pipe usually used in heating systems based on gas boilers
How to make a chimney with your own hands
We have accumulated vast experience in the installation of stoves and chimneys. Materials and components for this are presented in specialized stores in a large assortment to suit every taste and budget. The availability of information on construction technology in specialized publications and on specialized websites allows you to perform this work yourself if you have sufficient experience, tools and equipment.
Video: example of a chimney device
It is already important initial stage carry out competently design work, determine the type of chimney, foundation parameters, and, if necessary, perform calculations to select components and materials.
Calculations when building a chimney
Various chimney designs must be manufactured and installed in compliance with current standards and regulations. But, as practice shows, when arranging a heating system, mistakes are made very often. As a result, there are often complaints that the stove consumes an incredible amount of fuel with low output. In ancient times, an experienced stove maker diagnosed the stove by the nature of the firewood combustion, the sound and appearance of the smoke and could correct all its defects.
“...The stove turned out to be excellent, it required less firewood than the old one, three times less, it had good heating and did not get cold.
The fame of the new stove-maker spread instantly: the supply of firewood became tight, and according to signs, the winter was coming up cold. They started coming and asking the professor to build a stove for them too...”
Alexander Chudakov“Darkness falls on the old steps”, an idyll novel. Ed. Time. Moscow 2016
How to calculate the chimney diameter
The diameter of the chimney in the manufacture of stoves is a design parameter. And it’s enough for future customers to simply know about this, but still leave the calculations themselves to specialists. Each industrial furnace has a passport, which indicates all the necessary parameters for operation, including the dimensions of the chimney. If the stove is made by yourself, to avoid mistakes it is better to seek help from professionals, since all factors can be taken into account and the optimal parameters of the chimney for a particular boiler or stove can only be found at the site of its installation.
Chimney length and required height above the ridge
Centuries of experience in installing chimneys, as well as modern technologies using special instruments and techniques will help you find the optimal height of the chimney and determine its position relative to the ridge. For an average stove, the total height of the chimney from the grate to its top should be at least 5 m.
As for the position of the chimney relative to the roof ridge, its elevation above it should be as follows:
- at least 0.5 m above a flat roof;
- not less than 0.5 m at a distance from the roof ridge of up to 1.5 m;
- flush with the ridge at a distance from the roof ridge of up to 3.0 m;
- not lower than a conventional line drawn down at an angle of 10° to the horizon when located at a distance of more than 3 m from the ridge.
With the correct position of the chimney relative to the ridge, the heating system will operate as economically as possible
The amount of elevation may be affected by the presence of obstacles, such as a neighboring building or tree.
Choosing material for the chimney
The choice of material for the chimney is determined by two factors: price and quality. As a rule, high quality requires corresponding financial costs. For example, you cannot compare the costs of a chimney made of special red brick with the costs of a chimney made of galvanized pipe.
The most common and popular types of materials are:
- steel pipe (petroleum), stainless or galvanized steel pipe;
- asbestos pipe;
- sandwich pipe;
- brick.
Let's take a closer look at the listed materials.
This option is well suited for stoves in temporary or summer buildings and baths due to the low cost of materials and ease of installation. The design of a sauna stove often involves installing a tank for heating water directly on a steel chimney. This solution allows efficient use of fuel for heating the room and water.
Modern products from of stainless steel look very attractive.
Modern stainless steel components allow you to build a high-quality and reliable chimney with an impeccable appearance
Advantages of a steel chimney:
- low cost of material, manufacturability and reliability of installation by welding thick-walled pipes;
- no need to build a foundation;
- smooth inner surface that prevents the rapid accumulation of soot;
- ease of maintenance and cleaning.
The disadvantages include the following properties:
- the need for reliable thermal insulation at the junction with the roof;
- low durability (for example, when using galvanized thin-walled pipes).
The installation sequence can be divided into 2 stages: design and assembly. The design stage includes all preparatory work, development of sketches, drawings, acquisition of materials and everything else necessary for the second stage - assembly and installation. Here it is assumed that the installation of the furnace itself has already been completed.
Brief step-by-step instructions for installing a chimney from a steel pipe
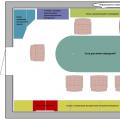
- Development of a sketch layout: taking the dimensions of the room indicating the location of the stove or fireplace, the required dimensions from the outlet ring of the stove to the opening in the wall with an external chimney device.
The diagram shows all the components of the chimney and the sequence of its assembly
- Selection of standard components in accordance with the recommendations of the furnace manufacturer. A standard set of pipelines, as a rule, is not enough, and therefore, in accordance with the actual dimensions of the room, additional fragments will be required. The composition of these fragments will be clear after the measurements are completed.
- Calculation of the quantity of materials and specifications of components, including kits for thermal insulation of the chimney. It is important to carefully review the list of these materials. It is convenient to carry out this work by contacting a specialized store or corresponding websites with online calculators, then you can immediately generate a list of required items by article and quantity.
In most cases, a standard chimney kit is not enough; you need to calculate a detailed specification of additional materials
- Preparation of tools and equipment for installation. The list of tools will depend on the chimney material. You will need a measuring tool, special brackets for attaching pipes to the wall, and a hammer drill for drilling walls. Drawing up a list of works will help you navigate the needs of the tool.
- Marking and preparing components by size. When marking, it is important to consider the joint tolerance. It is best to clarify the dimensions when pre-assembling the structure before installation.
- Assembly, installation and testing of the chimney. During assembly, special attention should be paid to sealing joints, since carbon monoxide must be reliably isolated from residential premises. All recommendations given by the oven manufacturer, as well as applicable safety regulations, must be followed. The chimney is tested in the mode of its full heating. It is necessary to monitor the effectiveness of the thermal insulation of pipes in interfloor ceilings and check whether heating of flammable materials, for example, a wooden roof, is observed. Below is a separate section on roof passages.
Proper thermal insulation will provide the necessary level of fire safety and keep the room warm
The presented list of items is for reference only and does not take into account the specific specifics of each project. For this reason, in the absence of experience, it is recommended to involve professional specialists in this responsible work.
Chimney made of asbestos pipe
Asbestos pipes are widespread due to the affordable cost of this material. When using it as a chimney, you should know the important features of the application. They are presented in a list of advantages and disadvantages; let’s look at them in more detail.
A variant of a combined steel and asbestos chimney can be used when changing the roof height
So, the advantages:
- low cost of material;
- environmentally friendly, no direct harmful effects;
- ease of installation.
Disadvantages of the chimney:
- a complete ban on the use of solid fuels with a high combustion temperature (more than 300 o C in the chimney area). At this temperature, a pipe explosion with unpredictable consequences is possible;
- the structure of the material, which has a porous surface, promotes the accumulation of soot. This increases the risk of exceeding the critical temperature due to the additional thermal insulating effect of soot deposits.
Thus, an asbestos pipe can be used as a chimney outside of high temperature zones. If the design of the stove includes a chimney made of different materials, for example, a steel pipe in a high-temperature zone, and then an asbestos ending, then it is quite rational to use this option.
Video: chimney made from asbestos pipe
Brief step-by-step instructions for installing a chimney from an asbestos pipe
To make a chimney from an asbestos pipe, you need a circular saw, a measuring tool, and protective equipment (gloves, mask, respirator). The main steps for installing a chimney with thermal insulation based on mineral wool in the box:
- Project part of the work. Room measurements. Preparation of a preliminary design with dimensions and a list of necessary materials and parts. The preparatory stage is no different from that in the section for steel pipes.
- Preparing the premises: making openings for the chimney, installing thermal insulation. Most often, installation in interfloor ceilings is carried out using a steel frame. This design provides additional rigidity, since asbestos pipes do not have elasticity.
- Manufacturing of necessary parts according to developed sketches and dimensions: pipes of the required length, adapters, brackets for wall mounting.
When installing asbestos chimneys through ceilings, it is necessary to strictly observe fire safety standards and lay the pipes in a rigid steel box
- Assembly, testing and evaluation of the functioning of the heating system. This stage fully corresponds to the point in the previous section.
Manufacturing of components for thermal insulation (for example, a box for mineral wool), brackets for attaching the chimney.
Thermal insulation material (mineral wool) is placed in a metal box to protect the floors from fire
Manufacturing of equipment for temporary fastening of the pipeline (stretch) during installation.
Installation of the chimney, installation of a spark arrestor, final fastening of the chimney structure. During installation, it is important to ensure the verticality of the structure. It is recommended to control this value and not allow its deviation by more than 3 o.
The chimney must be carefully fixed using clamps or brackets
Sandwich chimney made of stainless steel pipe
The sandwich chimney is an improved form of steel chimneys. The sandwich, true to its name, has a three-layer casing consisting of two coaxial pipes, the space between which is filled with a heat insulator.
Sandwich pipe is suitable for all types of heating systems, including closed
Pipes for such a chimney are made of stainless or galvanized steel, and basalt wool can be used as thermal insulation material organic origin or other non-flammable material. This design provides excellent thermal insulation properties, giving the following advantages:
- a universal material that allows it to be used with almost any design of furnaces and boilers;
- high level of fire safety protection due to effective thermal insulation;
- rational use of the internal volume of premises in comparison, for example, with brick chimneys;
- low labor intensity of installation due to the lightness of the design and ease of installation of individual segments;
- ease of maintenance, since on the perfectly smooth surface of the chimney the deposition of combustion products occurs very slowly, and they are easy to remove.
- great appearance, which also contains properties design solution. At the same time, external surfaces are easy to keep clean and attractive;
- the possibility of using the chimney indoors or outdoors;
- insignificant weight of the structure, which eliminates the need to build a separate foundation and reduces the cost of installing a chimney.
The disadvantages of a sandwich chimney include the following properties:
- loss of tightness in a three-layer structure during operation due to sudden temperature changes and exposure to vibration;
- high cost of quality materials.
The sequence for installing the pipeline generally corresponds to the sequence of work for a chimney made of asbestos pipes.
Brief step-by-step instructions for installing sandwich pipes for a chimney
- Development of a design sketch: taking the main dimensions of the room, from the furnace outlet ring to the floor and ceiling, then from the ceiling through the attic to the roof. In this case, you should adhere to the regulatory requirements for dimensions and structural elements.
When designing a chimney from sandwich pipes, you must adhere to regulatory recommendations by the arrangement of its elements
- Selection of necessary components in accordance with the recommendations of the furnace manufacturer. Based on the diagram and drawings, it is necessary to develop a complete specification of spare parts and components related to the pipeline. To do this, you can use the websites of specialized trading companies.
- Calculation of the amount of auxiliary materials, including kits for thermal insulation of the chimney when passing through the ceiling and external roof.
- Preparation of openings in the roof. The main task of preparing the opening is to ensure reliable thermal insulation and compliance with fire safety standards.
Thermal insulation with expanded clay serves to protect floors from fire and is characterized by its simplicity of design and environmental friendliness
- Marking and preparing components for installation. This stage is implemented after completion of the acquisition work. The dimensions of the chimney fragments are adjusted and a trial assembly is carried out. Additional materials and structures are being prepared: a box for thermal insulation, insulation, fasteners, brackets for fastening.
- Installation and testing of the chimney is carried out similarly to the testing of the steel chimney described in the previous sections.
Before installing the chimney, you must prepare a complete set of components and materials.
Brick chimney
A brick chimney has always been a presentable option. Of course, in this case the oven is also made of brick. When building houses, the foundation for the stove is built separately. This ensures independent support of the furnace from the foundation for load-bearing walls and reduces the likelihood of dangerous deformations.
A universal brick chimney and stove provide heat and make it possible to cook on the built-in stove
In turn, deformations can cause cracks in the chimney, which poses the risk of carbon monoxide leaking into living rooms.
Structurally, a brick chimney can be laid on the stove itself or nearby, supported by a foundation.
Brief step-by-step instructions and information on arranging a brick chimney
- Brick preparation. Special bricks are used for masonry, soaked in water before construction. A mixture of sand and clay without adding cement is used as a solution. This solution has the necessary elasticity and resistance to high temperatures. But the main property is that this mixture has the same coefficient of linear thermal expansion as that of brick. It is for this reason that numerous cycles of expansion and compression occur synchronously in the masonry, eliminating the formation of cracks.
- Making a solution. The average value in the proportion of clay and sand is from 1:3 to 1:4. The technology for preparing masonry mortar has its own time-tested features. The clay is soaked in water for at least 3 days, until it acquires the consistency of fresh sour cream. There are also certain requirements for sand; the fraction after sifting should be no more than 1 mm. The finished solution of sand and clay should be a homogeneous mass with minimal fluidity.
The mortar for the brickwork of the furnace is checked using a special method
- Chimney laying. When passing through the ceilings of a living room, a thickening is arranged - a fluff - in order to isolate the high-temperature zone and ensure fire safety. Thus, the distance between the chimney channel and the roof must be at least 0.25 m. Another thickening, called an otter, is installed for the same purpose when the chimney is routed through the external roof outside the house.
In brick chimneys, instead of a metal box with insulation, a thickening in the masonry is installed inside the ceiling - fluff
The internal dimensions of the chimney in brickwork are “subordinate” to the physical dimensions of the brick itself. The following chimney sizes are used depending on the characteristics of the stove and its purpose:
- 12.5 x 12.5 cm - option for kitchen stoves;
- 12.5 x 25.0 cm - traditional masonry pattern for Russian stoves;
- 5.0 x 25.0 cm - for fireplaces.
When designing a brick chimney, it is useful to work out the design by the number of bricks in the masonry for each structural element.
A brick chimney usually contains internal channels and additional chambers
Features of a chimney for a bath
The chimney for a bathhouse is subject to special fire safety requirements, since most bathhouses are wooden and vulnerable to fire. Reliable thermal insulation of the chimney from the wooden roof must be ensured. For this, environmentally friendly heat insulators are used, for example, basalt wool. It is very important to install a reliable spark arrester and ensure that the pipe can be regularly cleaned of soot.
The main parameters for assessing the efficiency of a heating system are draft and fuel consumption. With excessive draft, fuel is used irrationally and heat “goes down the drain.” With weak draft, the amount of heat sharply decreases due to lack of oxygen and there is a danger of carbon monoxide emissions.
The draft can be assessed by measuring the temperature of the smoke at the outlet of the chimney. During the combustion period, the temperature should be within 120 o C. The speed of gas movement is 2 m/sec, fuel consumption is up to 10 kg/hour.
How to seal a chimney at the junction with the roof
Exiting the chimney through the roof is an important part of the work when arranging a heating system. There are many reasons. First of all - fire protection. Reliable construction that complies with building codes is a mandatory and paramount condition.
Video: passing a sandwich pipe through the roof
There are many standard solutions for such arrangement at different prices for different chimney and roof materials. General requirements such:
- ensure complete tightness of the joint. Any penetration of moisture will cause damage to the roofing material, rafter system, floors;
- provide thermal insulation in compliance with building codes and regulations;
- maintain the stability of the chimney.
Sealing the joint between a chimney and a corrugated roof
A special feature of the joint between the chimney and the roof made of corrugated sheets is the need for fastening using special rivets with a gasket made of silicone sealant. These materials provide reliable sealing of the transition elements.
The joint with the corrugated sheet covering is made from metal plates with a special anti-snow “pocket”
To seal chimneys of various profiles, manufacturers offer a large set of additional elements: aprons, adapters, wall profiles, flexible elements for a specific roof profile.
Finishing the slate roofing area
When sealing a chimney on a slate roof, the fragility of the roof covering must be taken into account. Therefore, it is better to use soft elements for sealing. Detailed instructions The manufacturer of the material will allow you to perform this work with the highest quality.
Reliable sealing of a rectangular chimney with a slate roof with a soft silicone element on the sealant eliminates any leaks
Connection device with metal roofing
When sealing the joint between a chimney and a metal tile roof, attention should be paid to the stability of this structure. Horizontal loads on the pipe from the wind inevitably cause vibration, so a rigid connection may turn out to be irrational.
To seal chimneys, there are standard components that provide the necessary strength and stability of the structure.
Attention should also be paid to the rafter system at the junction. It may need to be strengthened and additional sheathing installed.
Video: thermal insulation of the joint between the chimney and the roof
How to make a spark arrester, cap (umbrella)
Equipping the chimney with a spark arrester is mandatory for fire safety. This device is especially relevant for stoves operating on high-temperature fuel, as well as in wooden rooms and bathhouses. With strong draft and wind, a burning spark can fly up to a hundred meters or more, so neighboring buildings are at risk.
The spark arrester is a mesh with a deflector. The principle of operation of the device is as follows: unburned fuel, rising in a stream of smoke under pressure, enters the deflector at high speed, causing their destruction and extinguishing, then safer particles break through the mesh along with the smoke. Mesh cells measuring no more than 5 mm do not allow large particles of unburned fuel to pass through, thus making the smoke safe.
A spark arrestor for a square brick chimney protects the house and neighboring buildings from hot parts of unburned fuel.
It should be remembered that the effectiveness of the spark arrester and its safety must be ensured by constant monitoring of its condition. Regular cleaning of the mesh with a wire brush, as well as cleaning the chimney from soot, are mandatory operations. This will eliminate the possibility of the mesh clogging and the risk of carbon monoxide poisoning.
To make a spark arrestor on your own, you can use ready-made drawings. Depending on the diameter of the chimney pipe d, used different sizes, for example: with a landing diameter d=200 mm, deflector diameter D=400 mm, total height of the product without deflector b=200 mm, seat a=50 mm. Based on these recommendations, you can make a high-quality product from available materials. It should be remembered that the initial dimensions of the material and the thickness of its walls for the spark arrestor must be close to the dimensions of the chimney.
Painting with special heat-resistant paint will extend the life of the spark arrester.
To make a spark arrester, you can choose a ready-made design depending on the size of the chimney
Instructions for making a spark-proof cap
The material used is galvanized sheet metal with a thickness of 0.8–1.0 mm. It is better to use a ready-made mesh, made of stainless steel, with cell sizes of 3–5 mm, made of wire with a diameter of at least 1.0–1.5 mm.
If plumbing skills are not enough, then we can offer a simplified version of manufacturing a spark arrestor.

The metal parts of the spark arrester are connected “in a lock”
Chimney insulation
Insulating the chimney is a preventive measure that significantly extends its service life. Many have noticed that ordinary metal pipes used as a chimney very quickly corrode and become unusable. The reason is the harmful effects of aggressive combustion products mixed with moisture. Moisture is formed from condensation and temperature changes.
Pipe insulation ensures a high temperature along the entire length of the chimney, thereby eliminating condensation.
Metal pipes are most often insulated with basalt wool. This heat-resistant material of organic origin has excellent thermal insulation properties. Up to 90% of the heat is retained over the length of a standard chimney. Good vapor permeability allows you to maintain the required humidity balance. Vibration resistance, environmental friendliness and impact resistance aggressive environment combustion products also makes it an excellent material for thermal insulation.
Insulating the chimney with basalt wool protects it from corrosion and destruction
Among other methods of thermal insulation of a chimney, we note perhaps the simplest and most affordable - insulation with wooden panels. To do this, a box is made and installed with a gap of 15 to 30 cm to the pipe. This space is filled with mineral wool, slag and even sand.
Waterproofing and sealing at the junction with the roof - the best way to do it
Modern manufacturers offer high-quality products for sealing joints between the chimney and the roof. Products are classified into the following types:
- viscous based sealants;
- roofing seals;
- sealing tapes.
Viscous based sealants for roofing works are produced on a silicone polyurethane or bitumen base.
Silicone-based sealant, when dried, forms a dense and stable layer that ensures sealing of the chimney with the roof
Roof seals provide a gasket-like seal. They are available in hard or soft construction. The first ones have a profile for standard roofing options, for example, corrugated sheets. Seals of the second type have a soft structure and therefore are a universal remedy.
An element can be cut from a universal roofing sealant to the required diameter of a round chimney
Hard seals have a longer service life, but they are more difficult to install. The soft version is easy to install, but has limited durability.
Combined sealing methods can also be used, for example, using sealing tapes.
How to clean a chimney
The efficiency of a chimney largely depends on the cleanliness of its internal surface. Over time, soot settles on the walls of the channel and reduces the cross-section of the chimney. Gradually, this noticeably worsens the draft, resulting in a decrease in the efficiency of the stove and an increase in fuel consumption. Used for cleaning various ways, which are divided into mechanical and chemical.
The main source of soot is low-quality fuel. For example, softwood firewood with a high resin content. Various household waste, plastic and similar products that cannot be burned in a stove also contribute to the deposition of soot. The regularity of cleaning directly depends on this. As a rule, the chimney requires cleaning annually with regular use, sometimes this needs to be done more often. A clear sign of clogging is deterioration in traction, black and acrid smoke due to unburned fuel. When performing cleaning, you must strictly adhere to safety regulations for work performed at height. If you do not have sufficient experience, it is strongly recommended to contact specialists.
Video: how to clean a chimney mechanically
Most often, the chimney is cleaned with a special brush with metal bristles - a brush. Sometimes using a brush does not bring the desired result, so you have to use a scraper. This method allows you to clean chimneys with a thoroughly hardened layer of soot.
The chemical cleaning method is based on the fact that special additives are burned along with the fuel. During combustion, they release substances that react with soot, causing it to burn out or decompose into oxides. The chemical method is also used to prevent the formation of soot.
The efficiency of the stove is significantly reduced if it is heavily clogged, so the chimney must be cleaned promptly
Among other methods, there is the so-called folk method: burning. To do this, a large amount of alder or aspen firewood is placed in the stove, which creates a high temperature at which soot is burned out. The end of the burning process will be indicated by the absence of black smoke.
Installing a chimney is a responsible and complex process. Professional builders can carry it out with good results. In this case, the customer receives full information and recommendations for the use and maintenance of the heating system, this will guarantee reliable operation. If you choose the installation option yourself, then you should make full use of all sources of information: instructions for the oven, operating rules and other requirements. An important issue to evaluate is the balance of price and quality. Monetary costs and final quality must meet expectations.
Choosing a stove for a sauna Fireplaces 
The main component of the heating system, powered by fuel combustion, is the chimney. Its installation must be approached responsibly and seriously, because not only the proper functioning of the heating equipment, but also the overall safety of the house and the health of the residents depends on it. A chimney in a house must be made to remove combustion products and create draft to maintain combustion.
If you plan to place or in a private house, then you should think in advance to properly erect the structure with your own hands. Among the many types of chimneys, they have been very popular for many years. The cost of a brick chimney is relatively low, but its design is very labor-intensive.
Design requirements
The chimney installation must include the following requirements:
- the chimney must be made as vertical as possible; if there are horizontal sections, their size should not exceed 1 m in accordance with fire safety requirements
- if the house has a flat roof, the pipe needs to be made 1 m higher, for pitched roof the height of the pipe will depend on the position relative to the ridge
- for good traction, the total must be at least 5 m
- The width of the chimney channel depends on the heat transfer power of the fireplace; the higher the power, the wider the channel.
Brick chimney with your own hands
Before you start building a chimney with your own hands, you need to be absolutely confident in your strengths and capabilities; it is better to consult with a specialist in advance or even entrust the work to him completely.
Preparation for work consists of drawing up a detailed drawing of the chimney; in many ways, the choice of a suitable diagram will depend on the type of fireplace or stove:
- for wood-burning models, it is enough to make brickwork with your own hands or a double version from masonry with
- gas-powered models will need an insulating, acid-resistant steel or ceramic pipe, which is placed inside the masonry.
Read also: How to reduce chimney draft
 It is necessary to determine the location of the fireplace according to the requirements (preferably near a load-bearing wall or walls made of non-combustible material).
It is important to set the flue gas temperature. A brick chimney will last longer if the temperature of the exhaust gases is high, so it is ideal for heating a private house with solid fuel. Low temperatures will lead to the formation of condensation on the walls of the chimney.
Water reacts with combustion products (especially gas) and forms caustic compounds that destroy the furnace structure.
Next, all sizes and distances to the nearest buildings or flammable objects are calculated. It is also important to properly prepare high-quality materials (brick, cement, sand), tools and equipment.
Stages of chimney laying
The most common type is a mounted chimney, which is a continuation of the exhaust vent of a fireplace or stove for a private home.
The following main stages are distinguished in the installation of a chimney:
- The top pipe (furnace neck) is laid out: smooth, but a few rows before the ceiling it stops
- Gradual expansion of the masonry (fluffing) at the intersection of the pipe and the ceilings. Expansion of the furnace device is achieved by gradually moving the brick outward by ¼ of its length. The joint between the fluff and the ceiling can be easily laid with your own hands using insulating material
- After the overlap, the masonry is narrowed as at the base, the pipe is smooth again
- Extend the masonry from the street side (otter) to protect against moisture between roofing material and chimney, the joint is also waterproofed (apron) with metal and other materials
- After the pipe is brought out through the roof, the masonry narrows again (the neck of the pipe), and the chimney is laid out evenly. The height of the pipe neck depends on the type of roof and strictly complies with safety requirements
- The head is laid out; this element of the chimney is decorative
- Installation of a cap (umbrella) for protection from precipitation.
 In the case when metal or
IN
Having taken up → (the link tells how to make a stove in the country), the owner inevitably faces the question of how to make a chimney with your own hands. A chimney is needed both to remove combustion products and to create a so-called draft in the stove, an air flow created by a pressure difference that ensures fuel combustion and removal of combustion products.
Content.
1.
2.
3.
4.
5.
6.
7.
What happens in the oven?
The combustion process from a chemical point of view is a process of oxidation, in other words, the combination of substances and oxygen with the release of heat.
The result of the reaction, in addition to heat, will be the appearance of new compounds, as well as the transition of some fuel substances into gaseous form. At the same time, in accordance with the law of conservation: how many substances by weight enter into the reaction, the same amount should be “output”.
If the fuel is solid (coal, firewood, peat, etc.), the lion's share of the remaining weight will be the ash remaining in the furnace. In addition, we will get steamy water, carbon dioxide, etc.
By burning gas or liquid fuel, the output will be carbon dioxide, water vapor and a set of other gaseous compounds. There will be practically no solid residue.
A little physics
Without knowing why and how smoke moves, making a chimney for a stove with your own hands is problematic; at a minimum, it may not be effective enough.
The mechanics here are quite simple: warm air has a lower density than cold air, and therefore less weight, therefore, according to the laws of physics, it “floats”, being pushed out by the heavier one.

During this process, it gradually cools down, mixes with the surrounding air and, finally reaching the same temperature, stops.
If we let warm air through a channel limited by walls that prevents it from mixing with the surrounding air, it will cool much more slowly, especially if the chimney for the stove is made of a material that does not conduct heat well or is additionally insulated.
The longer the chimney, the greater the volume of warm air in it, the greater the force it creates. Accordingly, the pressure of the air flow - thrust - is greater.
Interference and obstacles
The formation of an area can interfere with the process of smoke exiting the firebox. high blood pressure, which will “plug” the chimney like a plug.
Cooled air in the chimney can become such an obstacle. That is why, increasing the height chimney It makes sense only up to a certain limit, beyond which each centimeter of height will not increase the thrust, but decrease it.
Today it is difficult to imagine, but once upon a time fireplaces in houses did not have chimneys. The combustion products collected in the room and came out through a fiberglass window under the ceiling. At the end of the fire, the fire was extinguished and the hole was covered with a bunch of hay. Over time, stoves were improved, and special devices were created to remove smoke - chimneys. Operating experience led to constant improvement of devices, more complex structures and increased reliability. A real revolution in the design of combustion product removal systems occurred with the advent of lightweight heat-resistant materials - thin-walled metal pipes.
Scope of application of tubular metal chimneys
The advantages of using such materials include several points:
- Light weight. For chimneys, electric-welded pipes with a wall thickness of 0.5–1.5 mm are used. The total load of this design allows it to be used for all types of stoves, including metal bath stoves, closed and open brick stoves, slow burning stoves in greenhouses and residential premises, as well as for other types of heat sources.
- Tubular devices do not require special installation supporting structures in the form of foundations.
- Long service life. For galvanized pipes it is 10–20 years, and manufacturers of stainless steel products declare durability for 100 years. Of course, there is no factual data on this issue.
- The simplicity of installing a chimney from pipes makes it easy for even a person with minimal DIY skills to cope with this task.

Installation of a steel chimney for sauna stove is quite simple
The limiting factor in the use of steel pipes is their cost, but this only applies to stainless pipes.
Video: what you need to know about metal chimneys
Types of steel pipes for chimneys
A specialized hardware store offers a wide range of steel pipes, which differ in purpose:

Types of chimneys
Based on the components used, these devices can be divided into the following:
- single;
- multilayer.
The materials used for their manufacture are particularly durable and highly resistant to acid condensate. A clean surface helps to completely remove moisture and soot from the smoke duct.
Single pipe structures are very often used. Such technical solutions are used to adapt old chimneys to new heating equipment. Pipes for them are made square, oval or round. Austenitic stainless steel is used for their production. Enameled pipes are also produced, but they are not widely used because they are sensitive to mechanical stress.

Single chimney needs additional protection
When installing a single chimney, you should be guided by the fire safety rule, which requires a distance to the nearest wall made of flammable materials of at least 1 m.
Double-layer structures have their advantages. The thermal insulation layer between the walls of such a chimney reduces the cooling of the inner pipe, resulting in less condensation. The inner pipe is made of high-quality steel, since condensate has an acidic reaction and other materials, including galvanized steel, will not be able to work for a long time in such conditions.

The double-layer chimney is already insulated
Such chimneys are placed at a distance of at least 20 cm from walls made of flammable materials. If this cannot be avoided, then the wall is sheathed with metal with a backing. It is made from fire-resistant material, for example, asbestos sheet.
According to the installation method, chimneys are:
- Internal. This design can rise vertically from the furnace through the internal ceilings and roofing pie. Its main disadvantage is that condensate flows directly into the firebox, increasing its concentration in the flue gases. The result may be an unpleasant pungent odor in the room and accelerated wear and tear of the chimney.
- External. With this design, the chimney is diverted from the stove horizontally through the wall. For this, two elbows are used, which can have a rotation angle of 30, 45, 60 or 90 degrees. In this case, the outer one looks like a tee, and at the bottom there is a container for collecting condensate. The vertical part of the chimney is installed parallel to the wall, the pipe is attached to it using brackets and clamps.
Components
It is impossible to assemble a chimney without using fittings. They are intended for:
- performing contours of engineering systems;
- changes in pipeline direction;
- switching to another diameter;
- traction adjustments;
- condensate collection;
- protecting the upper end from precipitation, leaves, debris and nesting birds.

Additional elements for assembling a chimney from pipes must be used
Using these structural elements, you can assemble a chimney of any configuration with your own hands. The permissible length of horizontal sections is no more than 1 m, otherwise the traction will be greatly weakened.
Calculation of chimney parameters
The basis for calculating the height and diameter of the chimney is the power indicator.
The performance of a boiler or furnace is directly affected by the height of the chimney. For household appliances it is 5 m. This characteristic is provided for by the SNiP requirements for stoves in residential buildings. The measurement is taken from the device's grate to the hood. At a lower altitude, the natural draft in the stove will not ensure efficient combustion of fuel; it will smoke and not produce the optimal amount of heat. However, the ability to increase height is limited. Experiencing the natural resistance of the pipe walls, the air will slow down if the channel is too long, which will also lead to a decrease in draft.
Rules for selecting chimney length
For a private house, calculating the height of the chimney is based on certain rules:
- The pipe must be at least 5 m.
- The excess of the chimney end above the conventional flat roof no less than 50 cm.
- For a pitched roof, a pipe whose axis is located no further than 1.5 m from the ridge, and if there are superstructures, then from them highest point, the excess is 0.5 m.
- When the distance to the ridge is 1.5–3.0 m, the end of the pipe should be no lower than the level of the ridge.
- When installing a chimney at a distance of more than 3 m from the ridge, in particular for outdoor installation, the angle between the horizon level and the conventional straight line between the ridge and the end of the pipe must be at least 10 degrees.

The height of the pipe depends on its location
When choosing a location for the chimney outlet through the roof, it should be taken into account that it should not be located near roof windows and other similar devices in order to avoid creating fire hazards.
Calculation of the chimney cross-section
The procedure given below for determining the size of the channel is valid for a circular cross-section. It is the optimal form, since the flue gases do not move in a monolithic straight stream, but the flow swirls and they move in a spiral. In rectangular channels, vortices are formed at the corners, inhibiting the movement of gases. To calculate the cross-sectional value, the obtained result should be multiplied by 1.5.
You will need the following initial data:
- Furnace power, that is, the amount of heat generated by the device per unit time when fully loaded.
- The temperature of the flue gases at the outlet of the furnace is usually taken to be within 150–200 degrees.
- The speed of gas movement through the channel (is 2 m/sec).
- Chimney height.
- The value of natural draft (4 MPa per 1 m of smoke channel).
The dependence of the cross-sectional area of the chimney on the volume of fuel burned is obvious.

Smoke doesn't move in a straight line
To perform the calculation, you need to use the converted formula for the area of a circle: D 2 = 4 x S * Pi, where D is the diameter of the smoke channel, S is the cross-sectional area, Pi is the number pi equal to 3.14.
To calculate the cross-sectional area, you need to determine the gas volume at the point where they exit from the stove into the chimney. This value is calculated depending on the volume of fuel burned and is determined from the ratio V gas = B x V top x (1 + t / 273)/ 3600, where V gas is the volume of gases, B is the amount of fuel burned, V top is a tabular coefficient, which can be found in GOST 2127, t is the temperature of the gases at the outlet of the furnace, usually a value within 150–200 degrees is taken.
The cross-sectional area is determined by the ratio of the volume of passing gases to the speed of its movement, that is, by the formula S = V gas / W. In the final version, the desired value is determined by the relation D 2 = V gas x4/PihW.
Having made the necessary calculations, you will get the result - the diameter of the chimney should be 17 cm. This ratio is valid for a stove in which 10 kg of fuel burns per hour with a humidity of 25%.
The calculation is made for cases when non-standard heating units. If the power of the device is known, it is enough to use the chimney parameters recommended by experts:
- for devices with power up to 3.5 kW - 140 x 140 mm;
- at 3.5–5.0 kW - 140 x 200 mm;
- with a power of 5.0–70 kV - 200 x 270 mm.
For chimneys with a round cross-section, its area should not be less than the calculated size of a rectangular one.
Video: how to calculate a chimney for a solid fuel boiler
Materials and tools for making a chimney
Before you start purchasing parts, fasteners and tools to perform this work, you need to decide on the design of the device and complete a preliminary design, an integral part of which is a material list, which lists all the necessary parts. By adding the cost of materials to this list, you will receive a cost estimate.

Installation of the device is carried out from the bottom up, that is, from the stove to the top, for which you will need:

The list of tools is small and may look like this:
- drill with drill bits for concrete and wood;
- jigsaw;
- screwdriver or wrench for installing fasteners;
- plastic inserts (dowels) for attaching brackets;
- hammer.
Depending on the design of the chimney, other tools may be needed; this will become clear when drawing up a preliminary design.
DIY chimney installation
The degree of readiness of the metal chimney parts for installation is so high that its assembly is a sequential performance of a number of elementary operations that do not require any special skills or special knowledge.
The whole process might look like this:

If you plan to pass the chimney through the ceiling and roofing pie, the same technology for protecting structures is used as for the wall.
An umbrella is installed on the smoker on the pitched roof to protect the hole in the roof from precipitation.

All joints of the chimney with the wall and roof must be insulated
The installation process is greatly simplified when using sandwich pipes, since the temperature on their surface is much lower than on single pipes.
It is necessary to pay attention to the design features of chimney pipes. Docking is ensured by seats created during production, so during installation you need to correctly orient them in space. When installing multilayer pipes, the layers of internal insulation are also closed.
A significant advantage of assembling steel chimneys is that welding is not required.
Video: DIY sandwich chimney installation
Chimney insulation
This operation is only performed if single pipes were used. It is necessary to reduce the intensity of condensation and protect combustible structures from exposure to high temperatures.
The best material for this purpose is basalt wool, since it is absolutely non-flammable and does not emit harmful fumes in fire conditions. It is also used in the manufacture of multilayer pipes.

Insulation of a metal chimney may not always be required
An insulating layer of aluminum foil must be installed on top of the insulation, and its installation begins from the bottom up with an overlap of turns of 10–12 cm. This order ensures that the joints are oriented downward, which does not allow water to penetrate into the heat-insulating layer.
Features of operation
Metal chimneys, having a lot of undoubted advantages, require increased attention both during assembly and during operation:

Chimney maintenance
With a properly manufactured chimney, especially if it is made of stainless steel, the main maintenance operation is to clean the internal surface of soot.
Causes of soot formation
Combustion is the reaction of fuel oxidation with atmospheric oxygen. If it is insufficient, soot is released and adheres to the walls of the chimney. In reality, conditions arise under which the smoke duct becomes clogged in just a few months:
- A lack of oxidizer in the firebox can be caused by deliberately reducing draft by manipulating the damper in order to achieve slow burning or even smoldering of the fuel, which can quickly lead to negative consequences.
- Another firebox mistake is the use of damp firewood. Moisture prevents intense combustion of fuel, resulting in the formation of a large amount of soot.
- The use of resinous firewood, the combustion of which is accompanied by the release of soot, should be considered an unfavorable factor. Of course, heating stoves with oak or ash is too expensive, but you should strive to use firewood from non-resinous tree species.
- It is strictly not recommended to burn garbage in the oven, especially plastic bags or bottles for the same reasons.
- It is especially unfavorable to use plywood, particle boards and other materials for the manufacture of which synthetic adhesives are used for burning waste. With such fuel, the chimney becomes clogged with soot most quickly.
Methods for cleaning a chimney from soot
There are several of them, including:

You can avoid constant fuss with soot by specially preparing firewood. To do this, you need to build a large, well-ventilated woodshed with a supply of fuel for several years, and use them only when they are well dried.
The hearth, which is designed to ensure comfortable living in the house, will become a source of constant concern and grief if it is not designed correctly and the system for removing smoke from the living space does not work well. Therefore, before starting installation work, it is recommended to carefully study all the information and prepare.
Every residential or even country house or bathhouse that is not connected to a central heating system is equipped with a heat-generating device. To remove the products of fuel combustion in the firebox from the interior, a smoke exhaust duct is connected to them. The most affordable option is a galvanized chimney; in construction stores the price of 1 m of pipe made of this material is about 110 rubles. If you add to this the costs of the rotating elements, deflector and brackets, installation will cost a pretty penny. However, in this article we will tell you how to reduce costs by 60% and how to make a chimney from a steel pipe with your own hands.
The advantage of store-bought models of galvanized steel chimneys is that manufacturers produce a wide range of sizes. In addition, among the factory products you can find double-circuit, thermally insulated, corrugated, with increased flexibility and single-circuit. When making a homemade chimney, you have to limit yourself to only single-circuit pipes. In order for the smoke removal system to work effectively, the following parameters should be taken into account:
Important! A sheet of galvanized steel measuring 2500x125 mm in construction stores costs about 600 rubles, with proper cutting, one sheet produces 8.75 m of pipe with a diameter of 100 mm, the cost of 1 m is approximately 68 rubles, which gives 60% savings!
Manufacturing
To make a pipe from a sheet of galvanized steel, you will need a rubber or wooden mallet that is heavy enough to bend the metal. In the process of work, scissors are used for cutting metal, a long ruler, a scriber for marking, a corner and a “gun” for bending. The bending process occurs as follows:


Note! The installation of a chimney requires rotating parts, which are made by cutting straight pipes at an angle. If you cut the pipes at an angle of 75 degrees, then when joining, you get a 150-degree turn; if you cut them at an angle of 45 degrees, you get a 90-degree turn. To improve the efficiency of a homemade chimney, it is wrapped in non-flammable thermal insulation material.
Advantages
With the advent of a large number of factory products for assembling galvanized steel chimneys, the need to make pipes with your own hands has decreased. However, homemade pipes allow you to reduce costs and choose the ideal diameter. In addition, they are used to equip drains, so the ability to make pipes with your own hands will be useful in everyday life. Metal chimneys have the following advantages over others:
- A light weight. Smoke exhaust ducts made from homemade galvanized pipes weigh much less than brick or ceramic ones. Therefore, there is no need to equip a foundation, the cost of pouring which exceeds the cost of material and installation work.
- Fire safety. According to building codes, steel chimneys are completely fire safe. High quality metal can withstand heating up to 900 degrees, so it is suitable even for solid fuel stoves and fireplaces.
- Low cost. Chimney pipes made of steel are the most democratic way to organize smoke removal; the cost of installation is several times lower than the installation of brick and ceramic analogues.
- Easy to assemble. You can easily assemble a chimney made of galvanized steel with your own hands according to the instructions, thereby saving money spent on hiring professional workers.

Important! The effectiveness of smoke removal depends on the correct assembly of the chimney. Experienced craftsmen advise choosing a predominantly vertical configuration with the least number of turns. Each rotating element acts as an obstacle to the smoke, reducing the draft force.
Assembly Rules
To properly assemble a chimney made of galvanized steel, you must first mark out the layout and laying of the pipe. Using this drawing, you should determine how many pipes are required and cut them into sections of the required length. Assembly is performed as follows:


Note! The smoke exhaust duct is installed on the roof at a distance of 30-50 cm from the ridge. To ensure the level of traction, the skate should be 50 cm higher. Incorrect placement on the roof can cause backdraft or wind backlash.
Video instruction